So I up and vanished. Being a judge for Crystal Brush, Placing 3 (!!!) medals at World Expo, Another fabulous medal at Sword and Brus, My son's first competition.... all sorts of stuff and yet nothing here. Why?
Photobucket.
All my images are hosted at a paid photobucket account. This year Photo bucket has decreed that they will no longer allow external linking unless you pay an exorbitant amount of money - Hundreds of dollars a year. I make zero dollars from this site and instead post to share and connect with my fellow painters. I cant pay $300+ a year to host photos. I also decided I wont be loading more things to their servers just to have to worry about having my photos held for ransom. So is this the end..... ?
Nah. Just need to figure out a different way :)
SO that's what I'm doing. pursuing different means of hosting and sharing images.
I have been planning/writing articles, new SBS tutorials and making some plans for how to showcase some previous tutorials that are still relevant but which many people may have lost into the depths of time and the interwebs.....
Not the end. A new beginning instead. It is coming.
James

Monday, September 18, 2017
Wednesday, May 31, 2017
ScratchBuild Log Part 5: Final Pics 1915 Curiasse "Fortin" Aubriot-Gabet
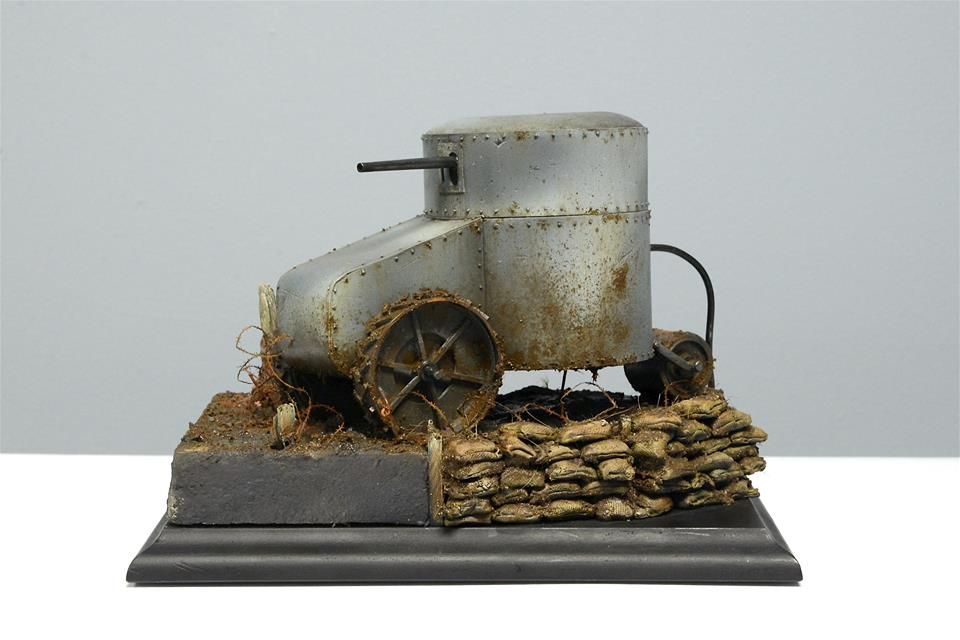
So here we are at last and the project was finally done! I am pretty proud of this build. It is not perfect by any stretch but it was a lot of fun and a really new and unique experience for me. I think the finishes on the tank are great and it is a really interesting piece overall. It won Gold in Vehicle at the Sword And Brush painting competition and 1st place at the local IPMS annual competition. I hope you have enjoyed following the build and if you have any questions do not hesitate to ask!
Thanks greatly to AMMO of Mig Jimenez - this piece wouldn't have happened if not for being thoroughly inspired by the innovative range of products they create. I don't work for them (or any other hobby company) in any capacity but when I see companies like AMMO, Badger, and Happy Seppuku - people who make great things that really ADD to my hobby experience - I don't hesitate to share either! Thanks also to my buddy Trevor Howard for taking these photos for me.
This piece is also on my Putty and Paint page! Id love an extra vote if you are able :)
Subscribe to:
Posts (Atom)