Showing posts with label AMMOofMIG. Show all posts

Wednesday, May 31, 2017

ScratchBuild Log Part 5: Final Pics 1915 Curiasse "Fortin" Aubriot-Gabet


So here we are at last and the project was finally done! I am pretty proud of this build. It is not perfect by any stretch but it was a lot of fun and a really new and unique experience for me. I think the finishes on the tank are great and it is a really interesting piece overall.  It won Gold in Vehicle at the Sword And Brush painting competition and 1st place at the local IPMS annual competition. I hope you have enjoyed following the build and if you have any questions do not hesitate to ask!


Thanks greatly to AMMO of Mig Jimenez - this piece wouldn't have happened if not for being thoroughly inspired by the innovative range of products they create. I don't work for them (or any other hobby company) in any capacity but when I see companies like AMMO, Badger, and Happy Seppuku - people who make great things that really ADD to my hobby experience - I don't hesitate to share either! Thanks also to my buddy Trevor Howard for taking these photos for me.

This piece is also on my Putty and Paint page! Id love an extra vote if you are able :)

Tuesday, May 23, 2017

ScratchBuild Log Part 4: Painting the 1915 Curiasse "Fortin" Aubriot-Gabet


So on to the actual paint! Started with a quick shot of Stynylrez. This primer by Badger is the best I've ever used, though **SPOILER ALERT** Ammo of Mig's new one shot primer is the same formulation made by Badger for Mig!!! Partnerships are something AMMO has really been developing as of late - Alclad being another example - What a great way to get an amazing products into even more hands!!

Once primed I reached for the AMMO by Mig Jimenez French WW1/2 Camoflage Colours - a great selection of period appropriate colours, but moreso than that a key selection of skewed grey tones - the light french blue was key in this paint job. I also grabbed some VMA German Grey and some Scale Colour Nacar to do some temperature adjusted contrasting zones in the paint job. With this being essentially a monochromatic model it was important to me to use contrasts of temperature and saturation to create interest in the surface of the model. I tried to create exaggerated and interesting areas of light and accentuated form without making it look completely unbelievable. This can be a difficult line to walk in these early stages as the following filters and layers will dramatically adjust these basecoats in a variety of ways. That being said I nailed 90% of my finishes on the first try. Came back the next day and could see what I wanted to change and made it happen. One of the best starts I have ever had on a model! A quick shot of dullcoat sealed this layer in.


After a little test fitting to make sure all was still properly aligned with the base, the front wheel assembly was removed for separate painting and weathering. I started laying rust tones into the rear roller assembly and then began to apply filters and stains using AMMO of Mig Enamels. Any of my readers will know I love these products and that they have dramatically changed the way I work. Another miniature artist making awesome use of AMMO products is James Wappel - if you don't already follow his incredible mini painting exploits you really should!!!!


While the filters and streaks were drying I started on the wheels where I used a combination of actual chipping with AMMO Chipping fluid and  Layers of paints, enamel rust effects washes and pigments.
I also used a graphite pencil and Forgeworld Dark Iron metallic pigment to add exposed metal marks and edges. While those were drying as well I took the Forgeworld Barbed wire and began to add it to the base as well. It really added life and interest just as I had hoped - Really pleased at this point with everything!  

Once all the parts had dried it was time for test fitting on the base again


So with that it was time to add more marks and interest across the surface of the hull. Some painters like to refer to this as more "information". Even if (especially if?) it is subtle it really engages the viewers brain more.   Sometimes it can also forward the story element by relating the piece to its environment. As this is designed to drive through barbed wire I wanted to make sure it has many little scratches across the lower hull in particular. These were painted with care and individually highlighted.


Once I had addressed surface detail and finish it was time for environmental effects - I like to think of my models in layers - Base coat and basic lighting come first. Filters and surface treatments are next. Weather/environmental factors are layered last. So I began by breaking out more of my AMMO of Mig enamels and using them to simulate a first spattering of mud - basically older dryer splashes that would have a matte finish against the slightly satin hull. I loaded up a large brush with the enamel mud and held it near the hull behind the position where the wheel would be. Using the airbrush I shot bursts of air effectively "flicking"  the bristles and giving a natural distribution of spatter across the hull. This was a VERY effective way of simulating the mud and filth that would be spattered by the turning wheels in this wet landscape.


While waiting for this to dry I also attached the extension cord that ran from the back of this wild little electric vehicle back into the friendly trenches (this easily severed and unreliable power source was one of the key reasons cited in abandoning this project after building only the one prototype!).  I also fit and primed the sandbags and supports and began to paint and weather them using a mix of acrylics and enamels. I wanted them to be harmonious with their muddy surroundings to be an accentuating detail rather than a secondary focal point. When finished they help lead the eye into the scene rather than drawing strong attention to themselves. Even the way they are stacked is to emphasize an upward movement pointing towards the tank.

Once the body was dry and the bags were in place I mounted the tank to the base and moved toward final harmonization - making sure it looked as though it was part of the scene and not just placed on top of it. I began by adding the next layers of dimensional mud. Made with pigment, acrylic pigment resin, paint, a little bit of gravel, static grass and some plaster this sticky mess matched the groundwork beautifully. It needed to be applied in stages, however, to build up naturally and to hold the dimension. It was really important to pay attention to the front wheels in this stage and make sure they looked partially sunk/dug in.


As the mixture was built up it was also added to the sandbags and areas of the base with additional roots and plant matter mixed into it - to keep the finish natural and to ensure harmony.


With that it was only a matter of small touch ups and finishes - highlighting the wooden posts, using dark iron pigments and black pigments on the gun barrel and metallic components with Ammo pigment fixer and a few more streaks etc with AMMO rust streaks and track wash. 

Next Week - Finished photos!


Tuesday, May 16, 2017

ScratchBuild Log Part 3: Basing for the 1915 Curiasse "Fortin" Aubriot-Gabet

So now that I had the proto-tank built and riveted, it was time to start working on the presentation base. I started by laying out some rough ideas with scrap pieces of balsa foam and once I had a clear idea in my head I started piecing together the pieces I would actually use.

For compositional purposes I wanted to use a raised piece of groundwork that would help draw the sight lines up and that would narrow towards the wide end of the tank and be wider at the narrow back of it. this would give emphasis to the bodywork and form of the vehicle while still giving me some space to add some landscape details and points of interest. It would also give the impression of forward movement.

As a competitive modeler an a judge, I cant emphasize enough how important good composition and interesting presentation are to separate your work from the competition.


Next up I started to carve into the layers of balsa foam. I wanted to add sunken track marks that would help to emphasise the weight of this contraption as well as to reinforce the nature of WW1 Trench warfare. The Fortin was designed to help cross the muddy shell pocked no mans land - pushing its way through barbed wire and shrugging off conventional small arms fire.  To the right here is a photo I took In France of a section of No Mans Land - even now a hundred years later the effects of the shelling and digging upon the landscape are frighteningly impressive.
Therefore I wanted to include:  Mud, Barbed Wire, Shell damage/craters, evidence of destroyed features from before the war, and a trench line. The tracks and pockmarks were easy to dig in to the balsa foam and then I just sealed them with some PVA foam glue. I took some Bass wood and used it to make some wooden posts, debris and the core of a shattered tree trunk. I built out the rest of the tree and its roots using Super Sculpey. Finally I made some Barbed wire support pigtails like the ones I had seen when touring the battlefields of Europe out of wire.

Next I broke out the Celluclay - a strong powdered paper mache that is great for making textures. I applied a coat of it to the balsa foam to give a real churned mud texture. It also let me smooth out the seams between the layers of foam. This also allowed me to build even greater depth into the surface and imbed the tree so that it looked like it had grown out of the landscape instead of being placed on top of it. I sprinkled some additional sand, small gravel, cork debris, static grass and wooden shards and worked them into the celluclay "mud" so that it all looked cohesive and organically occurring.


With the groundwork established it was time to begin building the edge of the trench line. I wanted to include a sandbag edge like the ones seen at Vimy. I have built these before with great success for a couple projects and find that it is important to build the bags one at a time and detail each because you never can be quite sure what will show. So I treated each bag as its own little sculpture - texture, patches, stitching tears and all. Though it takes a while it is quite fun to be honest. I made sure that I kept setting aside my favorite bags from the others to become the most visible ones where possible.
I made some with apoxie sculpt and some with super sculpey.


The next steps were pretty fun. I broke out a variety of earth colored paints and powders and went to work creating as natural a finish as I could. The photos don't pick up the color variations nearly well enough but I was pretty happy with the overall result. I broke out some AMMO of Mig rust finishes (enamels and pigments) and treated the barbed wire posts as well as some Forgeworld Brass etch Barbed wire. Once the tree, all the wood and earth and scrap had been fully painted I mixed up a batch of Envirotek Lite clear resin and using a medicine dosing syringe and an old brush I added wet effects and puddles to the mud and added a little static grass in both clump/growths and sprinkled into the mud and water


Time to let things sit dry and harden. 
Next week working on the paint and weathering for the Proto-tank itself!!


Tuesday, May 02, 2017

ScratchBuild Log Part 1: 1915 Curiasse "Fortin" Aubriot-Gabet

Here is the build log for my 1915 Curiasse "Fortin" Aubriot-Gabet (Experimental Electric Armoured Vehicle) Scratchbuild in 1/35

Designed in 1915, the Aubriot Gabet “Fortress” was considered as a way of pushing across the dangers of no man’s land. The armoured Body was fitted to a Flitz tractor chassis to provide protection for a crew of 2 (driver and gunner) and featured a 37mm Navy Cannon.
It was electrically powered by an external source which meant a long cable was required to trail behind it as it rolled through the fields of barbed wire and shell craters. This left it extremely vulnerable as any damage to the power line meant that it would grind to a halt.

Only a single prototype was built and tested before it was determined the design flaws were too significant to continue development, and only a single grainy photo of this remains. 
There does not appear to be any company manufacturing a model of this at this time (nor in the past) so it looked like it could be really fun and a chance to finally scratchbuild something!
Since many of the details were not shown in the picture (like the door to get in and out for example!) I looked to other experiments of the era to draw inspiration from - such as the Fahrpanzer rolling turret emplacement.


 I also found this rather handy digital illustration and tiny resin miniature that was being sold on ebay.  Though it was clear that this maker had altered some of the details (like the rear roller mount) and the placement of the door made no sense considering the large electrical cable that is supposed to hang from the back of this vehicle, it was really helpful to see a clear 3-d interpretation of the forms.
  

Finally, I came across a 1/35 paper model that I could purchase the download for $4 !!! Huzzah! This became the basis for my measurements and made the whole process a real treat. If anyone else decides to build one based on what they see here I highly recommend using this as your starting point.

Now it was time to begin scratchbuilding!!!!! Cya next week with details on how :)

Wednesday, February 22, 2017

Half A Million Views! Contest!!!!!


Holy Moly!


I looked at my view count today and realized I am likely to cross the half million mark in the next couple days!

This calls for a small Contest and Prizes!!!!!

So I'm going to make it simple.  Comment on this post on my blog (if you are reading this on facebook you will need to click the link to my actual blog). Please tell me one thing you would like to see (or see more of) in the next year on Lost In The Warp!

Thats it :)

Some time next week I will pick comments at random (probably using a number generator). I will then contact those people and send them a lovely little surprise from my shelves of mini stuff! I don't know how many prizes or what yet but I'm sure I can dig up some fun and random things :)

Thanks to everyone who has been kind enough to follow my little corner of the miniverse! Be good to each other!

The first picture I ever posted on this blog - not sure what I was thinking but it sure looks like fun!

Tuesday, October 11, 2016

Gobber Tinker Part 3 Final Pics


So in an interesting twist of fate - I have been invited to be a part of the Putty&Paint online community. An excellent gathering of incredible talent and inspiration - I am honoured to be a part of it! What is more, I have now posted this tinker, my Boromir bust and a special scratch built historical piece that I have been waiting to post the SBS tutorial for! I guess I had best get started on that for you all soon eh? ;)  Yeah ok - expect that pretty soon!

So aside from that here is the finished photo set of the Gobber Tinker - thankyou to all of those who have given such awesome feedback! If anyone tries a similar conversion Id love to see it and maybe host pics of them on here :) TTYS!


Monday, September 26, 2016

Time to Paint the Walking Scrap! - Gobber Tinker Part 2

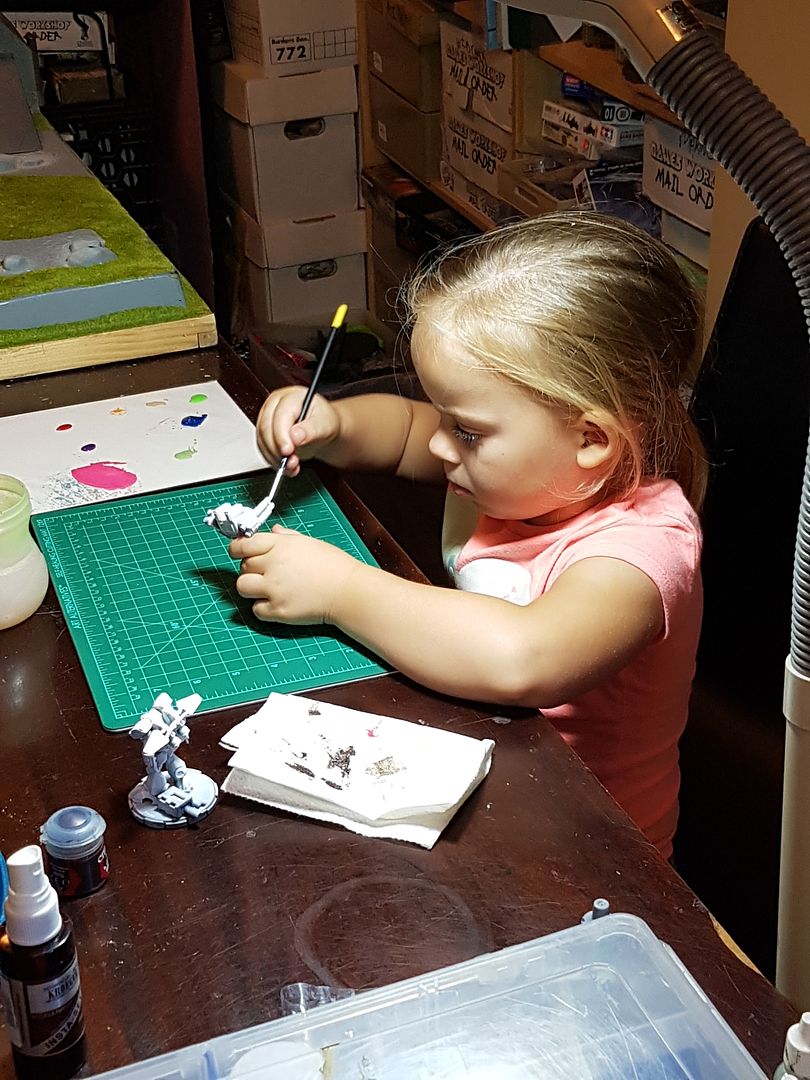
My painting buddy :) 
Full disclosure: This Gobber tinker is the first serious effort I have made to paint anything in nearly a year.  As the incredible Jessica Rich said in last weeks post, you use it or you lose it. The Warjack won't be the only thing showing how rusty it is in this article. After the passing of my mother a year ago I painted up a storm immediately after and then just couldnt bring myself to sit down and focus on it for a long time..... but now?

People keep asking if I'm back and I haven't really had an answer...But now, yeah, I'm thinkin' I'm back! ~ John Wick

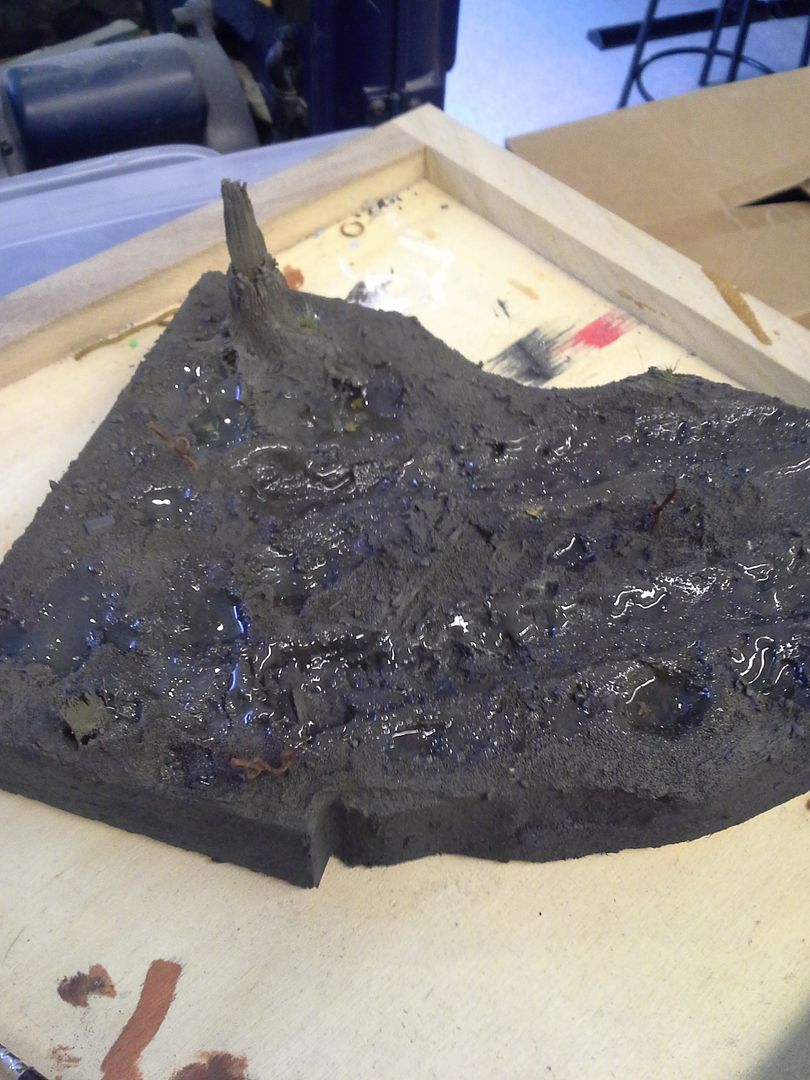
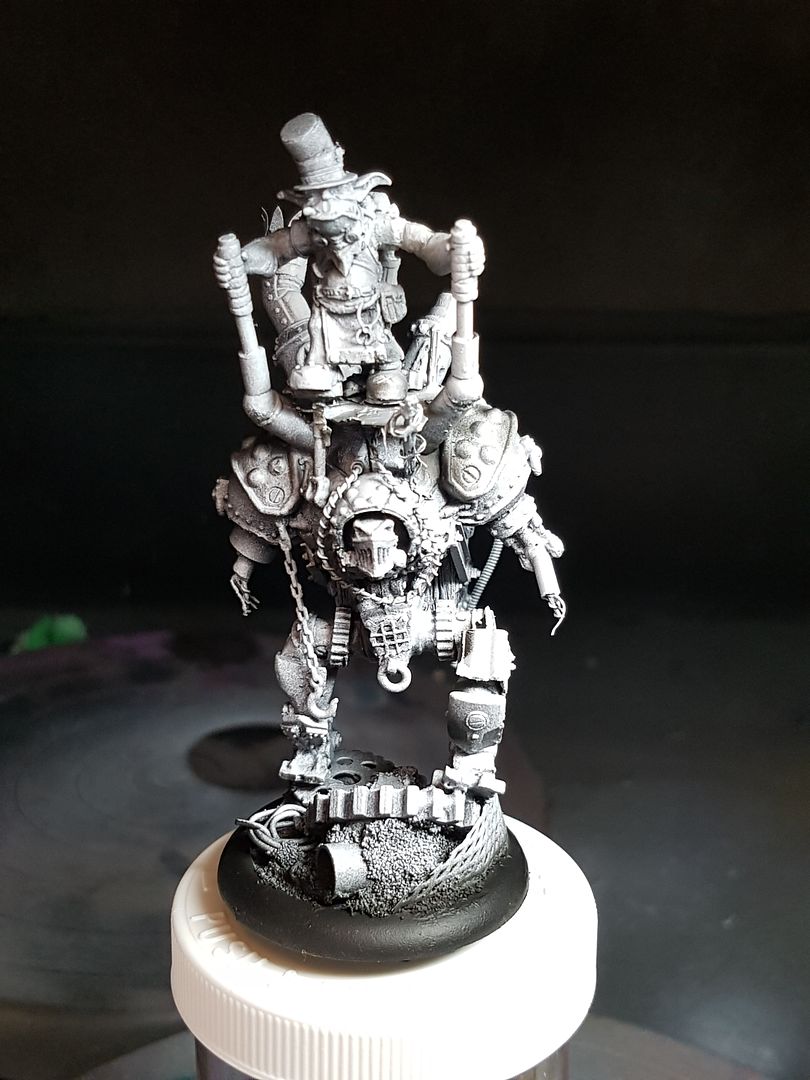
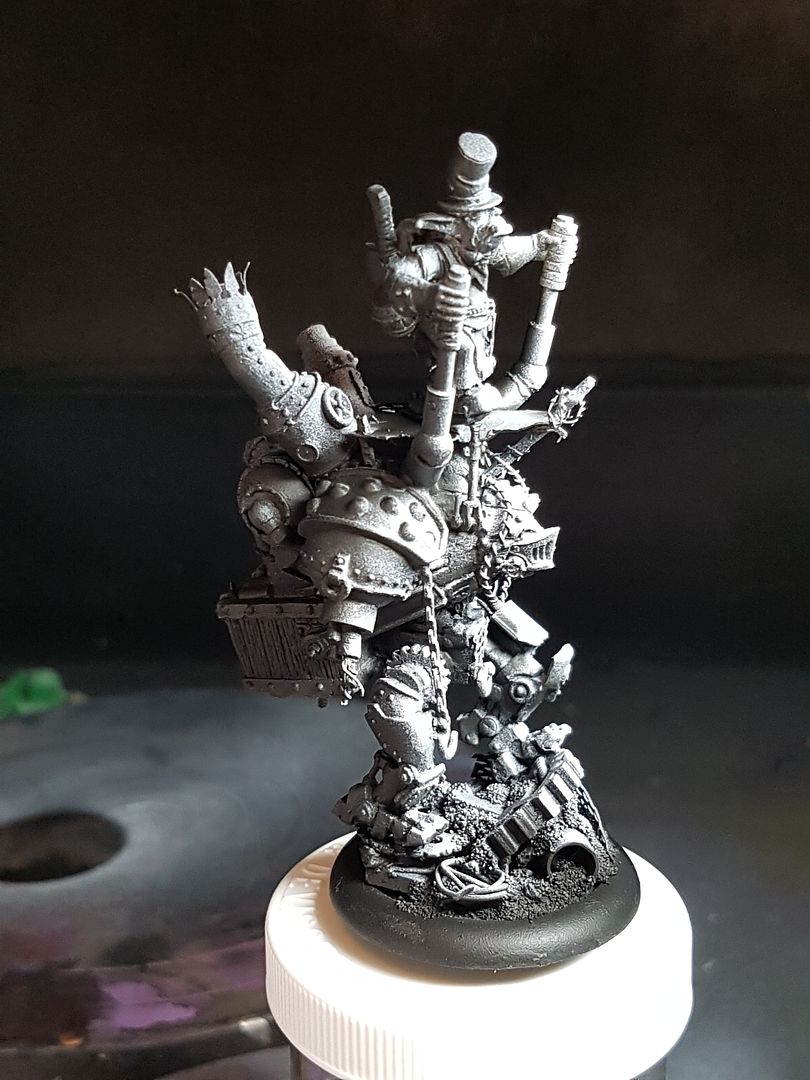
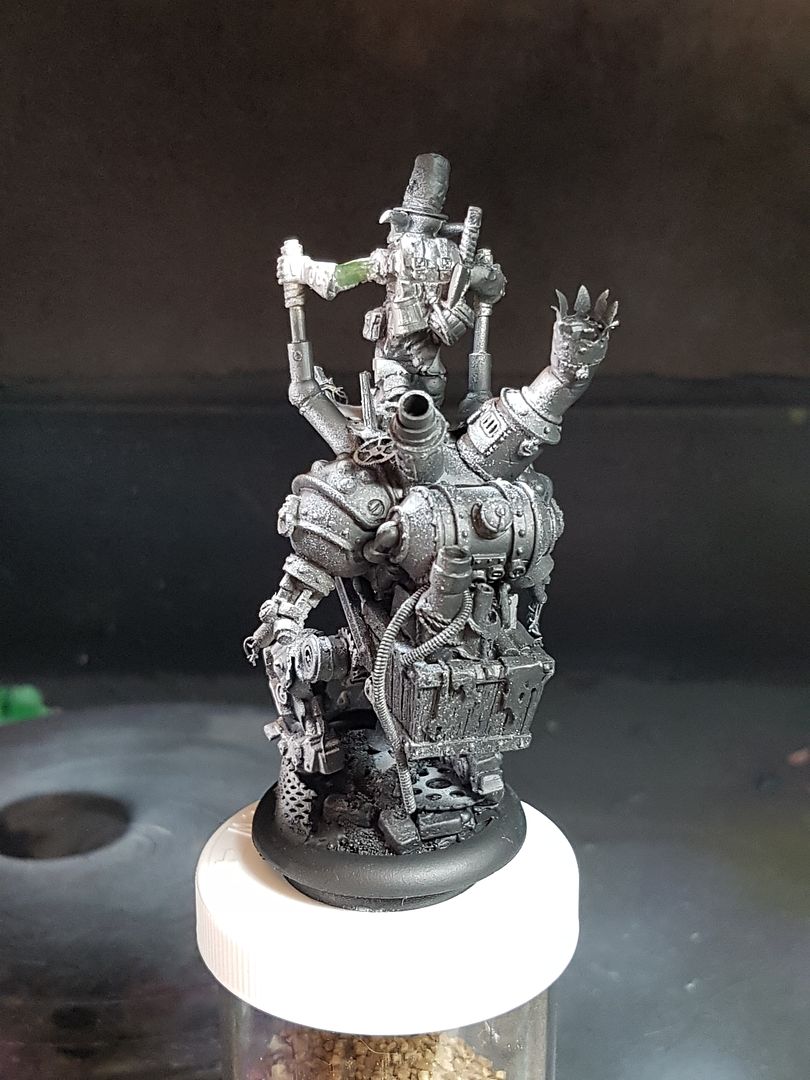
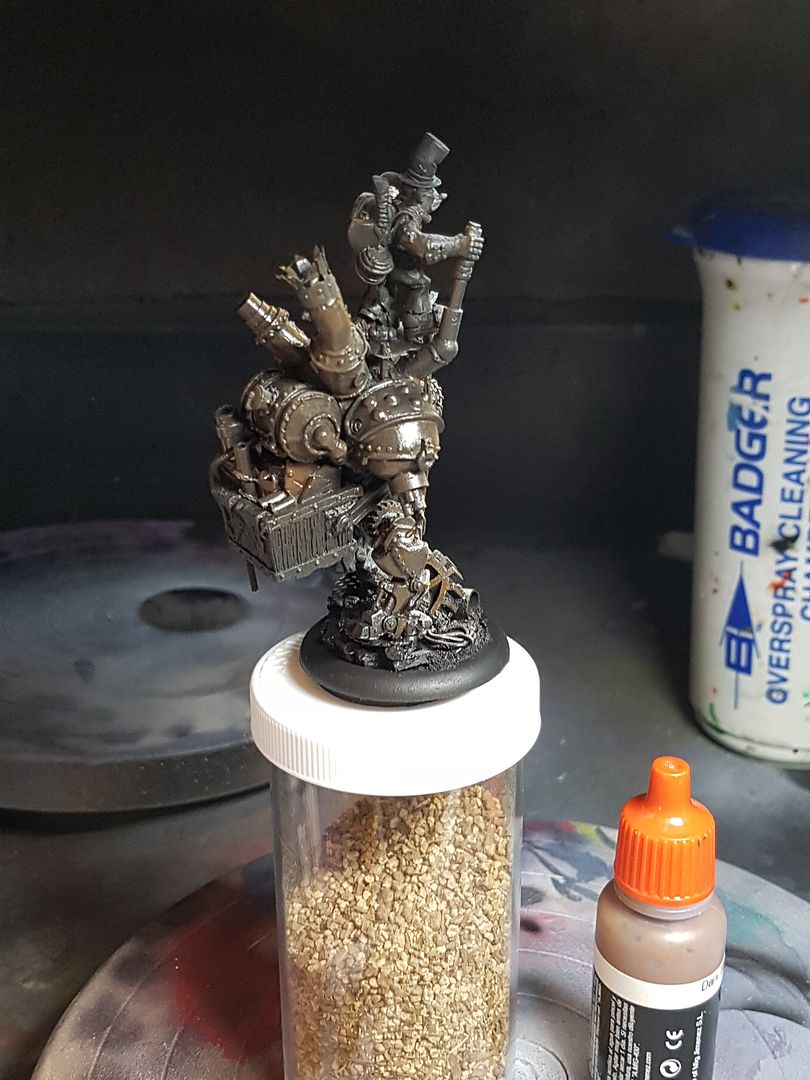
I really wanted to use lighting to give my model a sense of volume and to draw the eye upwards to the gobber himself so I started with priming in black and white - not as a full zenithal lighting but rather as an angled source that draws attention upwards and forwards. I used my ABSOLUTE FAVORITE primer in the world - Badger Stynylrez through my airbrush.
Ended up looking like this :


(3 pics to show the difference in the lighting - just click to enlarge if you want to see better!)

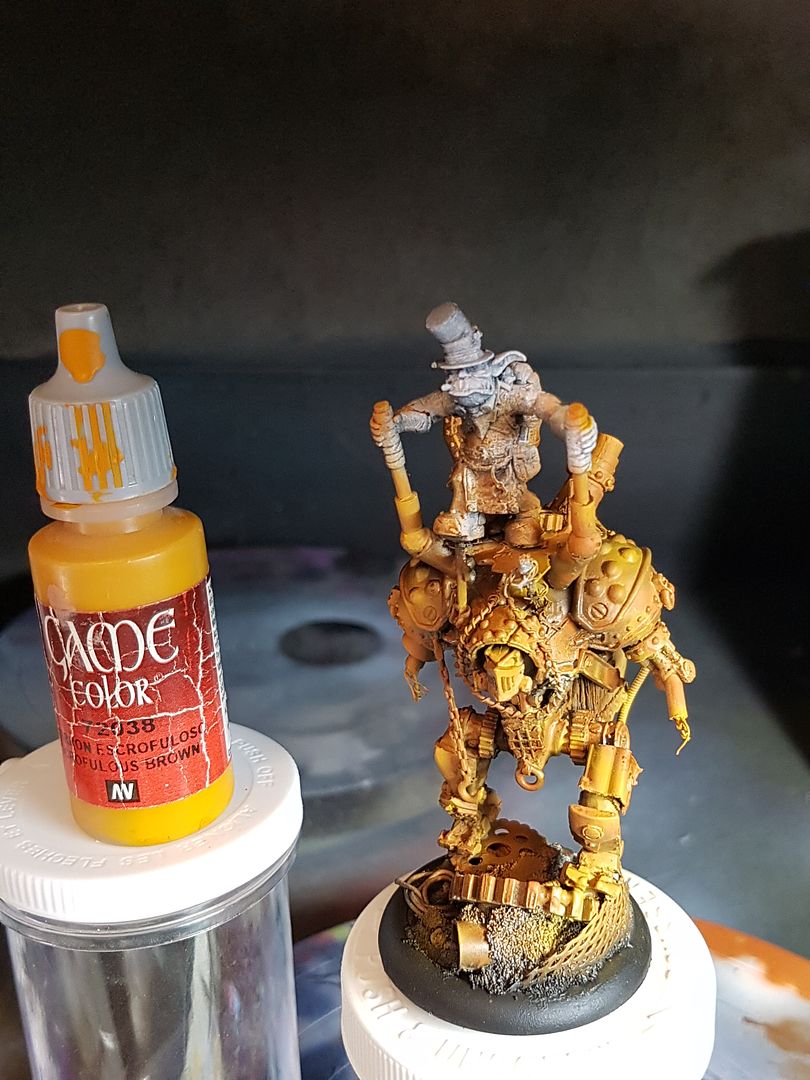
With that established it was time to begin my rust layer - This tinker didn't steal a new warjack after all - it has been bodged together from scrap and leftovers - while it may be "the big score" to someone like him, it still had to look like someone else's junk!

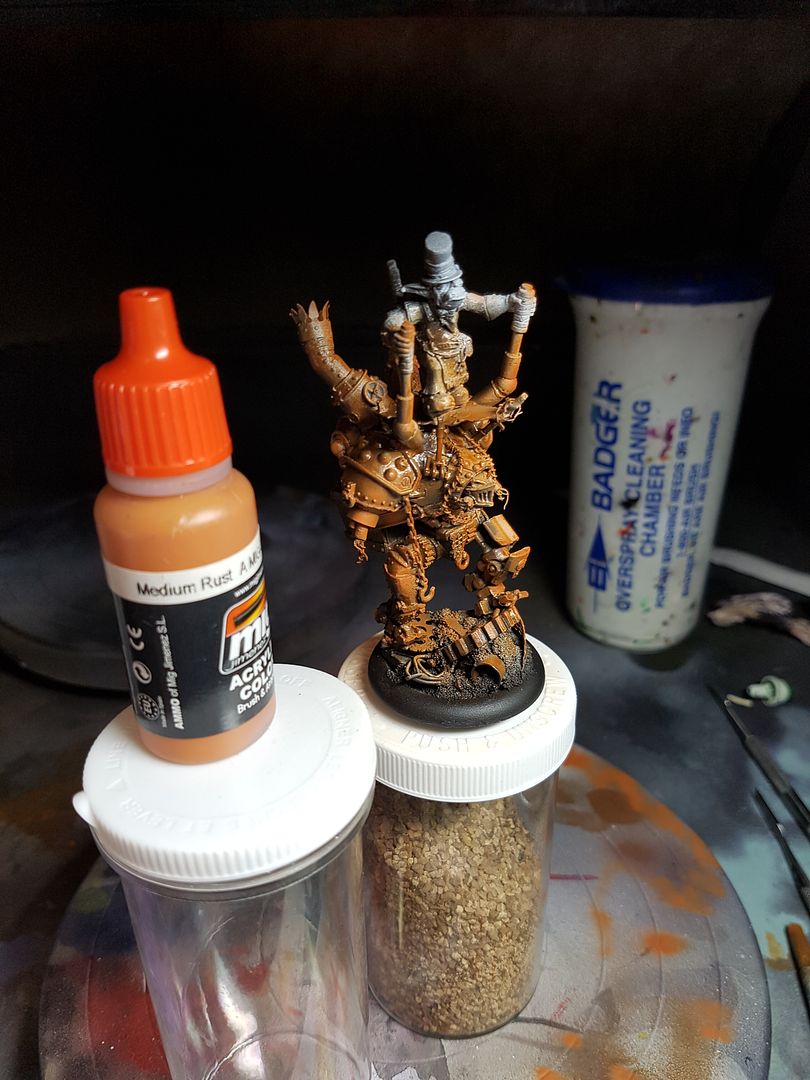
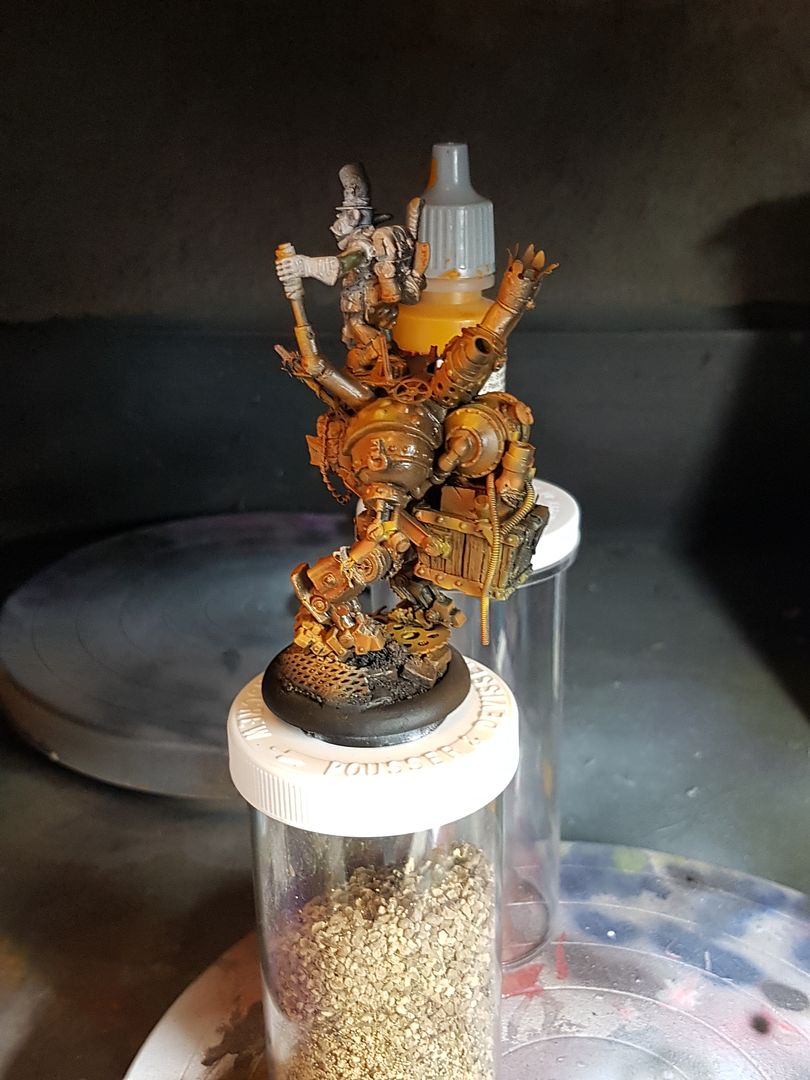
I started with AMMO by Mig Jimenez Dark Tracks and Medium rust to establish rusty tones in the shadows and mid range, switching to VGC Scurfulous Brown for the brightest areas - this really began to show the model's volumes and lighting even more dramatically than the black and white underpainting! I then used P3 Sanguine Base to warm several of the shadow zones particularily towards the front of the model (most of the deepest areas opposite the light source in the back I left the dull brown of the dark tracks over black) and to artistically deepen some zones because it was pleasing to my eye. (Remember you can click any pic if you want to see it larger!)


Once the rust coat was finished I let it dry for 48 hours and then coated it liberally with 
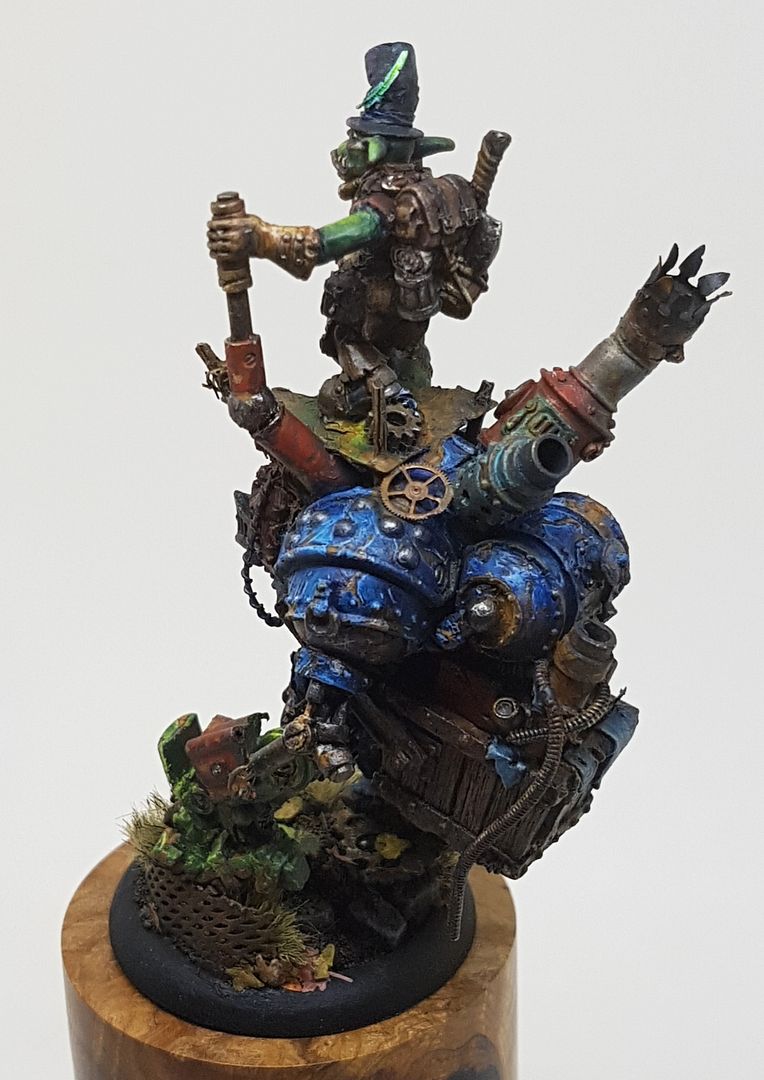
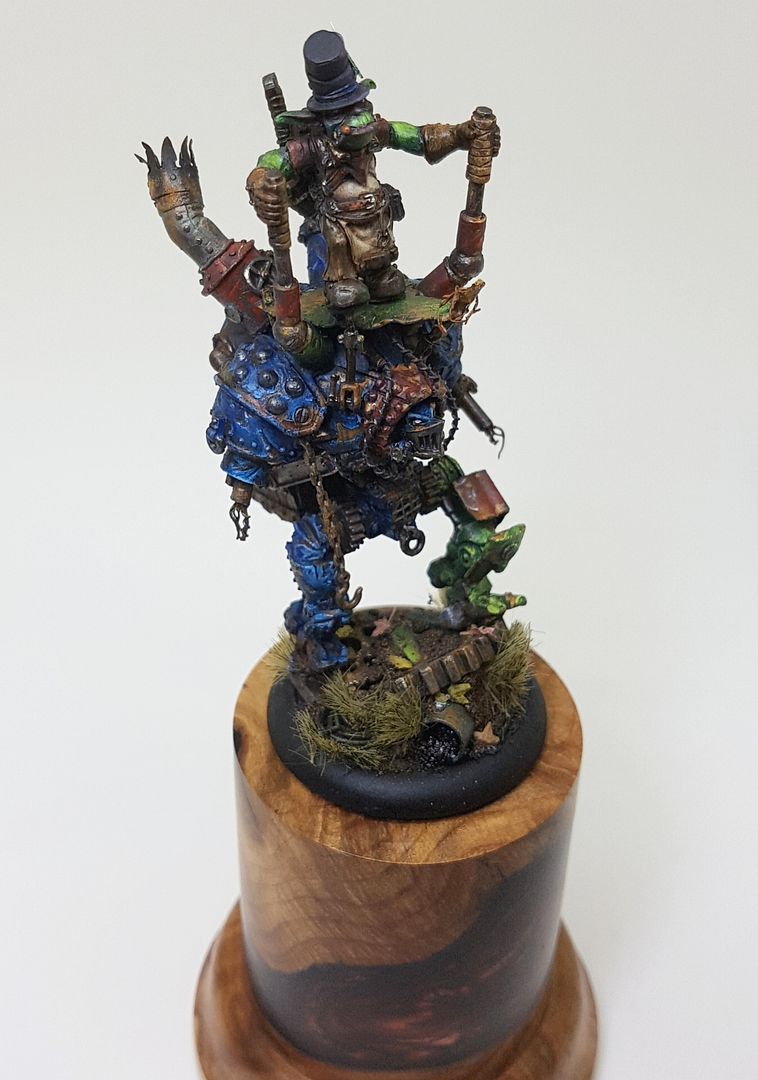
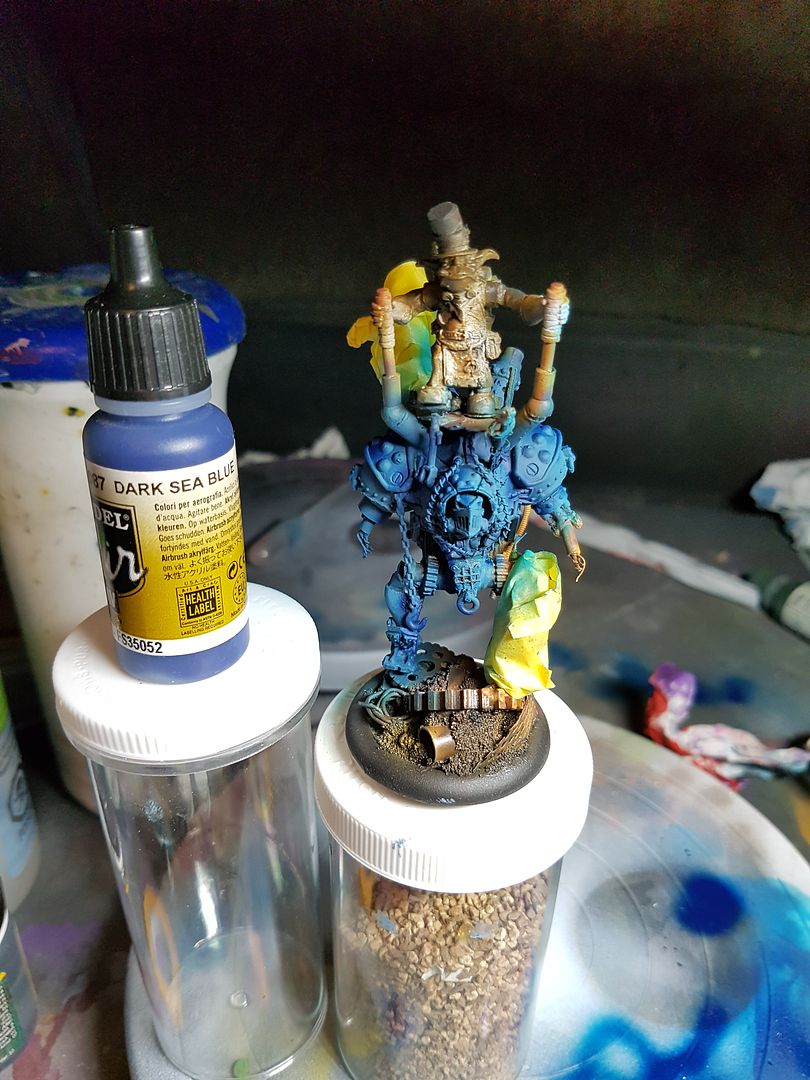
AMMO by Mig Jimenez Chipping Fluid..... Then the real fun begins! I decided that since I was using a Cygnarian Warjack as the basis of this model I would go with predominantly Blue - a colour I don't get to paint too often and that would relate well to my orange rust tones. I also decided that since I was using a Mercenary jack leg I would do it in Green (P3 Green with VMC Yellow Green) to tie visually into my Merc army and since the goblin himself would be green this would help to create harmony and a stronger overall composition. Red became the spot colour in both a strong VMC Scarlet red and a desaturated red violet made with the P3 Sanguine base.


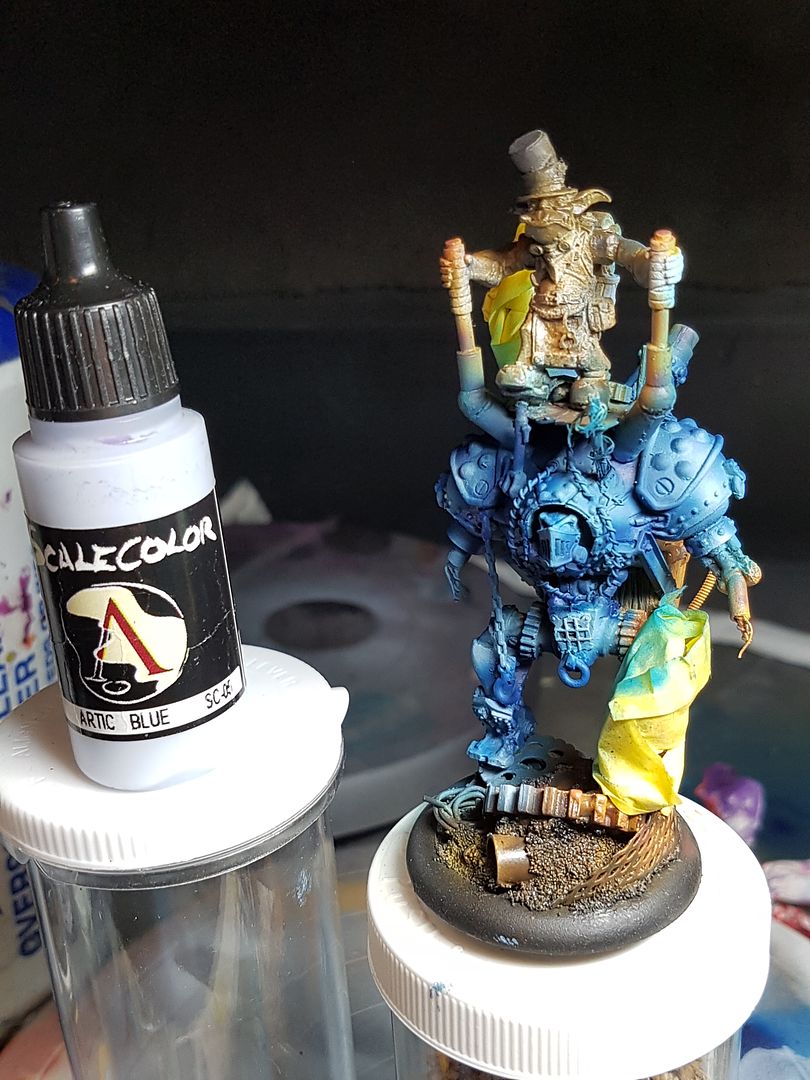
So now all the colours are laid in, but what about all that lovingly applied rusty tone? Well, this is where the fun part actually begins! Once the paint was touch dry I grabbed a larger soft clean synthetic brush and a small container of water with just a drop of running alcohol in it. I used that to rehydrate the surface of the model one or two sections at a time. then using an older rougher brush, a dental flossing brush (also super useful for cleaning your airbrush!) and a couple of pointed implements I was able to quite literally scratch and wear through the coloured paint because of the water soluble Chipping Fluid layer I had applied over the rust and below the colour coats! This exposes the "rust" layer beneath. 
(PS if Justin From Secret Weapon Miniatures thinks I need to use his Rust/Weathering paints....lets just say I have heardnothing but good and am more than willing to try them! ;P LOL) 

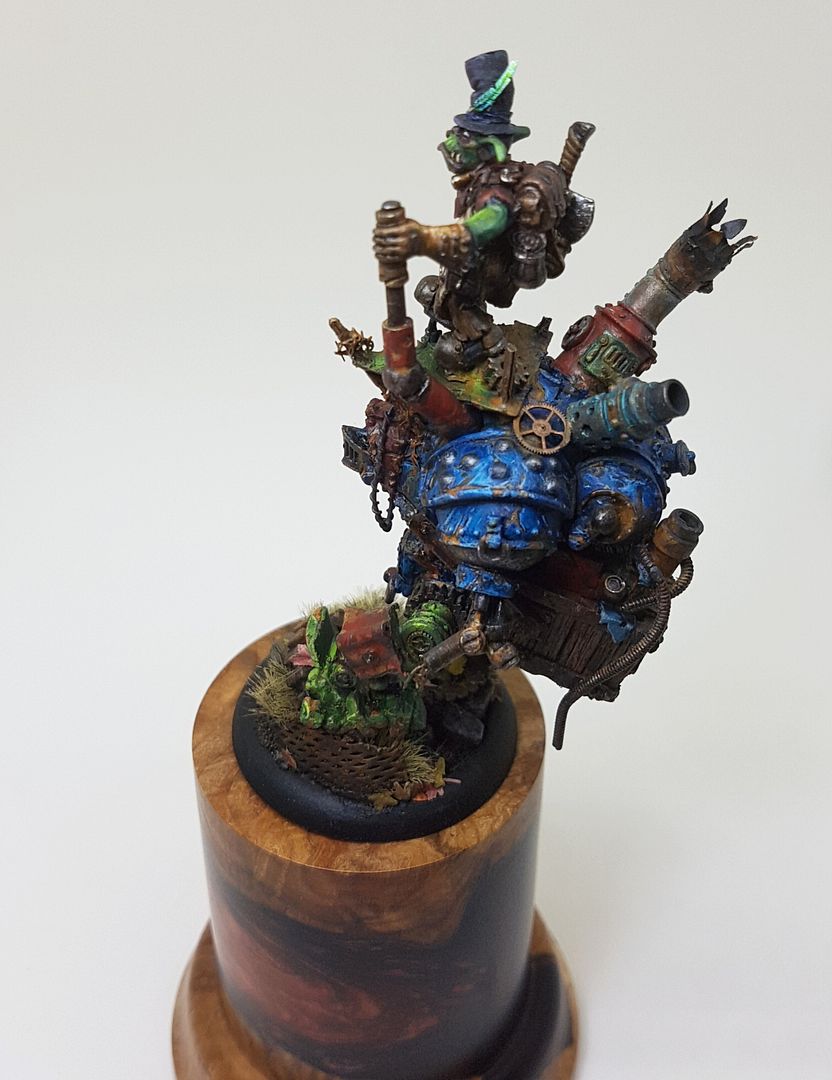
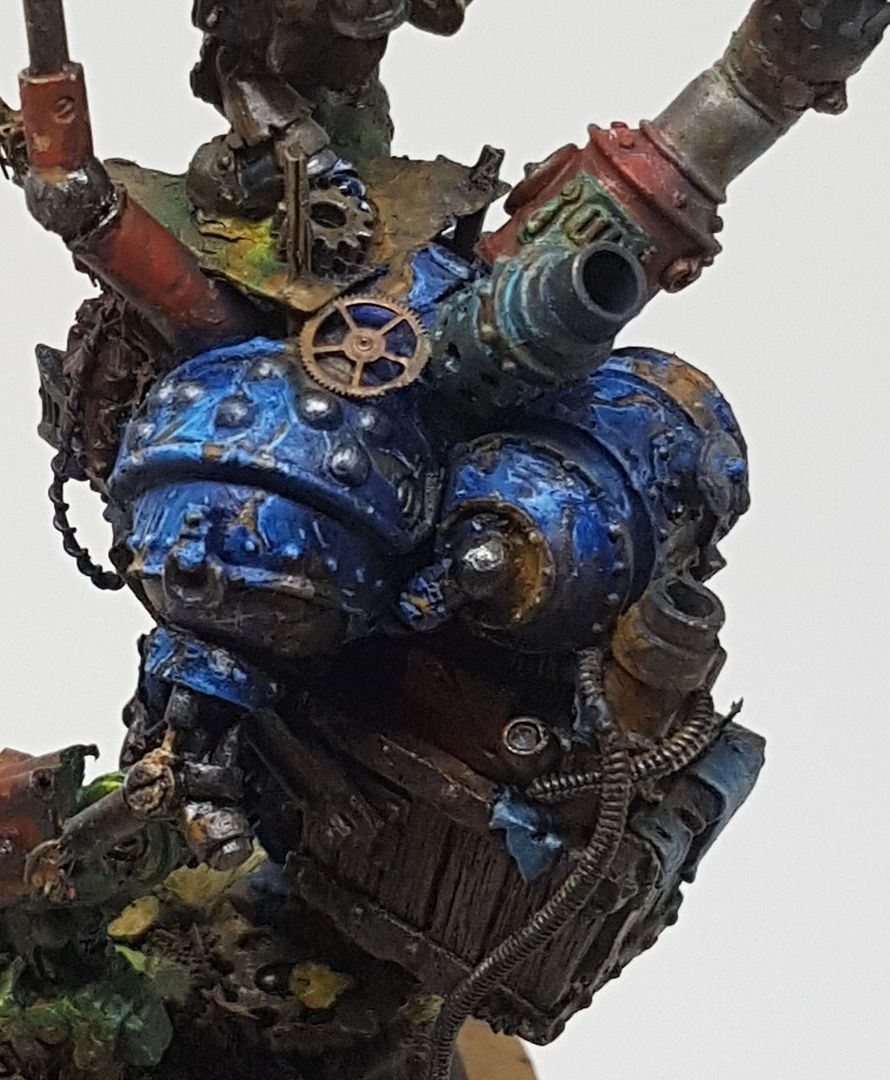
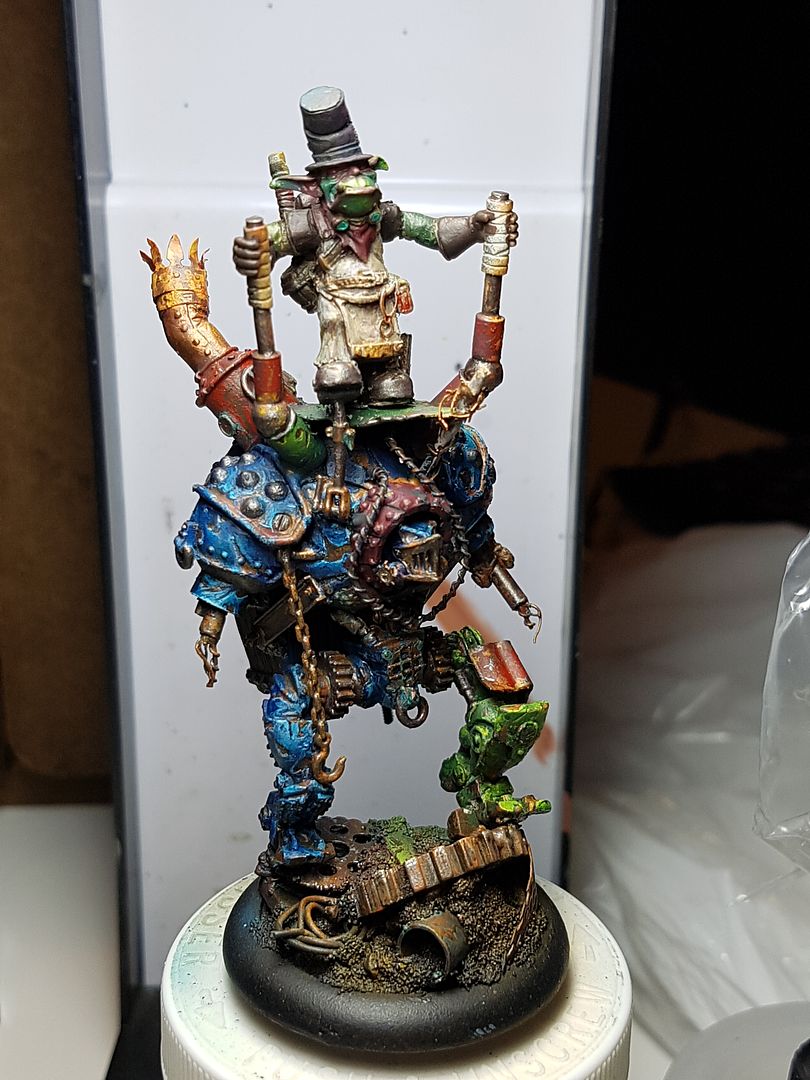
After a bit of work I have this: 


Scratched, rusted and worn it now looks more like scrapped parts for a proper tinker! (and doesn't he just look smug up there!) Once the model had dried fully again I dullcoated it to protect my work up to this point and to avoid and further accidental destabilization of the chipping fluid layer.

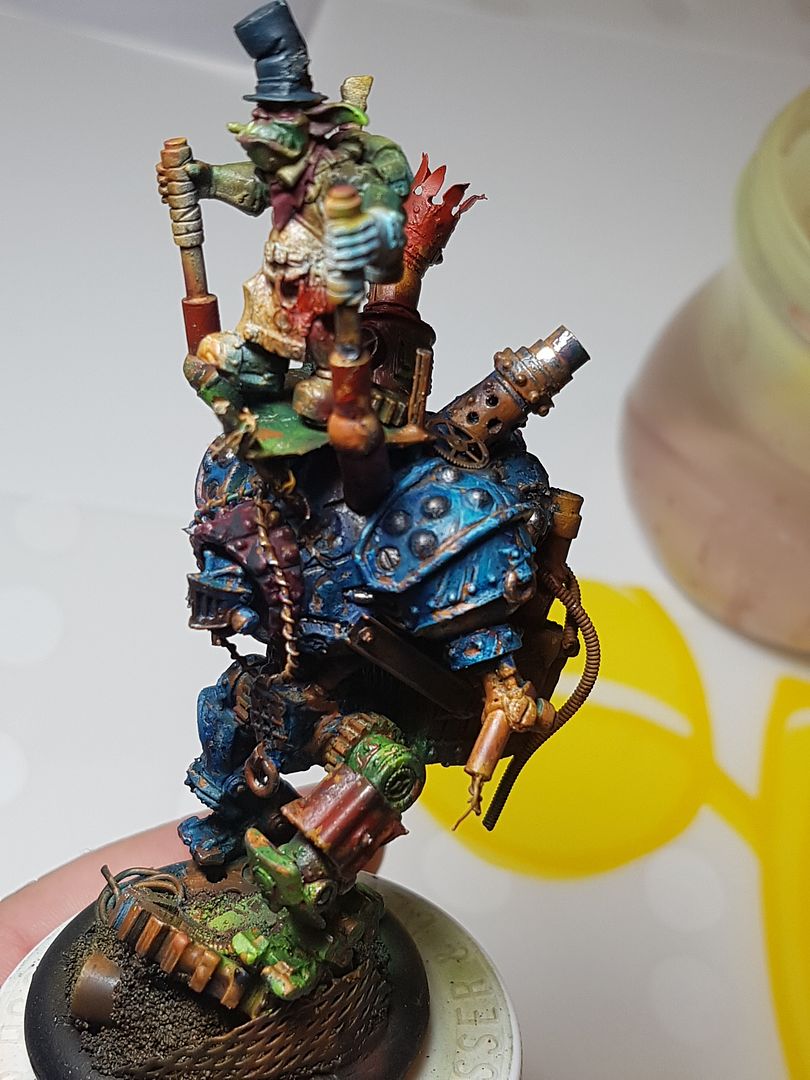
From there it was the slow painstaking process of highlighting and shadowing the edges of each paint chip and using fine glazes to build up luminosity and refine colour gradients across the major forms of the armour. I also began to develop the metals using a combination of my new Vallejo Metal Colour Burnt Iron (thanks Fernando Ruiz for the lowdown on this stuff - it is great!), DarkStar Miniatures Molten Metals, Forgeworld Dark Iron Pigment, and a pencil. 

It is really noteworthy that pencils can be super helpful in weathering - from making fine scratches that are not as exposed as the big rust chips we have done to simply adding a metallic sheen to edges. It is quick, easy and can look amazing - just be brave enough to go for it!


I'm going to leave off here for now because most of the interesting stuff has been done - I did have to go back and paint the goblin, stowage and to work out a few more areas, but the techniques in doing all that are either traditional or have been covered above. I did also break out my AMMO and stardust pigments, AMMO rust washes etc. to accentuate the weathering further - Next week Ill comment on more of the finishing and post this little guy's glamour shots as a completed piece! 

If you have any questions about colours, techniques or anything else do not hesitate to ask!