Showing posts with label News. Show all posts

Tuesday, April 04, 2017

Sword and (CRYSTAL) Brush!!!!! New Canadian Qualifier!!!!!

No secret that I look forward each year to the Sword and Brush Competition in Toronto Ontario Canada and today they dropped some Truly EXCELLENT news!!!

From Sword&Brush Organizer Alex McCutcheon:

Great news! Sword & Brush is proud to announce that we are now a Crystal Brush qualifier! 

Crystal Brush is a prestigious miniature painting show held every year at Adepticon in Chicago that attracts painters from all over the world. The Best in Show award at our show will receive free airfare to the 2018 Crystal Brush for a chance to win up to $10,000!

Thanks to the fine folks at CMON for including us as a qualifier. For more info about Crystal Brush, please visit their website:

http://www.crystalbrush.com/ 

So excited that this added dimension (and added draw) has been...well... added..... to one of my favorite events!
I expect that this means the already high level of competition is about to become even more fierce!!!

Keep up to date with the Sword and Brush at their facebook page:
https://www.facebook.com/swordandbrush/

Note: you dont have to win at one of these qualifier events to attend Adepticon and enter crystal brush - it is just a cool way to win a flight to the event!!!!

Wednesday, February 22, 2017

Half A Million Views! Contest!!!!!


Holy Moly!


I looked at my view count today and realized I am likely to cross the half million mark in the next couple days!

This calls for a small Contest and Prizes!!!!!

So I'm going to make it simple.  Comment on this post on my blog (if you are reading this on facebook you will need to click the link to my actual blog). Please tell me one thing you would like to see (or see more of) in the next year on Lost In The Warp!

Thats it :)

Some time next week I will pick comments at random (probably using a number generator). I will then contact those people and send them a lovely little surprise from my shelves of mini stuff! I don't know how many prizes or what yet but I'm sure I can dig up some fun and random things :)

Thanks to everyone who has been kind enough to follow my little corner of the miniverse! Be good to each other!

The first picture I ever posted on this blog - not sure what I was thinking but it sure looks like fun!

Friday, February 17, 2017

Luxumbra!


In case you hadnt seen yet :) my fellow CB judge Angel, of Studio Giraldez, has a kickstarter on the go that is looking amazing (<- click here to check it out!!!).

Fully funded in minutes and working towards many stretch goals. I have been waiting for some time to see this campaign come together and it looks impressive! I am not an Infinity player but these busts and figures are beautiful - I definitely want to paint one!

The sculpts are evocative and characterful. They appear to be exceptionally well sculpted and cast and represent a nice variety of subjects from the Infinity world. Even for those not associated with infinity the characters have great variety to appeal across genres and styles.
Whats more the model stands that have been unlocked are pretty darn cool! I hadn't seen this style of plinth before but I REALLY like the clean aesthetic of them They could be used as display stands or as holders while painting and are priced very well.

With more limited release models, special bases, painting guides, a WONDERFUL deal on a great H&S airbrush kit!!!!! this Campaign is going to be amazing. 30 days still to go means lots of room for surprises yet :)

Best of Luck to Angel and the crew at Luxumbra!


Thursday, February 09, 2017

I AM JUDGING YOU!!!

Well sort of.

If you come to Adepticon.... and enter Crystal Brush.

Posted now on the Crystal Brush website under the heading "Meet Our Guest Judges for 2017"


It is an INCREDIBLE honor to have been asked to be a part of this! Really makes a guy feel valued in this community. Thank you to Jen Haley for the kind words in my intro. :)

Being a volunteer in a role like this carries a lot of responsibility and I am definitely feeling anxious, but I really think it will be a fun, educational and community building experience without parallel.

I hope to be able to connect with many of my artistic peers - both old friends and those who I have not yet met face to face. I look forward to working with, learning from, and sharing insights with you all. This is going to be a weekend of painting, sculpting, sharing and inspiration to be sure.

See you soon
James

PS - if you follow this blog but prefer Facebook - I have a mirror there with additional content https://www.facebook.com/lostinthewarp/

Tuesday, June 07, 2016

{T}Rolling Along..... Horthol gets a makeover!

Horthol - one of the most Bad @$$ solos in Hordes. He is a Toughalow riding, line breaking, Elite Cadre inspiring, PS15, presumably 1 inch reaching KD/Slam Machine!

Further, He is a well sculpted and characterful model. Great face, upgraded Toughalow armour, Upgraded leg armour, Big spikey shoulder, bigger shield, unique hammer, basically ALL THE THINGS I WANTED ON MY REGULAR LONGRIDERS....... And yet......


He still just doesn't quite do it for me. Horthol is still pretty tiny especially that lovely detailed face.. The shield sits really funny and far back on his arm....and while better than the other ones it still looks like more hinderance than actual protection.... and when dismounted he shows the trait well known amongst the uber muscled trolls - skinny legs. (C'mon man ya cant be skipping leg day!)

So I decided that with my beefing up of the other long riders - Horthol needed a significant makeover himself!

I started by chopping up the dismounted model - carefully keeping the hammer and spiked shoulder pad that is unique to this model. I took this and added it to a warders body instead. The large model merged easily with the big hammer and looked as though it could legitimately swing it one handed. It also had the requisite leg armour that Horthol should have.

Furthermore, in keeping with the big warder shields I had added to my longriders, I chose the awesome warder champion shield for Horthol and tracked down a second one so that both mounted and dismounted versions would match. (Special thanks to my good buddy Jason Matheson for hooking me up with a second one of these from his bitz box!!!!). Finally I dry fitted one of Dozer's knee pads as shoulder armour to make him even a little more beefy and broad looking - and it was perfect!

When looking at the models - especially the walking one, I realized that I had made things a wee bit more difficult on myself as the standard Horthol Head was going to look tooo small on the warder body and a warder head was way too big for the mounted Horthol body...... So digging through my box of bits I had ordered from PP I came across the head of Horthol's buddy Borka.


This face has a TONNE of attitude and was just the right size that it could fit both torsos without looking weird and out of place on one or the other. It did mean making the mounted one a new neck of greenstuff and a pin while the warder body needed both a neck and an armoured neck gorget, which I made out of plastic tubing.


A little fitting and detailing with kegs and bits later and Voila! A MUCH more satisfying solo who looks ready to smash face on or off his toughalow!


I am REALLY happy with this conversion and cant wait to field him in Mk3 - I think he and his crew will be fun to run with Jarl and the Fennblades, maybe Frank my bomber and a couple others to make a fast list with hitting power! Or perhaps with Borka, though now that he has Borka's face I may have to convert my Borka up too..... :P   Only a couple more weeks until we find out how MK3 is going to shake out!

Cya Soon!
James "TKKultist" Craig

Tuesday, May 31, 2016

{T} Rolling Along..... Minimal input for Maximum Style! Fennblades 2.0

Howdy readers, back again with some Trollblood building goodness! A few small updates this week.
I know I said I would be continuing with my Long Riders, but I am still waiting on some conversion parts from PP so Ill end up rolling them out a little more slowly and showing a few other things first!

Which brings me to my Fennblades! A while back I wrote a very favorable review of the Fennblades kit - where my only real concern was the repetition of models - not really a big issue for most - but always a minor thing that grates on me. Back then - my intent was a quick paint to play kind of army.... since that idea has completely fallen off the rails with me now converting and personalizing the majority of models in this army, I have decided to revisit these sword wielding dervishes!

Being beautifully simple 2 piece models, however, leaves me with very few choices how to modify them without major re sculpting. Then again, sometimes the simplest solutions are the best :)

Head Swaps!!!


Grabbed the clippers, knife and a file and had 4 of their heads off in no time flat! Some of the extra metal heads I have bits ordered or cannibalized from other kits and a tiny bit of greenstuff for new necks/gap filling and I had successfully added genuine variety to the unit.


Plus I still have the limited Fennblade "kilt lifter" to assemble which means with the 5 unique bodies in the box,4 conversions and the lifter I have 10 different models now in the unit! (plus 1 left over for the bits box!) With that this unit of really great looking models will look even greater (which will line up nicely with their rumored new greater utility - CLEAVE FTW!!!!)

Since this was a pretty small edit and simple conversion- I also had the time to clean and prep my Dhunian Knot - I LOVE these models. Brian Dugas is to trolls what Brian Nelson was to Orks back in the day - stylized fresh and genuinely interesting sculpts! As I showed before I bought two sets of these - one to use for conversion (like my super cool Fire Eater conversion and my equally satisfying Runeshaper Conversion) - and the other I chose to simply assemble as is! They are so nicely sculpted and with such variety that I saw no reason to do otherwise.


I can already tell these will be that hybrid of a joy to paint because of the character and cool details while simultaneously being a paint to do because of the same multitude of fiddly small things to paint!!! #firstworldgamerproblems LOL!

That being said, I am having so much fun building the models that I haven't really painted anything in a while - Id best start figuring out what Im going to do about that before the AMAZING crew over at Moose Machine start teasing me about it...... (see what I did there...no?... it was  plug for my favorite Warmahordes podcast! You should watch it too.)

Till next week
James TKKultist Craig


Wednesday, May 18, 2016

{T}Rolling Along - Long Riders come up short......

When I decided to pick up a small Trollblood force (HA! I should have known better...my friend Erik and I now own almost the entire faction worth of models between us) one of the units that enticed me to make this leap was the Long Rider Cavalry. Even before I knew the rules the idea of a fast crushing cavalry unit of mounted Trollkin just really appealed to me - so I decided to buy them.

Holy crap they are an expensive unit - Over $100 even before Horthol! But..... they were so cool, and I heard the rules for them were also awesome - Totally going to be worth it anyway. Right?
So I dove in!

.... And then I opened the box to begin the assembly.....

Oh Crap.


Seriously - what a load of crap.


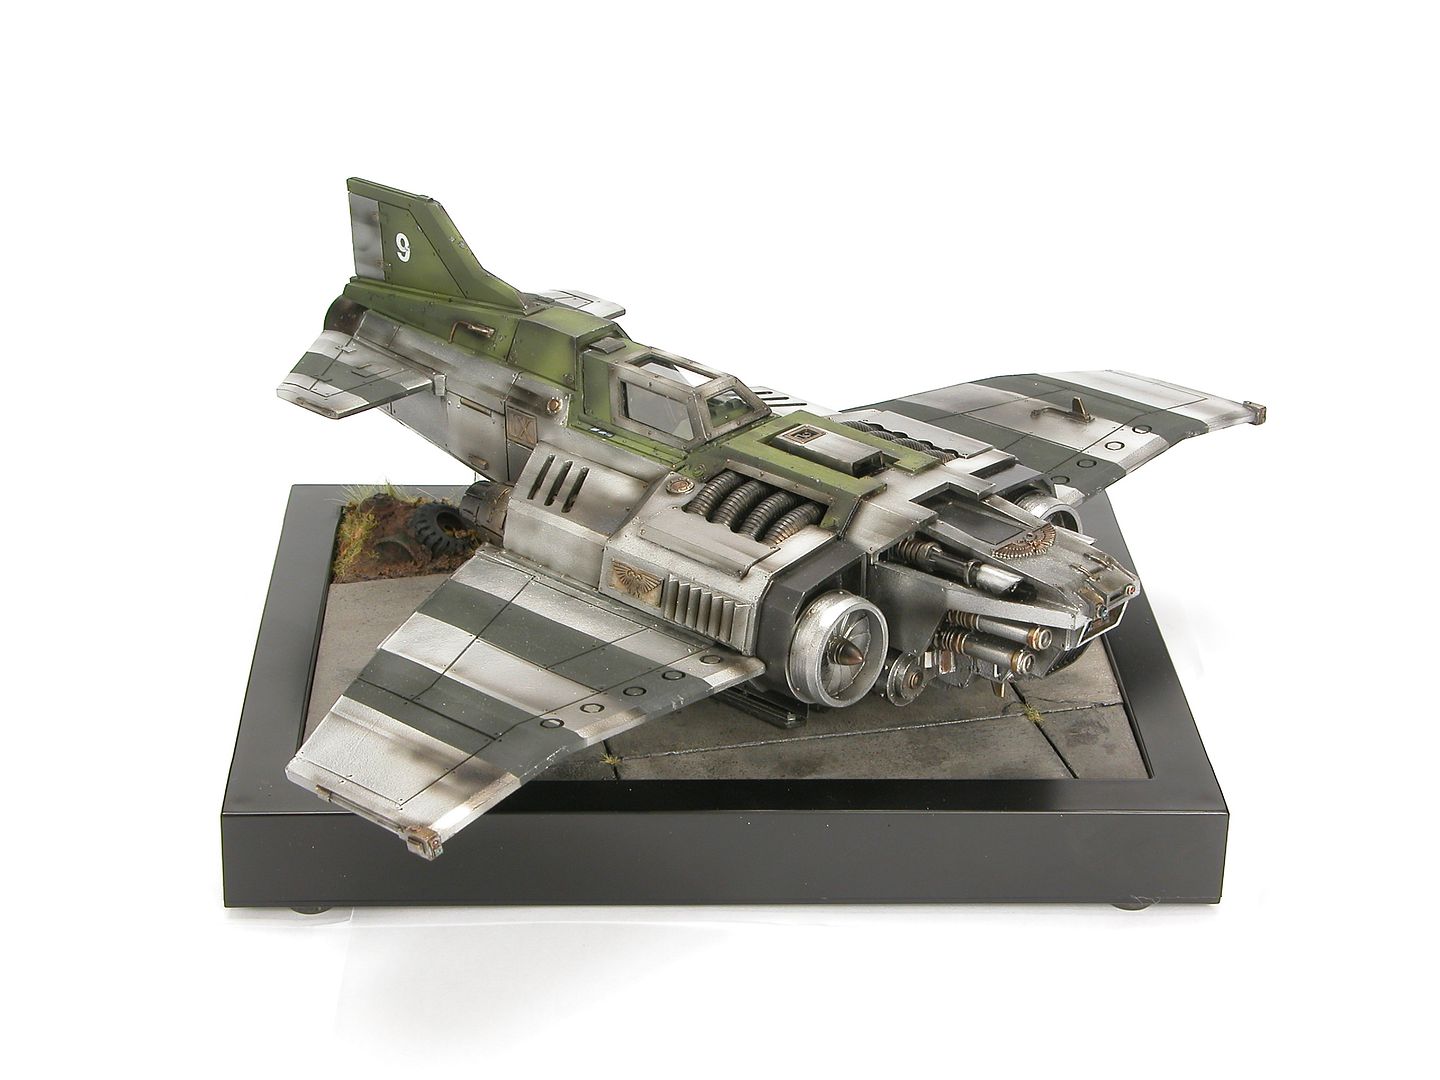
I was flabbergasted - these were some of the worst fitting models I have ever built - and I built that jacked up P.O.S. Forgeworld Thunderbolt where I had to completely rebuild the wing mounts and whole sections of the body......Ok maybe a they weren't quite as bad as that....

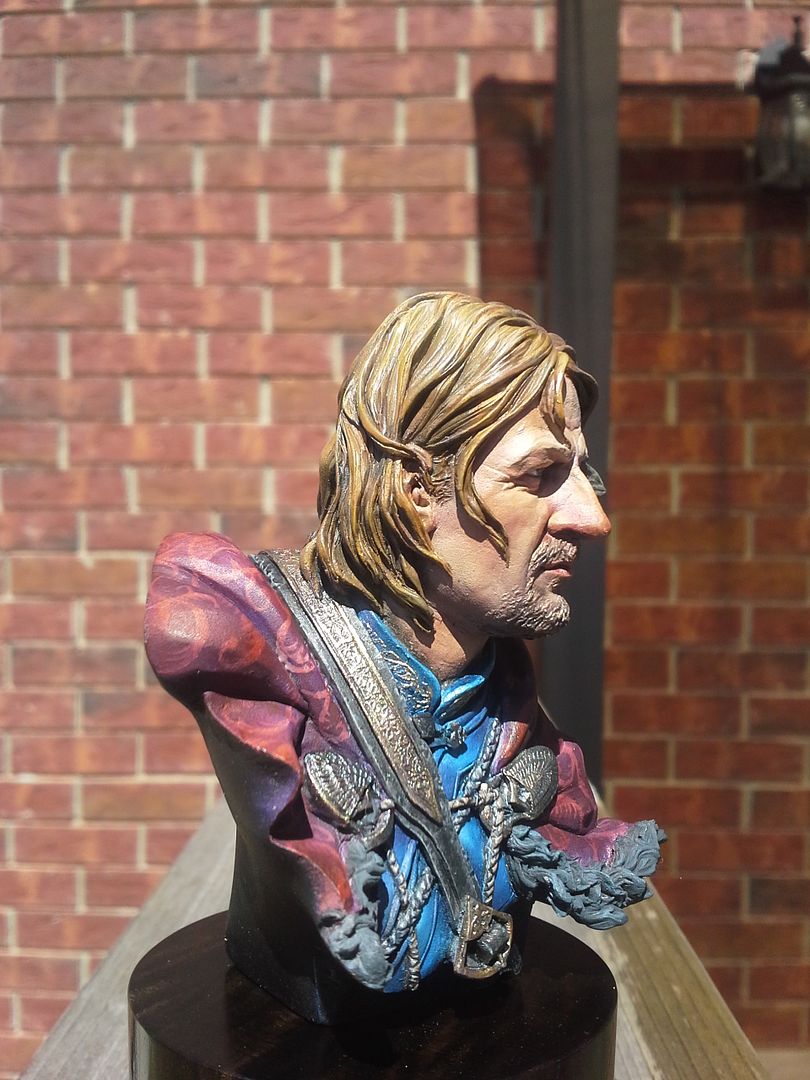
And it turned out ok in the end....... ;)
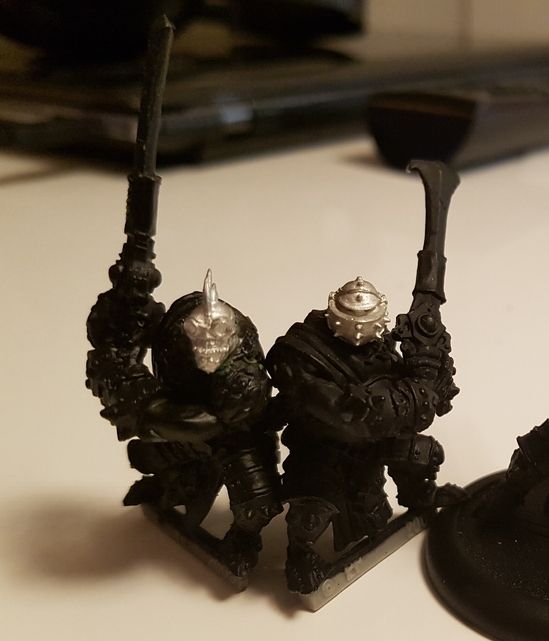
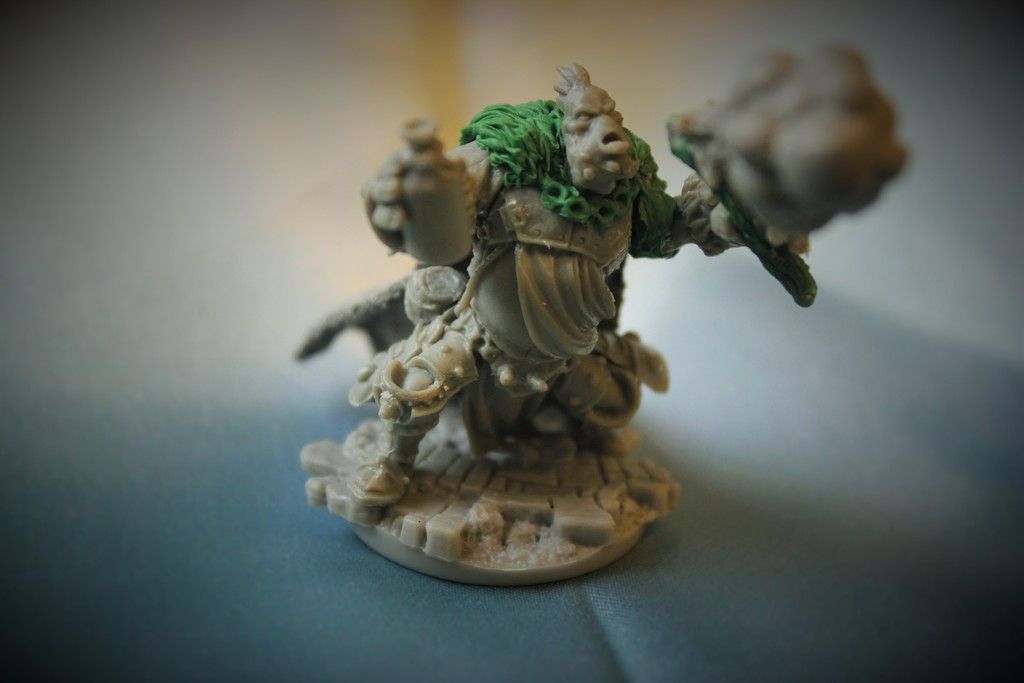
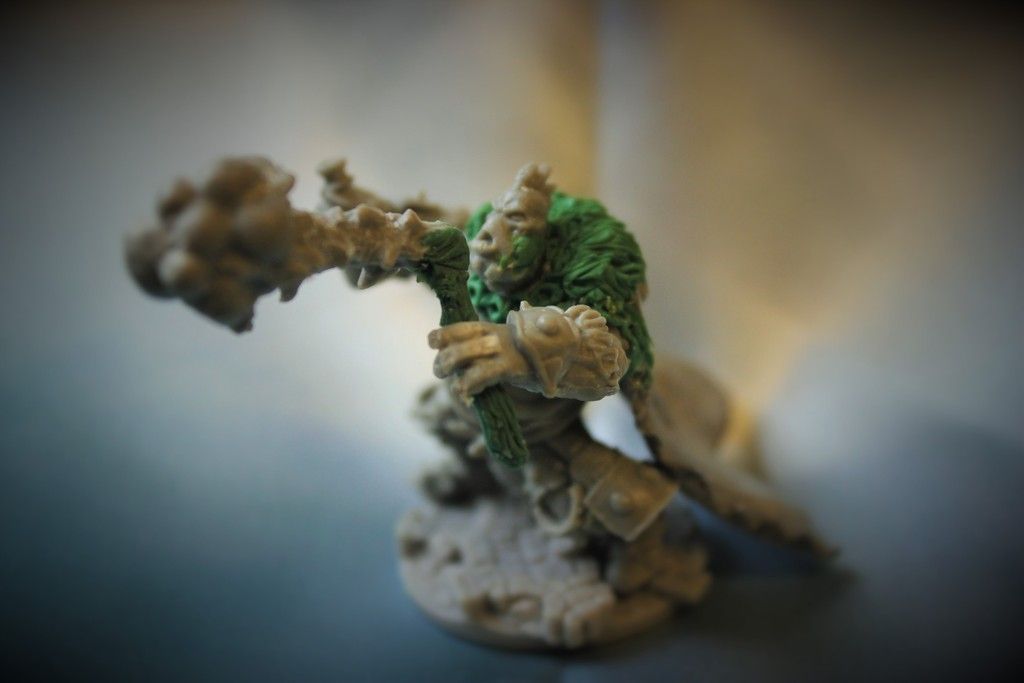
For the price of a colossal or gargantuan, I think this little unit of models should have almost assembled themselves. Instead they had ENORMOUS gaps. No two halves fit properly - not a single pair out of 6. The Molding lines were a real pain and a couple of the parts required a significant amount of filing, grinding and/or filling because one side of the cast or mold line was lower than the other.
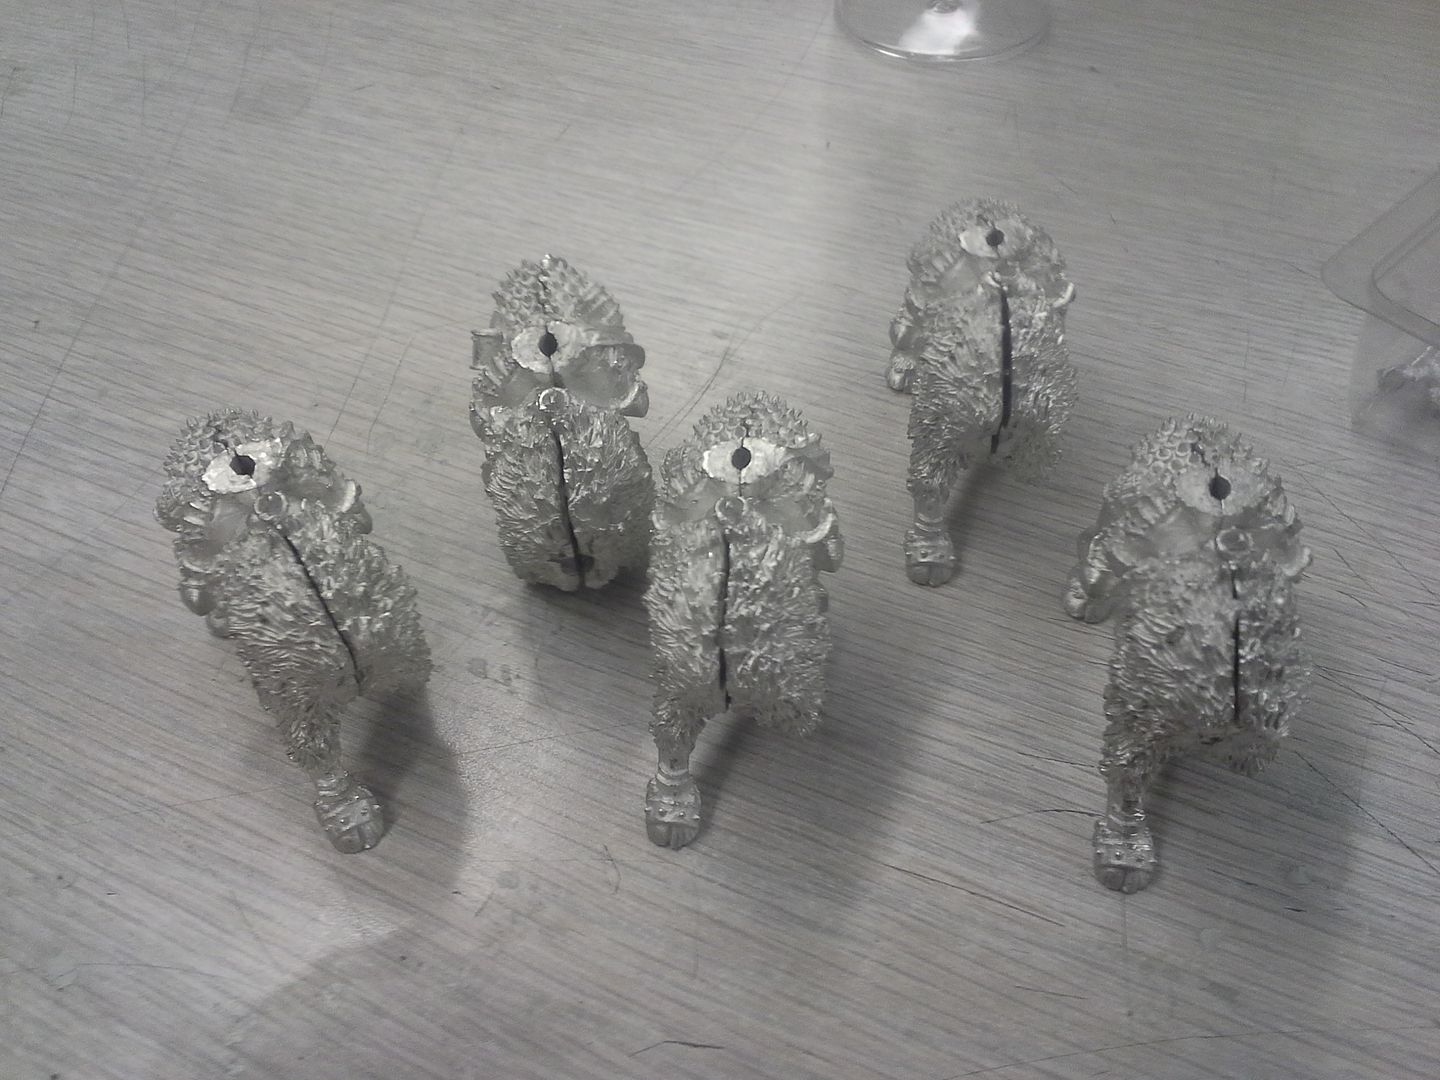
Bad as it is, this picture does not show the true extent problems faced by belly halves that required major filing/dremelling to even out or the poor fit and finish of the riders. I can only hope that I had a particularly bad batch and that this is not the usual situation faced by people with these models....
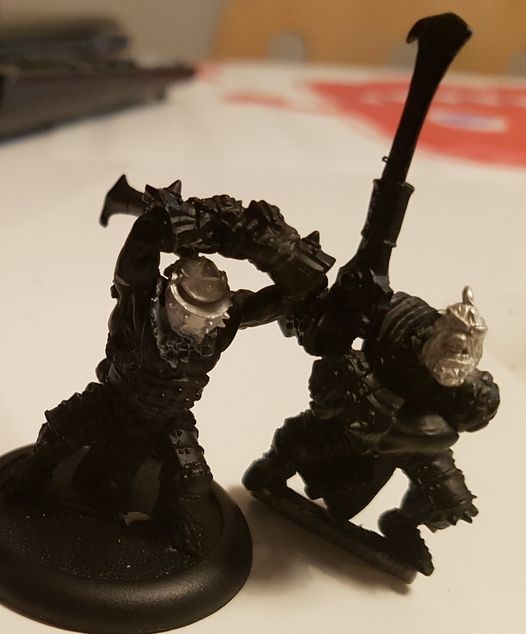
In the end I used apoxie sculpt and resculpted the center section of each model. Hair textures and straps, some armour plates. It was a lot of work to be honest and took all impetus I had to complete this unit and flushed it away. They have sat unfinished for about a year now. I have played them riderless in friendly games to get a feel for them several times, but still they have sat unfinished.
 

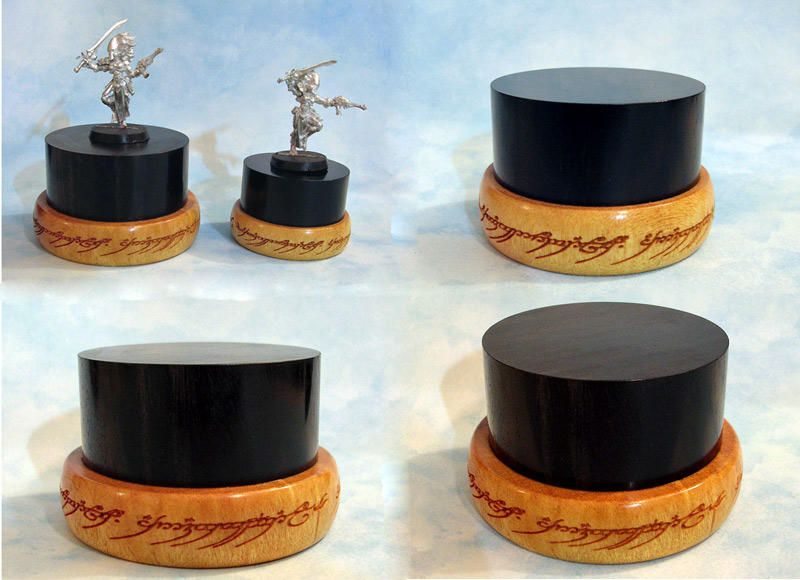
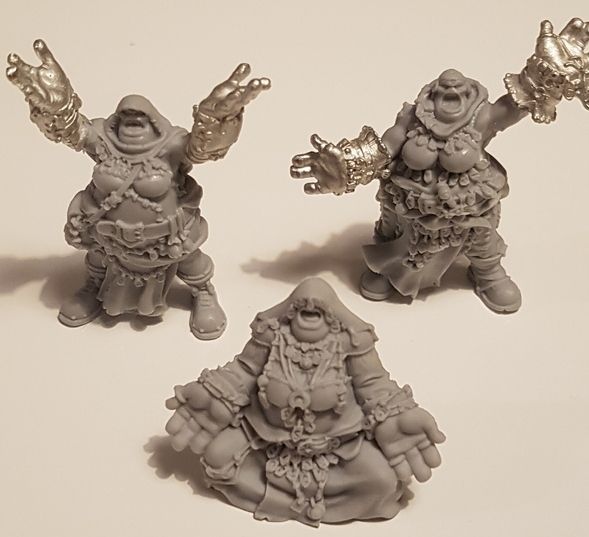
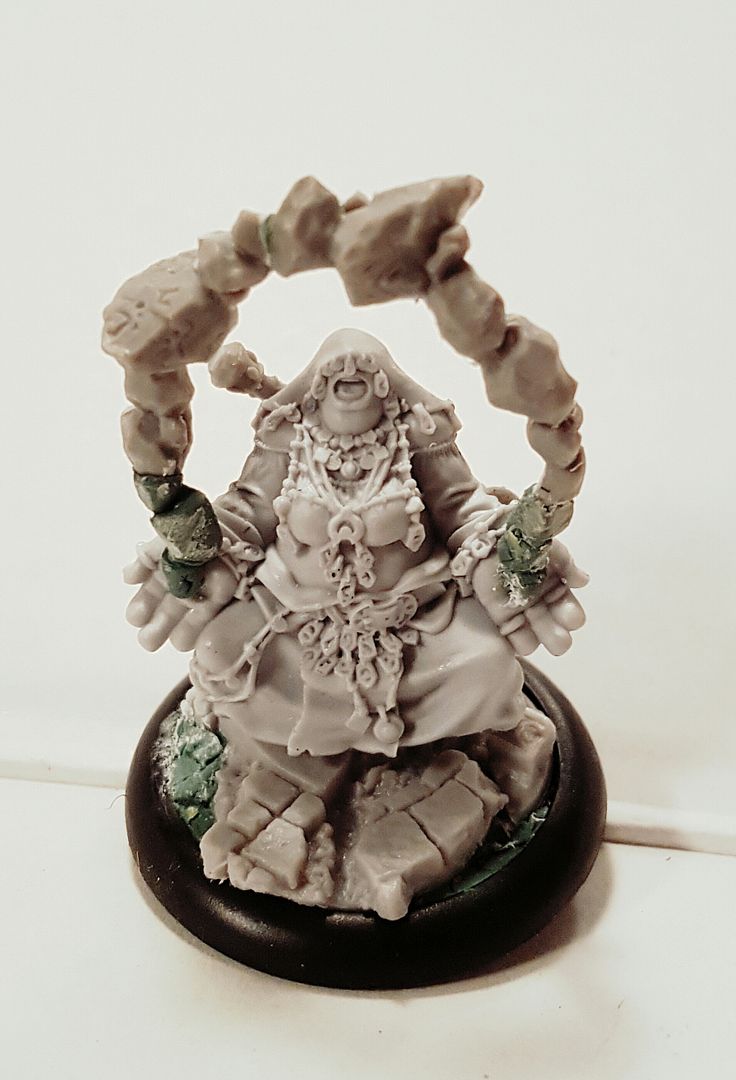
Longrider by Bakaryu
What is more, the last year has seen many changes in the Trollblood line - notably many larger proportioned figures - making these older long riders look a little puny by comparison.... Mind you I really like mixing older and newer sculpts - showing a populace of varied height and size, Also it makes sense that the absolute biggest trollkin would be less likely to be mounted and massively weighing down their rides..... that seems more a job for somewhat slighter kin. So I took another look at these models,and realized that the biggest and least fun part of the job (basic assembly)  was already done.

Whats more, when I saw the cool Bear mounted versions by bakaryu on the pp forums I could feel my interest rising once more. As I got into the swing of things converting my Highwaymen and 2 Fire Eater Units, I knew I was finally ready to revisit the toughalows! The PP insider discussing Longriders as being the most powerful cavalry unit in MK3 sealed the deal. Time to level up the Longriders!

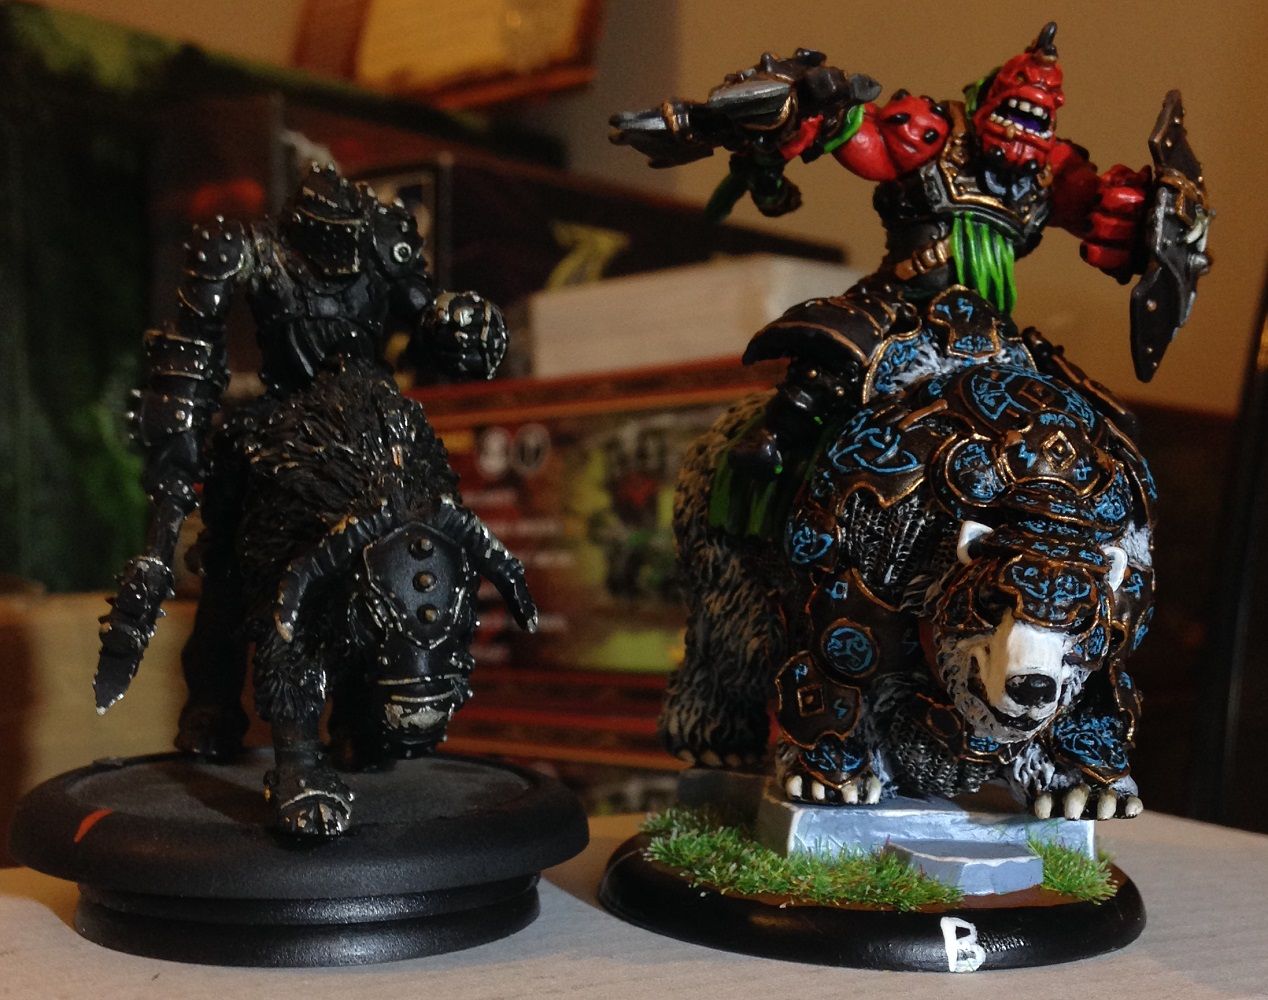
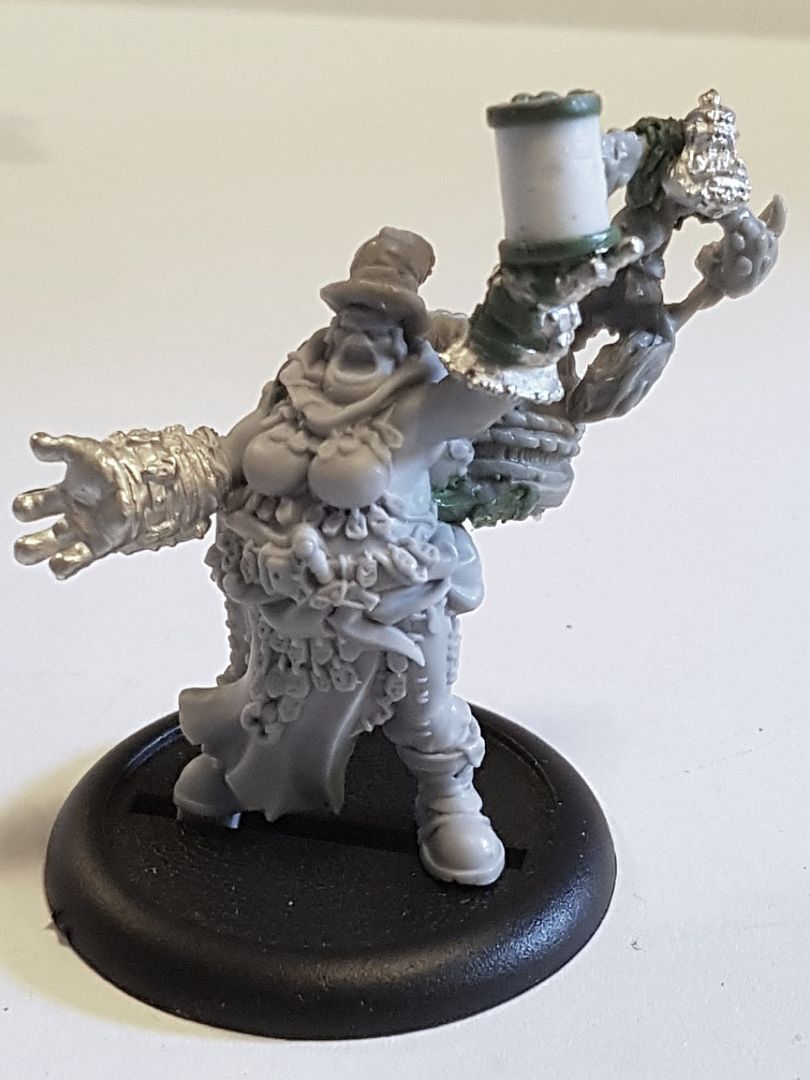
Much more impressive!
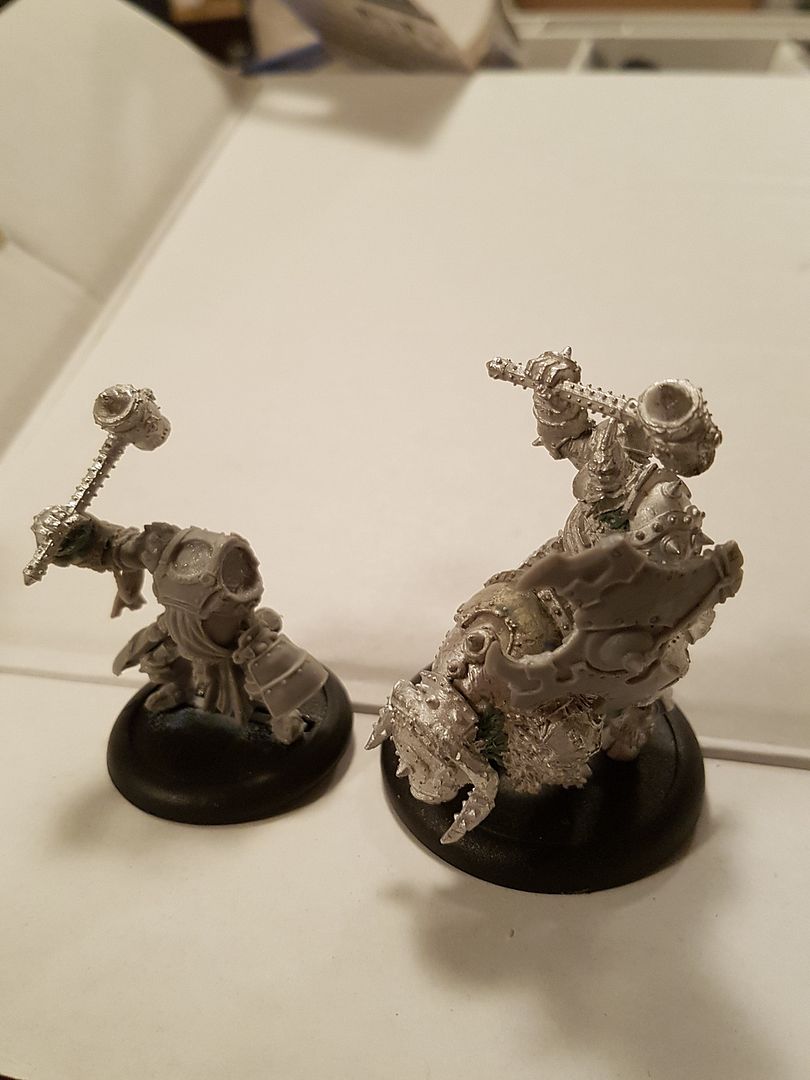
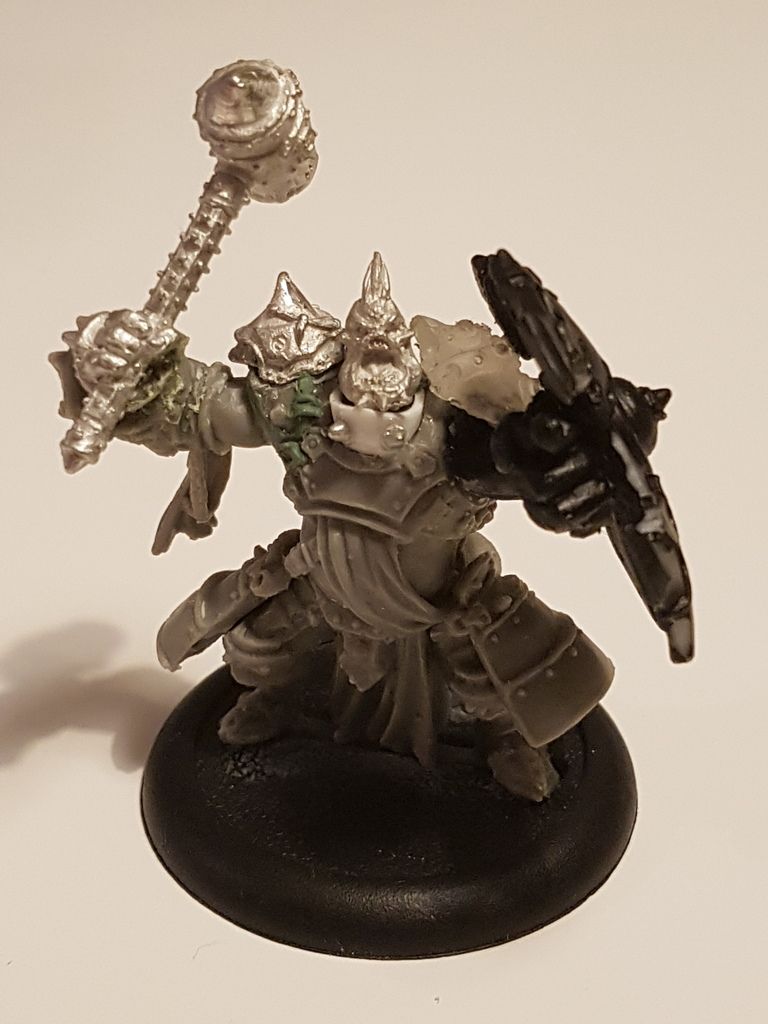
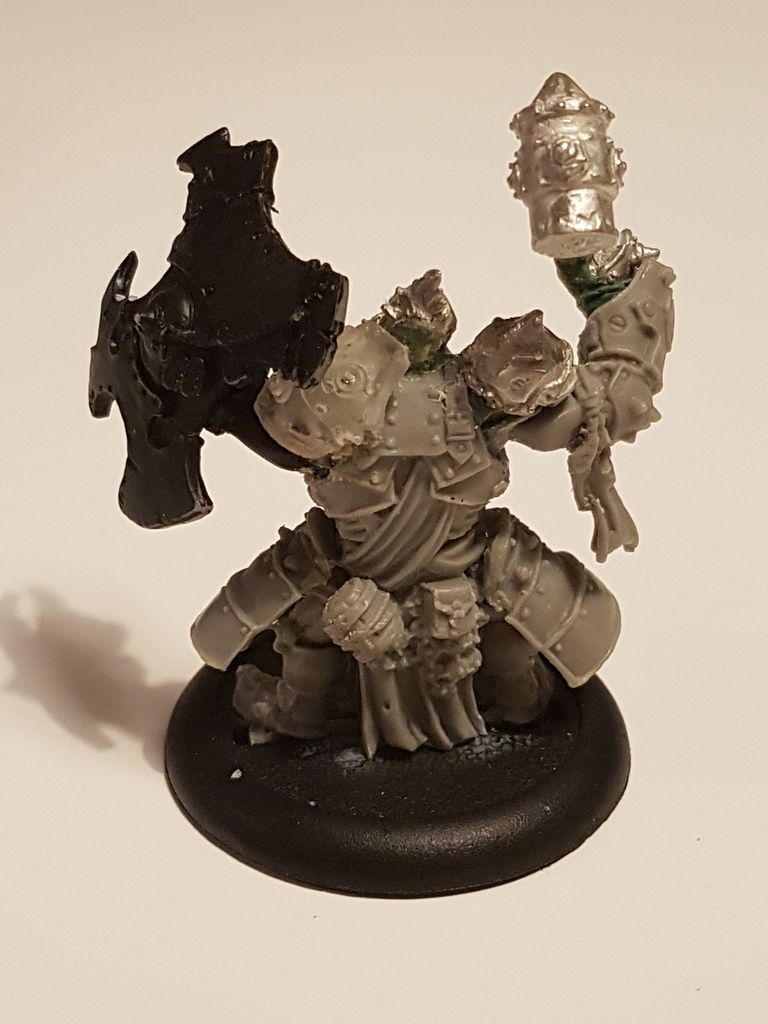
So what could I do to make these models better. I initially thought of swapping the upper body of some of the models but was unconvinced that the legs would look right under one of the plastic torsos - so instead I decided to find ways to add a bit of added bulk and some character to the existing riders. The first idea that stuck was to upgrade their shields. The ones that came with the Warders are super cool and much larger than the little target bucklers carried by the riders (and old kriel warriors) - they would certainly add some bulk to the profile! I had an unbuilt box of Warders (since the nerf I was in less of a rush to build another unit anyway!) but felt that I might want to use these awesome shields in multiple places and applications so I broke out my CMON Instant Mold and made a press mold of the shield I liked best. Soon enough I had a full set for the unit and with only a smidge more work added some unique battle damage and amulets/trophies to some of them to differentiate. I used the actual plastic one on the unit leader because you can clearly see the inside of the shield and my press molded shields are really best seen from the front. I also replaced the heads of a couple of the riders with armored helmets from my bits box (from Boomhowlers unit IIRC)

In breaking out my box of warders I was reminded of something else that I had squirreled away for a conversion! You see - my first warder unit had already been filled with characterful tweaks and weapon swaps, and when I had planned to run two - I had also planned a little something for the second group. Whereas the first unit had all gone for hammers and bludgeoning weapons, I had planned the second squad to have all axes....not just any style of axe though - ones that would command a little respect and attention. As such, I happened to have nearly a squads worth of "Lola"'s ready to use! The iconic axe of the Butcher in each of his incarnations is just such a cool and brutal design! It would have served the warders well - but I think it will be even better utilized to replace the small but ridiculously powerful "Cavalry Axe" carried by each long rider! Also with the Warders are some really cool armoured skirt/thigh pieces. Horthol the Longrider character also has these but the regular riders don't..... A couple more press molds and bingo I have matching leg armour to bulk up the riders that little bit more!


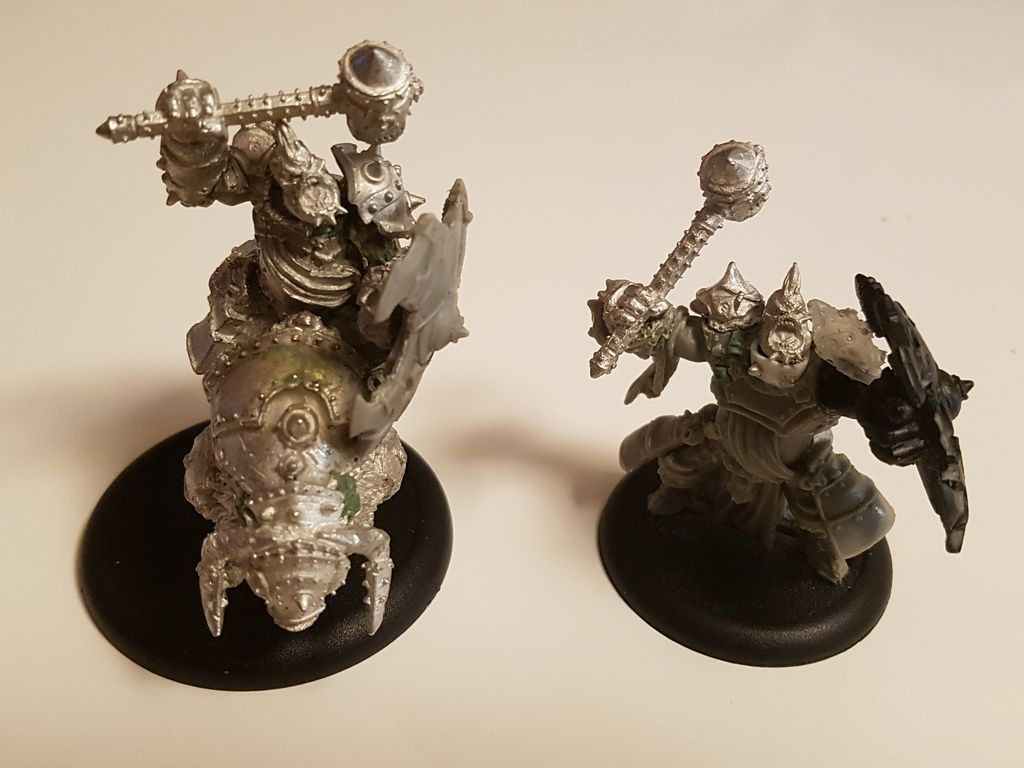
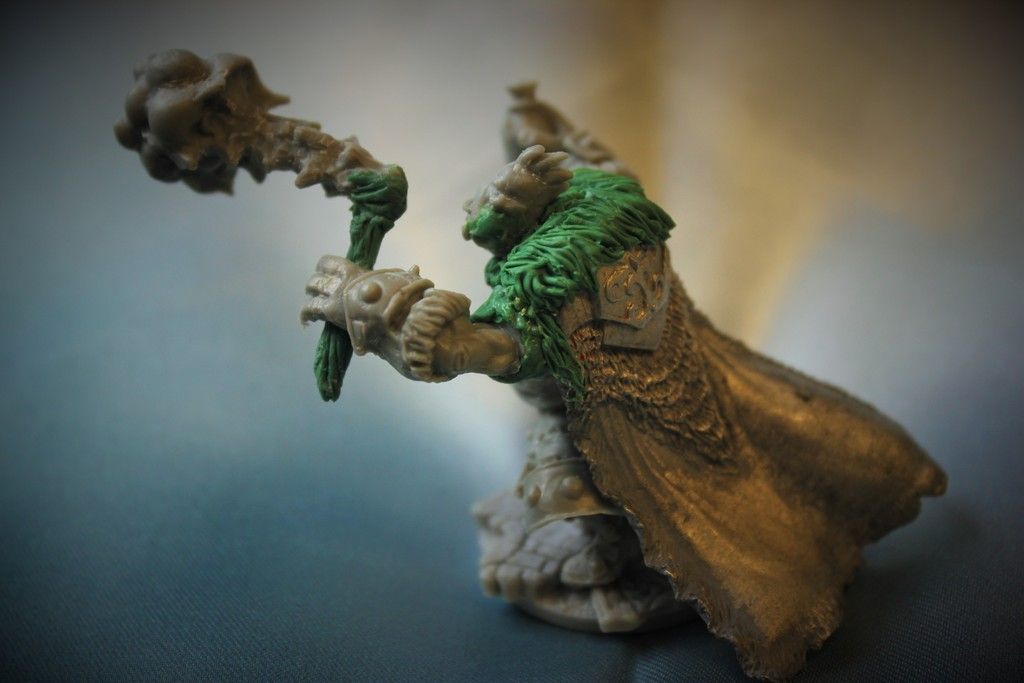
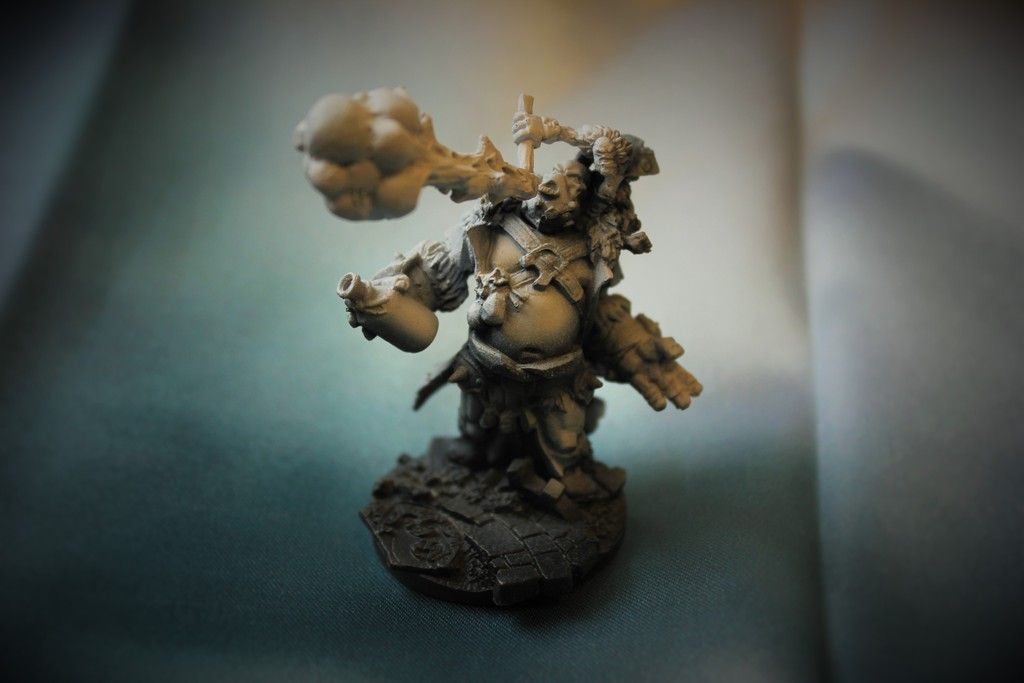
Oh yes this is getting much better! Now that the riders are looking a little bulkier, I decided to add a bit more armour and detail to the toughalows. Once again I grabbed my Instant Mold - this time one that I had previously pressed of the Bouncer's shield when I was making the shoulder pad for Frank (my Dire Troll Bomber). This time I only filled the center of the shield with putty to create a smaller but still really cool looking plate. I also grabbed some of the smaller shields I had and played around with fitting them as additional plating for the mounts. A few extra pieces of stowage/kit and they really started to look great!

So a year on, I finally found the inspiration and impetus to build my longriders... But what of their fearless leader Horthol?  To see what I have done with him, and the rest of the (now mostly finished) unit - I reserve the right to a couple more tweaks and surprises!- you will have to check back next week!

CYA Soon!
James K. Craig AKA TKKultist

Tuesday, April 05, 2016

{T}Rolling along - Runeshaper conversion #1

Hey folks - Back at the workbench again - Had an idea for a new rune shaper model!

Now I don't play Runes of War/Runeshaper Spam but I do have a couple lists I want to play that use one or two units of Runeshapers - my one Jarl list in particular looks to use them as support for the Dire Troll Bomber either throwing AOE hammers to clear out infantry or using themselves as living auto KD missiles to give the bomber targets made of even the highest Def models.....

I have one unit that I will build the models nearly stock, but I need three more to compliment them and make up the six bodies I need for 2 units.

As I'll probably mix the stock ones and the custom ones across the units (I think this may increase recognisability and reduce opponent confusion) I will also need to make sure the aesthetic is clearly connected as well.

So like last week I grabbed one of my extra Dhunian Knot models - the seated one - and made two very simple additions to emphasise the Runeshaper design elements - I first took a piece of the the magical rock formation effect from the runeshaper set and bent and reworked it so that with only a few extra greenstuff rocks it reached from her one hand to the other - nothing screams runeshaper like magical rock shennanigans!

Then I strapped a runeshaper hammer to her back (bits ordered from PP) - clearly arming her to match her peers. With just these two little tweaks and the fact that she is already covered in small rock medallions - she fits perfectly into the runeshaper unit look. All that was left was to choose a base from my CMON basing system and it appears from frontal views as though she is floating above the stone.

Cool stuff - easily done! She will be a treat to paint!

Friday, April 01, 2016

Thursday, March 31, 2016

{T}Rolling Along - Last of the Fire Eaters AND their new best friend!

So I have done two posts now showing my fire eater models - and I have saved the best for last... or at least the most extreme conversion!

This is one of those models where I will drop it on the table at a major event and have to hope for the best - I think it should be just fine BUT if someone wanted to be a tool they could most certainly call me out on it and I would have to accept that. Meh, I love it and wont lose sleep over such silliness.

So without further Ado, here she is!

 I know that I have done right by the concept of the fire eater and have included what I consider to be the most important thematic elements (fire/torch, flamboyant outfit/theatrical flare and booze) but in this case I only used two actual fire eater model components - the top hat from the fire eater pyg and the XL sized Keg backpack from one of the trollkin. I turned the hat around in the opposite direction of the pyg (which I built stock in my other fire eater unit) because it helped to further differentiate the two AND supported the overall compositional movement of the figure. Good stuff.


The body comes from one of the Dhunian Knot models (I picked up 2 blisters because I liked the sculpts so much! One to build stock standard and the other for conversions....the second of which I will show you very soon.... ;) )  I adjusted the arms and hands a bit so that it appears as though she is holding up the scratch built mug like a performer or magicians reveal (or perhaps as a holy object of veneration - either interpretation works for me!)

The mug itself is simply a piece of plastic tubing and some greenstuff rims and "froth". I also greenstuffed a few straps and minor detail edits on the model to complete the backpack and arm conversions.

The "piece de resistance" that really sells this as a fire eater is the torch bearing whelp. His body actually comes from the Dire Troll Bomber but I replaced the head. This figure is situated on the shoulder of the fire eater (much like the one from the actual FE unit leader) and the metal hand hold bracket sculpted to his hand has instead formed the handle to the mug/stein in the fire eaters hand! A little subtle bending/heating and reposing and it the whelp just looks so damn cool holding the mug/toes barely perched on the keg, flaming torch at the ready. I love the way this figure looks from multiple angles and it is going to be a real treat to paint.


And what is a unit of fire eaters without a Pyre troll? I'm afraid that I had some plans for his stock head (mwuhahahaha) and in my bits box I had this really awesome head from an IK troll model that I ordered on a whim once upon a time. I showed it to my son and as soon as he saw the combo with the new head he went wild - it just looks really cool. So expressive and SO MANY teeth!

RAWR So much more attitude now! Definitely ready to set his friends on fire :)

Cya soon!

Tuesday, March 22, 2016

{T}rolling Along Nicely 2..... MOAR Fire Eater conversions!

Man that is a pretty obnoxious title... sorry.


Anyhoo the task of converting and personalizing my Trollbloods continues! As mentioned last time I have 2 units of fire eaters and I dislike duplication in my models. My first unit were pretty standard - just a couple of tweaks in terms of magnetizing, a couple greenstuff details and a simple head swap.

This unit will be a little more..... creative?  I am still going to strive to make models that I can play with in most events. Stuff that is still easily identifiable because it contains the key design features of fire eaters, is built mostly of PP parts (rather than being largely sculpted) and which makes use of  iconic fire eater parts from the original kits.  Will they be allowed everywhere/all the time. There is a chance the answer is no - but I have been making models long enough that I feel I've got a solid handle on how far I can push the "rule of cool" envelope and still make something work.... gotta admit I'm gonna push the boundaries on this one more than a bit though ;P

Lets get to it then!


The first Fire Eater conversion uses several key iconic elements from the Fire eater kit - namely the billowing fire, arms and the head with the spitting/blowing face.
The fire eaters are a warrior unit second and trollblood entertainers first. I felt that these models could do with a little bit of extra flashiness and in that vein I used a warder body because I liked the little bit of extra "bling" in the armor details. If you look, the leg armor really echoes the Fire eater wrist bracers nicely.


I made the torch handle out of Greenstuff and a brass pin and just shaved out the insides of the fingers a bit so that I could bend them to appear as though they are actually holding the torch. I also added a big flashy cape - in fact I have to think this is the biggest and flashiest cape I the game (iron mother may disagree but meh) and this one was taken from the Khadorian Dark Prince himself - Vlad. I painted a vlad model for a friend some time ago and made a less giant and silly looking cape of greenstuff so I had this one in my bits box.   I think it suits this model in a lot of ways - style/flashiness, size (much better than on the puny prince) and it really enhances the visual movement -  helping to accentuate the pose and posture of this character. I recut the angles at which the shoulders met the body, filled the gaps with Greenstuff sleeves and created an ostentatious fur collar that both blends the cape into the figure and again echoes other models in the army, including Borka and the other Fire eaters. I even added a big gold (well green right now) chain to the front as a sign of wealth and showmanship.

The second model of the unit was something a little different - but one I am really pleased with!

For the Pyg in this unit I decided to raid my copy of Iron Kingdoms Unleashed. This bowler wearing pyg is the thing that sold me on ordering the box in the first place and while it is a great game, it is not one I get to play often. It seemed a shame that this cool character would just sit in a box waiting for someone to recue him. Clearly he should be marching along side his super cool Kin in my army!

So after I shocked the soft plastic to harden it somewhat, I cut off his hands and added actual fire eater hands in their place. This gave him the obligatory torch as well as a great big stein that echoes his little friend's drink nicely/ I also re-carved a few details - like the hatchet head at his waist - so that the 3d detail looked appropriate instead of merging into the sculpture. I also used greenstuff to remake the weedy little arm on one side of the whelp and to add rocky bumps on other areas. A new base and it is hard to believe that this model was ever armed any differently! With the torch, booze, fancy hat and a mini keg he makes a great Fire eater!

The last of my eaters still has some putty drying and a bit more work to resolve so Ill jump back on in a few days to update with her (Yup a female Fire Eater) and ill add a group shot when I do. Till then have fun and make cool stuff!

James AKA TKKultist

Tuesday, March 15, 2016

{T}rolling Along Nicely 1..... Feel the Burn! Converted Fire Eaters.

Following last weeks peek at a couple of my trollblood conversions, I gotta admit I was having a lot of fun so the conversion train just kept rolling along! Over the next while (as the Greenstuff and Glue dries & the pieces resolve) Ill post up pics a couple times a week. Stay tuned!

So I have picked up the (obligatory?) 2 units of Fire eaters for my army - three of the most beautiful models in the entire range - Brian Dugas just keep cranking out all sorts of incredible when it comes to Trollbloods. So if the models are SO GOOD - what could I feel the need to add....

Well, there are 6 total and only 3 poses so that was going to mean some significant changes for at least 3 models. ;)


The first one is pretty much stock standard except for two little things 1 the base - which is part of the CMON/Micro Art Studios Basing system - Totally love these and will be using them across my army. and 2 - a subtle addition in that the pyg with the torch is actually magnetized at the waist so that he can come apart for easier transportation.


The second model in the first unit is also close to stock but with a more notable personalizing detail - I did a simple head swap with an EGrim bit that I ordered from PP! I love the hat and the overall look of this bit and I think it really looks amazing on the fire eater. I also added a neckerchief/bandana/bandit mask made of Green stuff .

Here is a cell phone shot of the three models together - I assembled the amazing top hat wearing pyg as is - with only the CMON base as an added element.


The effect is simple, effective and still personal. The fur Collar connects well with Borka and the hat/head connects the unit visually to the highwaymen and Jarl and/or the Grims - and all bear the definitive hallmarks of fire eaters. I like that kind related visual design cue in an army!

More conversions More fire eaters More Booze More Torches More fun - Soon!

Tuesday, February 02, 2016

Boromir's Struggle - Part 4 - NEW Metallics, Shield, Hair & Leather

With the biggest scariest steps out of the way, my first bust (Knight Models Boromir) was really coming together - but there was still a great deal to do.
 I have long been an advocate for aiming to use different surface finishes and contrast of luster across a model (inspired by David Rodriquez and his slayer sword winning tyranids way back in 2007!) and while I was pleased with the effects and surfaces so far, I thought it was time to really push this with my metallic areas. I had actually acquired a new range of metallic paint for this project because I saw a sample of one golden tone that I felt filled a gap in the ones I already owned, and if you are going to order one paint, well it would be churlish not to try a couple more at the same time - helps make the shipping seem more reasonable right? ;P

Am I ever glad I did.

Dark Star Metals makes some of the most beautiful metallic paints I have ever worked with. They have exquisite colours - great coverage, superior lustre and they intermix like magic. When finished I gave them a quick polish with a soft cloth and wow do they shine like genuine metal. Just. So. Good. Find them on Facebook as Dark Star Miniatures or on their website.

 I used several of the paints and mixed them together in varying amounts. The results were these:


I also began to clean up the leather strap and painted it in a flat black (AMMO of Mig Jimenez   A.MIG-0033 Rubber and Tires) Mixed with a drop of P3 Coal Black. I then highlighted this in a textural way with additional coal black and some small amounts of ScaleColor Nacar (a warm grey/brown tone) working to make it look like a real worn/well used leather finish - again inspired by something that Fernando Ruiz of FER miniatures showed me last spring :) (Thanks Fernando!).

In between drying times I also started into the shield. I was inspired to try something though I'm not 100% sure why - perhaps I was just feeling brave seeing as how well everything else had gone and that it was just the shield - more easily stripped if it all went very poorly! I took three of my Scale 75 Scalecolour paints and began to layer them in random patterns with sponges and stippling with old brushes. The resulting pattern was an incredible texture and provided a beautiful warm base over which I glazed several filters of SC54 Navy Blue and a touch of P3 Coal Black. The result was very pleasing to me and I have received more compliments on how cool that part looks than maybe any other lol!


With the metal and leather taken care of and the shield in progress, I began to work in earnest on the hair and small details like the ropes - as well as fine tuning the colours in the face. On a sunny day I sat it on the rail of my deck and shot these pics.  


While it can be seen in the first one above, I think the one of the back does the best job of illustrating the break between the two sides of this bust and the transition of warm and cool tone.


I am really pleased that it is genuinely present in the figure - especially the face - without overwhelming the model and making it look like a strange OSL glow. I knew going into this piece that it could be a potentially confusing and polarizing choice for viewers, but I am still very pleased.

With a bit more cleanup and some painting of the fur trim around the bottom this paintjob could be called done...... But a great bust is not presented as paintjob alone. It requires something special to bring it head and shoulders above the competition (pun intended!). Boromir was going to require a great base - and I cant think of ANYONE who makes finer display bases than Wayne  Rogers of Waynes Bases.  In this case I had bought one from him several years ago not even sure as to what I would put on it - but it was so absolutely incredible I couldn't resist!


Ebony in the center with a laser engraved golden oak replica of the one ring surrounding it. This base was a work of art in and of itself. Here was a plinth that would add to the story element, the beauty and not just compliment but enhance the craftsmanship element of this presentation.

Thank you Wayne. You are the absolute pinnacle.

NEXT WEEK - The project completed with a GALLERY OF FINISHED PICTURES!!!!!

CYA

James K. Craig AKA TKKultist