Showing posts with label AKInteractive. Show all posts

Tuesday, February 16, 2016

REVIEW: FAQ2 - A brilliant resource for Modellers!

In honour of one of my favorite artists/modellers - Mig Jimenez - coming to Canada for HeritageCon
(March 20th 2016 in Hamilton Ontario - HERE is a link to their site) I have decided to post a review of one of his books - the really cool and incredibly useful FAQ2.

I love to read. I love books, magazines, websites -just about anything I can lay hands on - doubly so when the material is hobby related and can offer me real challenges and insight. First let me say, I would consider my self primarily a war-game miniature painter though I do and have really started to explore more historical subjects.


Having often looked at historical models on the internet or in magazines I was greatly inspired, particularly by the work of Mig Jimenez, Mike Rinaldi and a few others to try this and that out and look to combine the realistic effects I see on models with the creative freedom allowed by SF and Fantasy subjects. Amongst my "go to" resources for techniques and inspiration - Imperial Armour Model Masterclass Volume One by Phil Stutcinskas  and FAQ2 by Mig JimenezThe book (first released about 4 years ago now) has sold thousands of copies worldwide and even went to a revised second run where MIG had taken the advice and critique of modellers around the world and made some further improvements to the book (mostly size of pictures, flow and text tweaks) to ensure that this book is of the utmost quality. 

Just before Christmas 2015 AK Interactive put the English edition of this amazing book into a third printing!

From their site:

"The third edition of our best-seller, first published by AK four years ago, and available in a limited edition for this Christmas. Considered as the modelling bible for military vehicles, containing all the modern techniques that you need, to raise your modelling to the very highest level. This title is suited for beginners and the advanced modeller alike.
The book has 320 pages, more than 1500 colour photographs."


In the opening of F.A.Q.2, Mig does such a fantastic job of describing what exactly this book is, that I’ll just let him do it here:
“...this book is like a technical manual used by a car mechanic. You take for granted that the mechanic already has the skills to do the job, the manual only helps to solve more difficult technical problems. However, the manual on its own will not turn you into a mechanic. If on the other hand, you are an experienced modeler, with plenty of finished models under your belt or have even won some contests, then you have found the perfect book that will help you take the next step on your journey.

This is technically the sequel to his highly successful “FAQ: Frequently Asked Questions of the AFV Painting Techniques” (published in 2005 by Andrea Press, but now out of print for some time) but is very much a completely new book as well. It covers a large gamut of techniques not seen in the previous incarnation of F.A.Q.  such as modulation style, Streaking effects, Salt weathering and the "hairspray" technique pioneered by Phil Stutcinskas.  Each section is an involved step by step explaining the application of mud, rust, chipping, fuel stains etc.

On page 19 of the book Mig states,
"The present book is not exactly the second part of the book I published years ago,  as much as an update of that book. It is possible to say that FAQ1 is now obsolete, because things have changed so much."

Unlike the original FAQ, there is essentially nothing on construction at all. The large focus here is on finishes and weathering though it also features some REALLY COOL chapters on composition in dioramas and vignettes.  Also Featured are chapters on composition in dioramas, terrains, vignettes and much more.

Sections include:
  • Priming: a proper section with meaningful advice and discussion of various types of primer and application methods
  • Base Colour
  • Colour Modulation: OK, this is a big section (which makes sense considering that Mig and his former MIGProductions partner Adam Wilder are the two key figures in putting this technique in the spotlight to begin with!) This is an excellent guide, very comprehensive, offering several examples with differing degrees and purposes of modulation. Some very nice photos.
  • Panelling: briefly includes outlining techniques and also using masks and modulation type methods.
  • Washes and Filters: two sections, relatively brief
  • Streaking: covers in some depth both grime streaks as well as running rust streaks. Rain comes later.
  • Oil techniques: quite interesting that Mig sees oil paint as a medium that has gained increasing significance for AFV modelling; here he explores some techniques with AFVs that relate to those used with figures, such as shading and highlights.
  • Rain Marks: essentially more streaks but watery and subtle.
  • Hairspray and Chipping Fluid. One of the happening techniques of the moment, and it gets over twenty pages with detailed techniques and variations explained. No-one will be able to resist trying it out after reading this section.

  • Chipping: lots here too - principles; with a brush (8 pages on that!); sponge; more hairspray; salt.
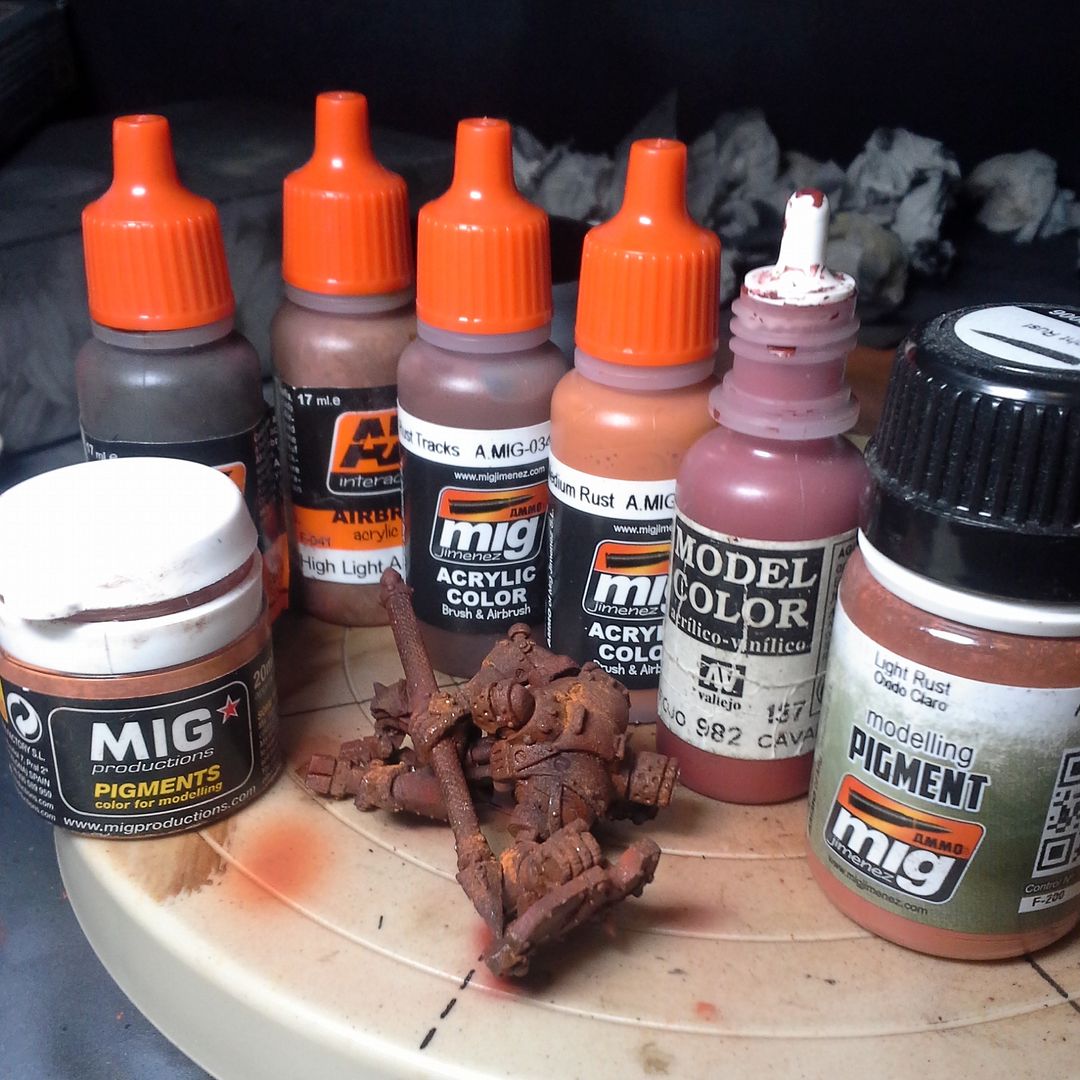
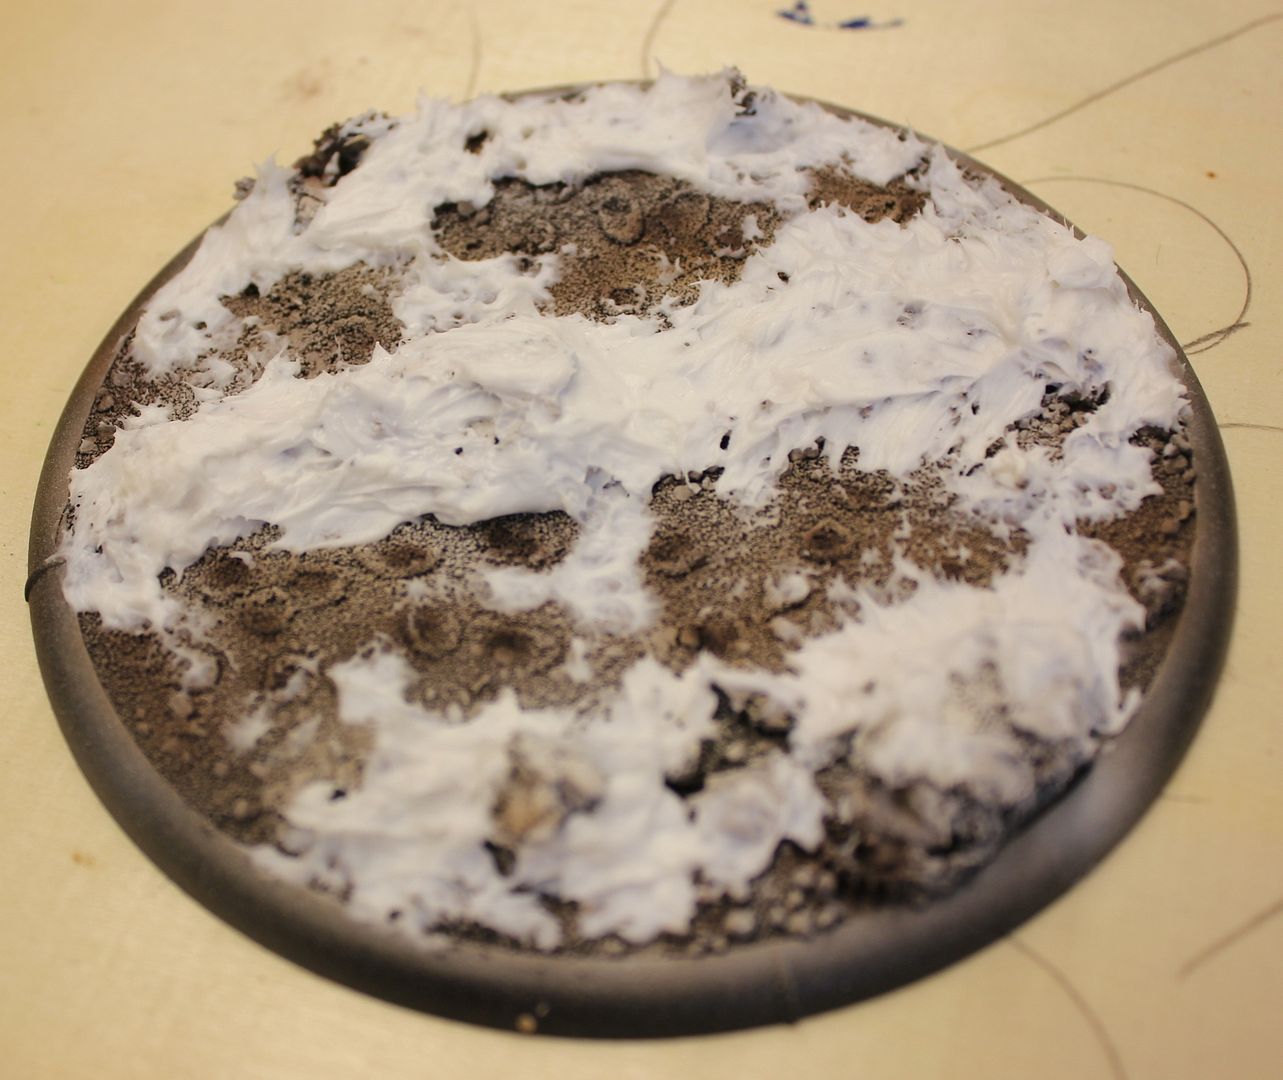
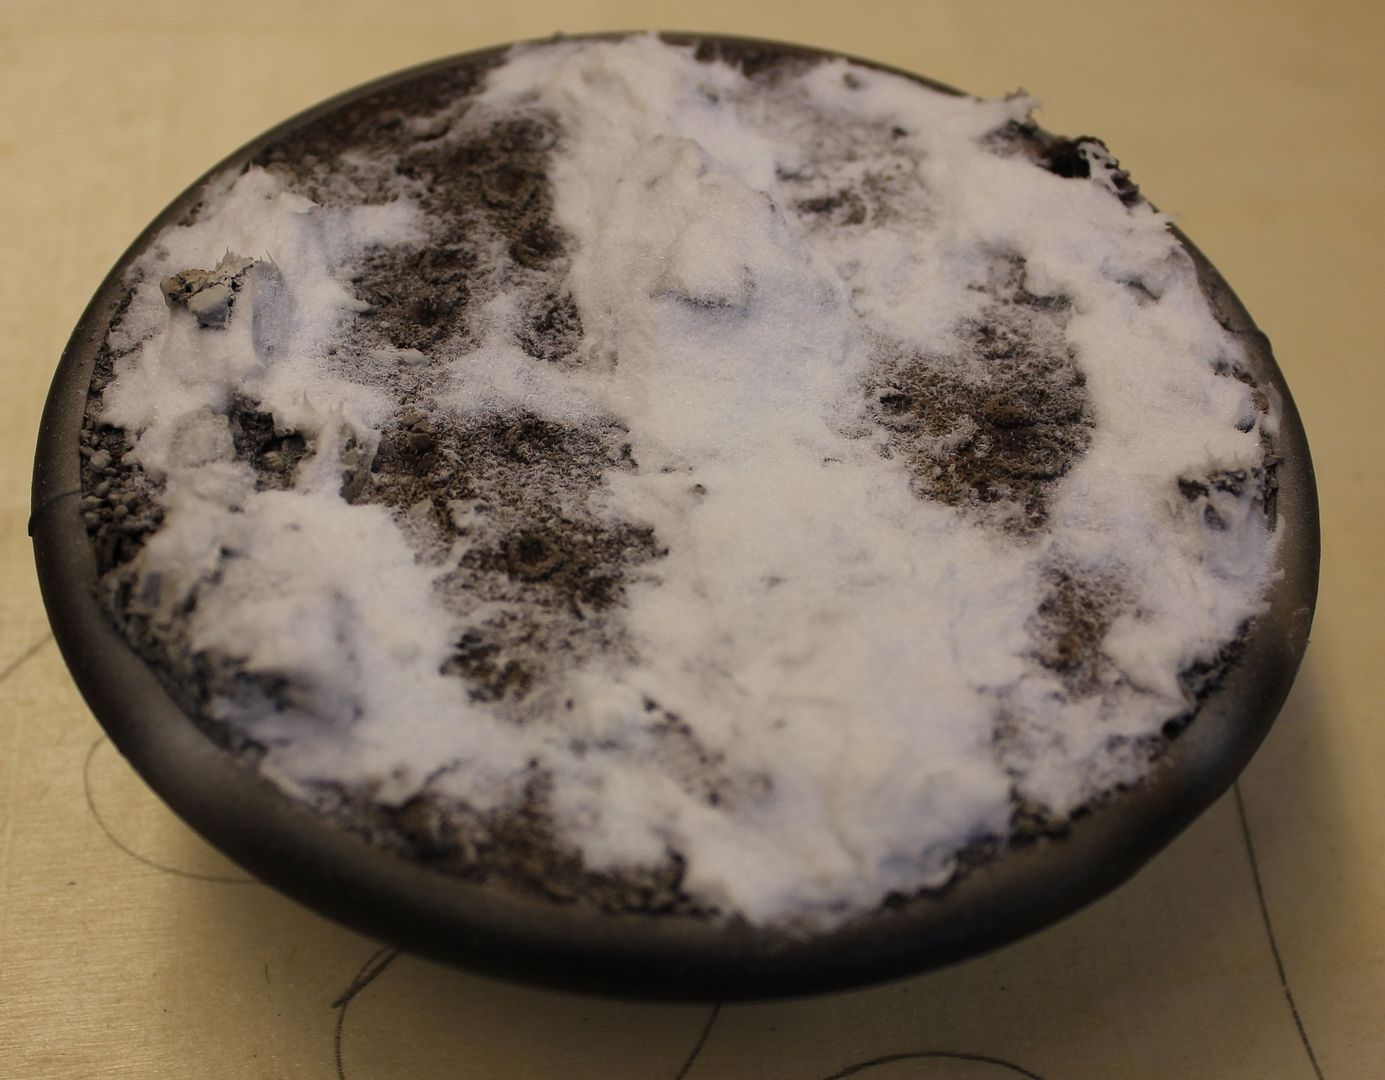
  • Rust/Dust/Mud: all cool stuff.
  • Oil and Fuel: “Theory of oil” – nice explanation and source photos, though mostly concerned with how to use AK Interactive products specific to this purpose, not more generic materials – more on that later.
  • Tracks: goes into painting finishes with acrylics, acrylics-enamel- pigments, Blacken-It, and painting spare links.
  • Special effects: a section mixing metal effects, leaves, transfers, headlamps, wheel masks
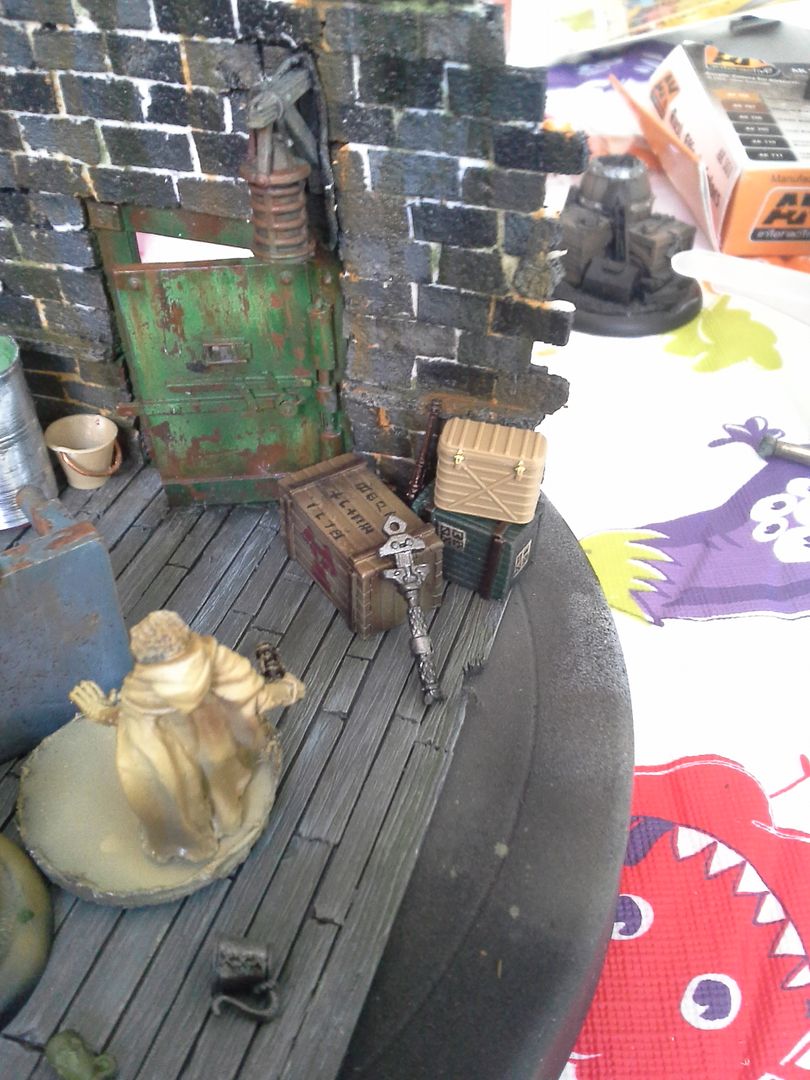
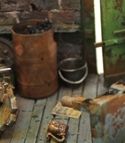
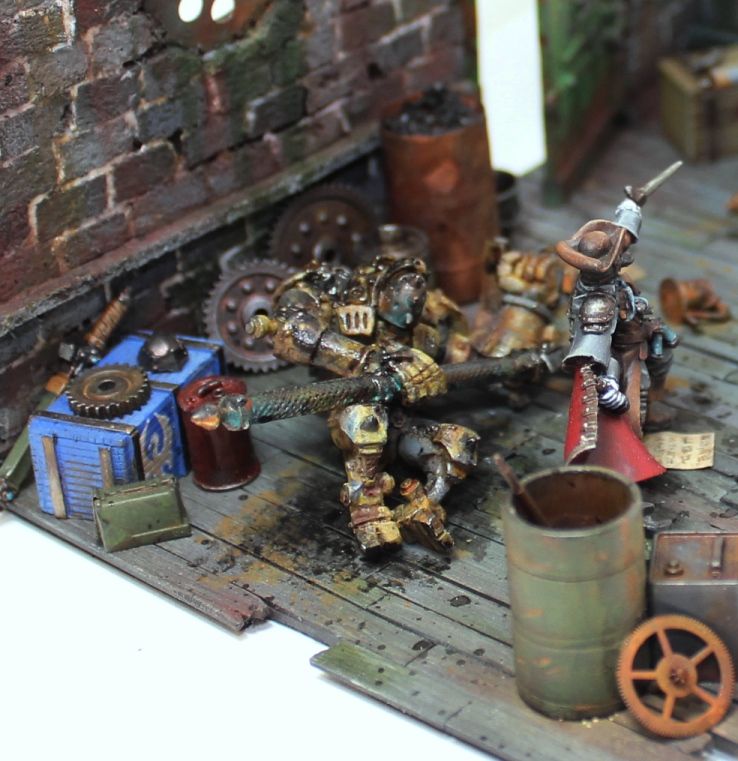
  • Painting Accessories:  big step by step photos with less text. Four pages on oil drums alone, three on jerry cans, then ammo boxes, helmets, buckets, guns, sacks etc…. awesome starting points for learning
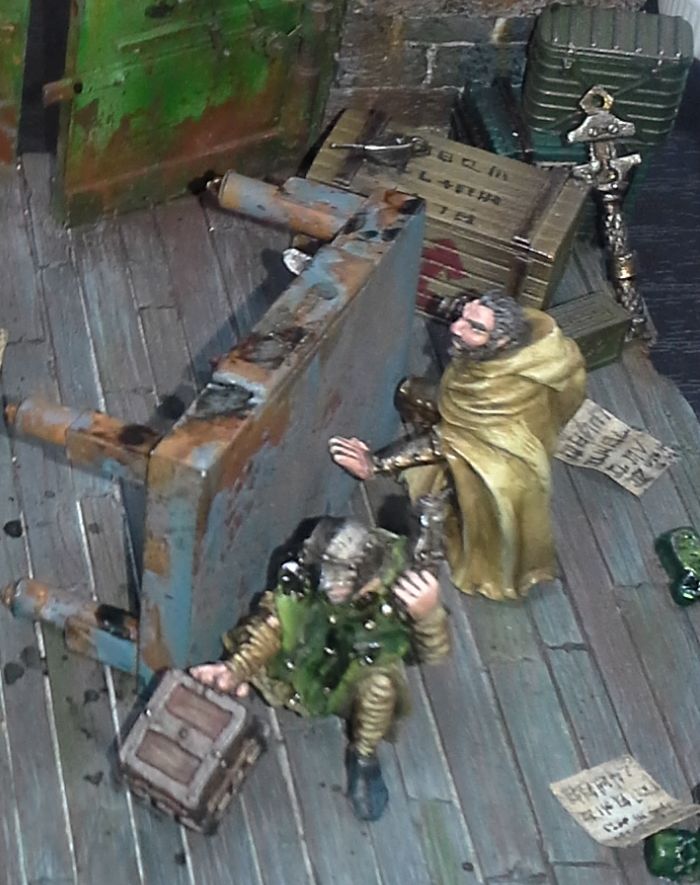
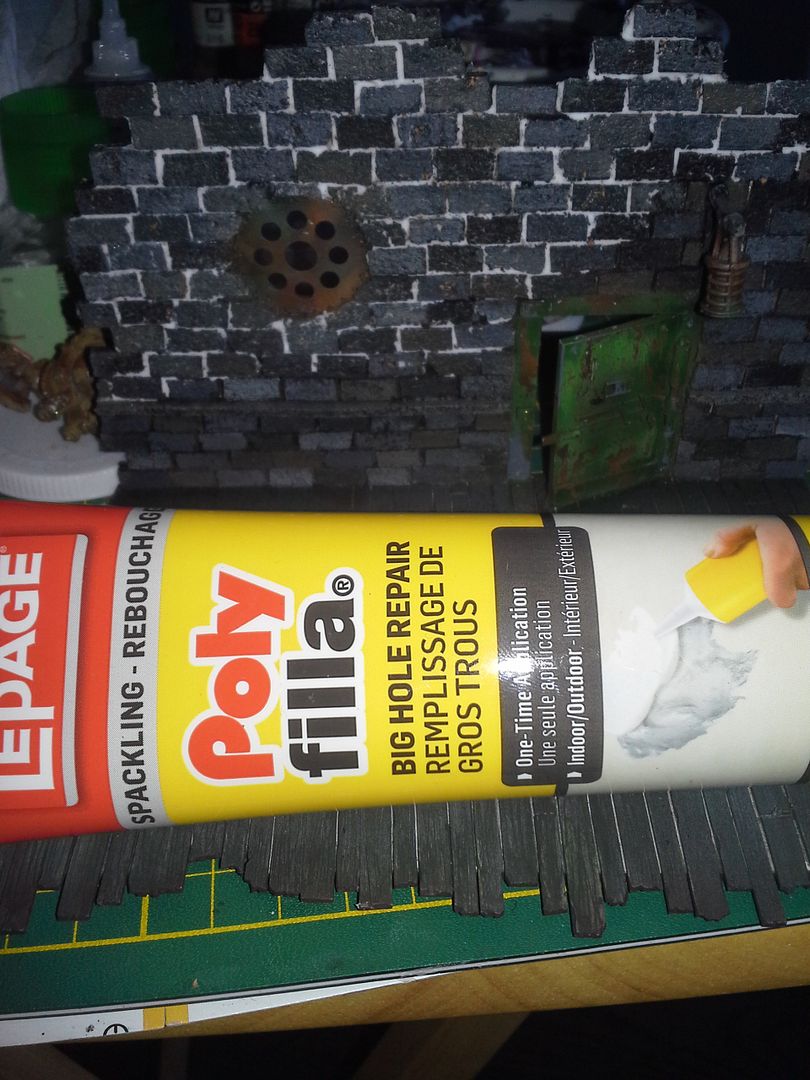
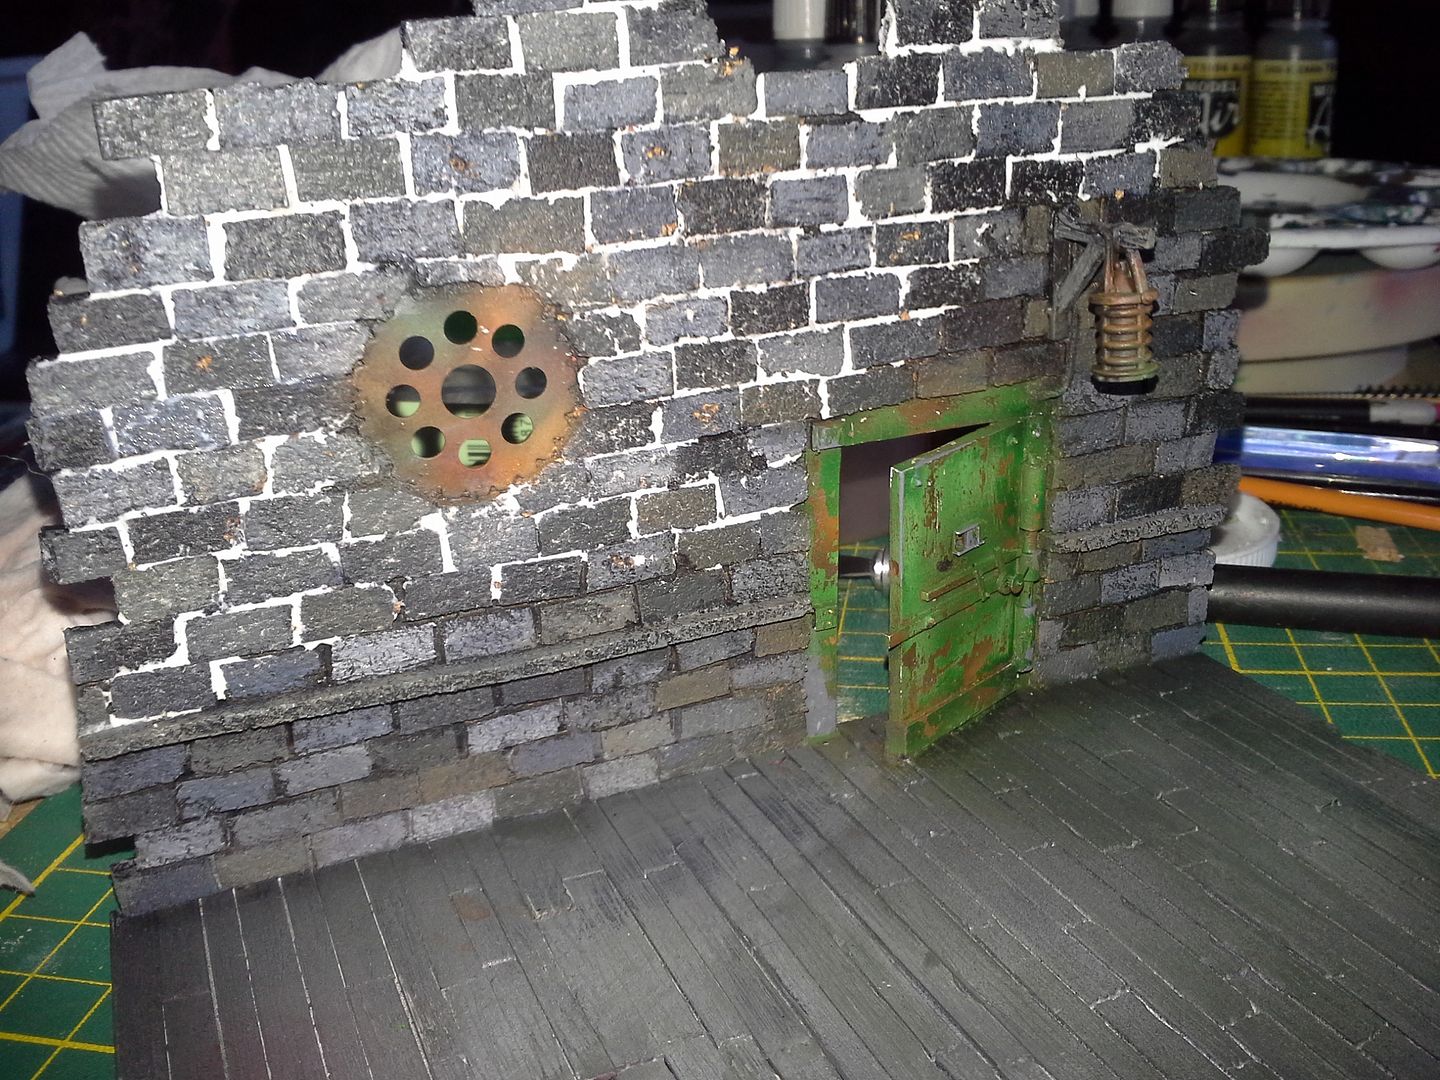
  • Simple dioramas: 45 pages starts off with some quick techniques using DAS clay and then goes into really quite a lot of theory about the composition of elements within a diorama, using lots of arrows and circles. This is something I have taught extensively on at conventions etc. and it will be a nice addendum to what I usually do.
  • Gallery: another 45 pages, and you know what to expect here; high quality models to admire and be inspired by, some of which I recognized as having seen before, while others were new to me.
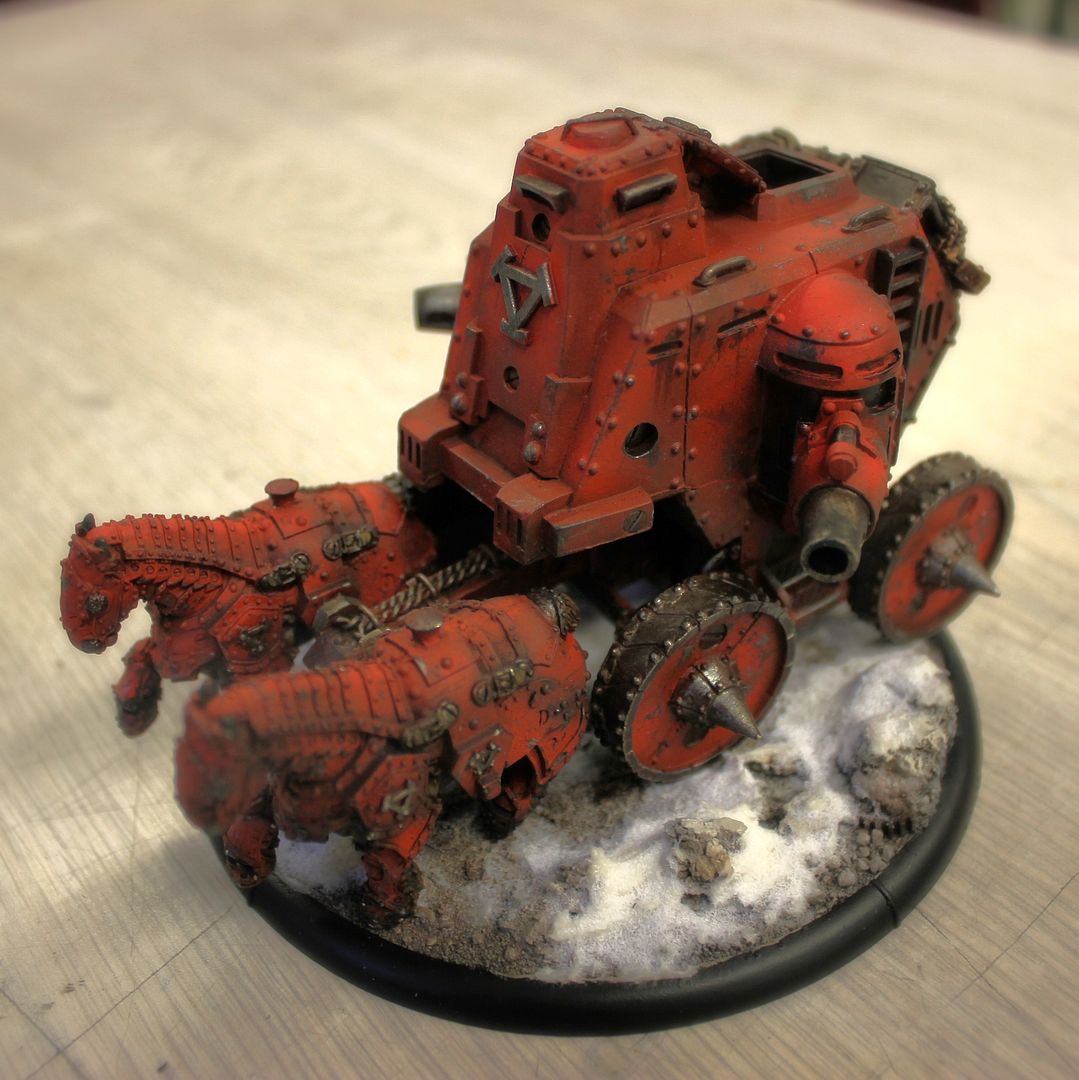
I still love this one....

This is an amazing book for any AFV Model Builder.  Although I consider my personal skill level to be a little better than average, I think this book has helped me to set my goals ever higher and has definitely helped me to achieve many - it inspires as well as teaches.

As to cost, this book at 57 Euro (approx. $63 USD/$87 CAD) isnt super cheap  BUT compared to what I have spent on magazines ($10-15 for 60 pages and half of it being ads) this is a DEAL - high quality paper/ beautiful colour, and sharp images! Whats more is that the second and third editions of this book have greatly edited text to make the translation and description much more clear than in the first edition. (my copy is a first edition sent to me by Mig that I treasure greatly but having flipped through the 2nd edition I had to admit the text was somewhat an upgrade!)

Do Yourself a favor, click on AKInteractive to check this out. Thank me later.

See ya soon!

James K. Craig AKA TKKultist


Monday, August 24, 2015

The Go-To list

Some people emailed after last weeks article reviewing the awesome IN COMBAT by Mig Jimenez asking what the rest of my Go-To list of highly recommended books/resources for painters are.

So since y'all asked here they are (in no particular Order):

IN COMBAT - by Mig Jimenez - published by Ammo of Mig Jimenez.

An amazing guide to chipping, weathering and enamel techniques. See my longer review HERE


FAQ2 - Also by Mig Jimenez - published by AK-Interactive.

This book is a bit pricey BUT is also quite long and covers a really wide range of finishes and techniques with detailed photo breakdowns. It covers Priming, Colour Modulation, Paneling, Washes, Filters, Streaking, Oil Techniques, Rain marks, Chipping, Rust, Dust, Mud, Oil and Fuel, Tracks, Mixed metallic effects,, Weathering powders, Transfers, Foliage, Accessories, Dioramas, Composition and more....

When I think of the money I have sunk into historical modelling magazines to get articles with a fraction of this info...ugh best not to think of that.


Some of the english translations in this book leave a little to be desired but it is clear enough. Several of the techniques shown are also demonstrating specific products that are unique to AK Interactive (and subsequent split in creating the mirrored initial releases for Ammo of Mig Jimenez) but the universality of the approach is still clear. An amazing book that has great breadth and MORE than enough content to warrant the investment.


NOTE: AVAILABLE AS A DIGITAL DOWNLOAD VERSION AS WELL AND I WILL POST A FULL REVIEW SOON!


Imperial Armour Model Masterclass Volume 1 - Mark Bedford and Phil Stutcinskas - published by Forgeworld

This has been my first stop for showing and explaining (and learning!) techniques for many years now. Master modelers Phil Stutcinskas and Mark Bedford take the reader through a variety of projects that show a lot of really cool techniques. Hard bound and beautifully laid out this clearly premium book is really clever in its approach. My only critique is that they discuss a lot of techniques in terms of colours and materials that are no longer produced. It isn't that these cant be extrapolated for other paint ranges but sometimes it feels as though it is very specific choices that aren't clearly explained (what quality is it that this particular colour adds to the effect - so that i could choose another hue of appropriate warmth or translucency etc..).

Volume 2 of this series was also good but not AS good or expository as this one in terms of bringing forward techniques and finishes for painters to explore and develop on.

That being said, I LOVE VOLUME 1! Such a great range of subjects, so many great techniques. I still refer back to this book often in my own work. Ironically enough, I could not have made my FW best of show winning trench diorama without it - see my gallery tab above for pics of this piece - one of my favorites that I have ever made!


Painting Buddha - If you are a miniature painter and aren't aware of these guys - then you probably aren't online....which means you aren't reading this blog either.... hmmm. It is hard to be a part of internet painter communities and completely miss the work that these guys are trying to do.

Check on their You Tube channel to see some of their free videos - what they call their "community college" and you will see nothing but the highest production values showing solid techniques from some of the best painters (Ben Komets never ceases to amaze me - I seriously hope he puts out a book on painting skin tones some day....).

With your help, Painting Buddha has become one of the fastest growing miniature painting communities out there. Our mission is simple: Grow our community of extraordinary miniature painters and gamers, help others, help you to 'BE a better painter' and have a lot of fun in the process. 


They work hard to try and create a community of painters learning together. There are several ways to become a part of this - one is to become a patreon member supporting their videos.

This way you get access to all the videos they make as well as the ability to interact with the artists themselves.


Another is to buy one of their model/tutorial video combo packs. I am looking forward to one announced in conjunction with the amazing guys over at NutsPlanet to do a combo of a dvd and the Viking Maiden Bust - which looks strikingly like Ragnar's wife from the show Vikings! Too cool. I really hope to get that one for myself - and will review it for y'all when I do!

In the meantime, Here is one of their free videos. Please give these guys some serious consideration if you are looking to improve your painting. It will be well worth the investment!

Until Next Time - Enjoy!

PS - IF ANY OF YOU HAVE AN ABSOLUTE "GO TO" RESOURCE YOU WANT TO SHARE JUST HIT THAT COMMENT BUTTON AND LETS SEE WHAT WE CAN DO :)

Tuesday, May 19, 2015

M4A3 Sherman in 1/35 by John Bunton


This model belongs to my good friend John Bunton.  John is an exceptionally knowledgeable history teacher  who has been working on historical models for over 30 years. He has, however, really been focused on improving his quality and technique by working with me for a little over 2 years now. This particular project is a very exciting one for him as it was a chance to really put together some of the lessons I have been working on him with and to try several new techniques.

He says of the build:
So many times I have looked in the magazines and balked at the skill and techniques used to create such wonderful models....Yet here I am doing the same thing. I can look and say "I've done that, and that and that." I can hardly believe it and am very excited for what is next. 


I am also excited to see what is next for John. His skills and confidence are growing by leaps and bounds and his work is becoming really impressive.

He used Citadel Black Primer, Vallejo Air paints, AK Interactive washes and streaks, Tamiya Nato black sponged on for chipping, AK Interactive track wash and a combination of AK Interactive and Forgeworld pigments with MIG Acrylic resin for pigments and AK Interactive pigment fixers in the mud.

Overall I think the effect is fantastic and the model looks wonderful. Congrats John.

Monday, February 23, 2015

P3 Grandmaster Diorama - "Contract Renegotiation" Part 5 Paint trickery!


Edit - sorry for missing last week - I had this all cued to go and somehow screwed it up and forgot to hit the publish button... oh well back again!

So when last we left off - I had painted and mortared the back wall, base coated the floor, rust coated the door, table, warjack etc., added a chipping fluid layer and done my layer chipping on all of those, Made some barrels from sheet metal and markers and did the bulk of the painting of Gorman himself. Not a bad start!

From here I started to work on the accessories in earnest. I had a box from Herne and Jonne, a box and barrel from the Mule kit, some swords, troll mugs, flasks, a Menite Wrench, Trencher Helmet, and assorted odds and sods from the Privateer range to add some detail to the scene that would be recognizable as being from their model collection/universe. I used some great metal gears from Jeff Wilhelm at  DRAGONFORGE DESIGN (check out his stuff/support his work as he is a great guy who makes amazing quality products and has sculpted several pieces for PP to boot! The Gears are in the "Conversion Parts' Section) along with many Tamiya 1/35 scale historical model parts as well - gas cans, a really great oil can, a bucket etc.  If I had used just those historical parts (there are plenty available) they would have lacked consistency in the sculpting style, and quite frankly visual consistency with the established world/story on their own. In my mind it was REALLY important to have some very specifically Warmahordes parts in the set dressing.

What I usually do when I have a bunch of pieces like this to do is batch paint sections of them by taping them down to a plate or plastic sheet so that I can do a lot of the bulk work quickly and spray or brush whole sets of pieces rather than one at a time (though I do finish and detail individually!).  In the pic you can see them in the pre rusting stage same as the pieces you saw in the last post :)

Something else you might notice are the resin crates that I painted up - if you look closely you will see that each is painted with a different Nation's iconography - visually supporting the idea of these guys being Mercenaries or criminals in five fingers and dealing in stolen goods/weapons etc. from many ports. If you can read the runic scripts of Immoren you will discover messages thanking my wife for her support and listing the names of her and my children  (Daddy loves you guys!)  ;)

I also started to paint the crooks themselves - I stuck them to bases/pieces of plastic to hold them and decided to use Green (a colour often associated with the Merc faction and which helps to connect the visual of the studded cloak to the studio Croes Cutthroat models that inspired it) and ochre tones (as that is the basic colour I used for the Magnus pieces I have worked on for the kids to play with in my local club!)

Also I felt the warmer tones would separate them well from the greys and help to firmly establish them as a
focal point in the diorama. I purposely skewed more towards the ochre for this reason - plus it is fun to paint! I used the AK Interactive Dunklegelb paint set along with some P3  colours to establish my lights and shadows and then used AMMO of Mig Jimenez Enamel filters to tie it all together and dirty up the appearance slightly. Reaper skintones (check back in my tutorials section - Chris Borer did a great article for this blog once about these! ) made the faces a piece of cake (as did the sculpt on the face of the bearded figure - it was a real joy to paint!).

Now for the tricks:
These are actually quite simple things that lent a great deal of interest to this and several other paint jobs I have done! I hope you find some of these useful.

I started to paint the bulk of the metal items in the usual manner starting with warplock bronze by GW - I really like the warm tone this lends to all my metals (trust me on this one folks - it is worth it) and then worked over it in a variety of metallic tones. For many of the pieces (like the bucket by the door) I went to powdered graphite and Ammo of Mig Gun metal pigment and Forgeworld Dark Iron pigment along with pigment fixer instead of (or in addition to) other metallic acrylics. These give such a beautifully smooth true metallic finish - really awesome (way better than the pictures show in most cases). I added this to the helmets, cogs, handles, boxes, the oil can - lots of places. Looks great!

I also needed to represent both the rust effects and black oil effects of Gorman's arsenal. Aside from the rusting I had already done using the chipping fluid - I generally find it is best to layer effects to create a really natural appearance with great variation. So to create the splash effects of the grenade and to create streaks in other areas I reached for my trusty AMMO of Mig rust streaks, track wash and rust effect enamel fluids. These create such amazing looking rust with genuinely minimal effort. I spattered this around the floor making small puddles and spattered and streaked it across all other surfaces that made sense. This brought areas of the floor into the same warm palette seen in the rest of the diorama. Once dry I worked several AMMO of Mig, Mig productions, Forgeworld and Stardust pigments throughout the scene (really evident in the floorboards in the pic to the right). The only place I left fully clean was Gorman himself - again helping to keep him the contrasting focal point of the scene.

In much the same vein I grabbed Tamiya Smoke. This is a translucent sticky black paint that I often use for oil effects. It stays highly gloss and as such creates yet one more contrast in the scene.

This kind of contrast of shine/lustre is something I have really tried to incorporate in several of my pieces ever since seeing the amazing tyranid pieces of Slayer sword winner David Rodriguez. I like to work with it in a highly diluted form first and then work my way up to using it straight from the pot for maximum shine. Overall this makes a variety of marks and really helps to sell this particular story concept.

I really enjoyed soaking the warjack with this and splatting it right across the face of the thug pushing out the money box in acquiescence (though I must admit this was a little scary to do to a full painted and otherwise finished figure - but it was totally worth it in the end. In pursuit of similar contrasts I also used gloss varnish on Gorman's vials and lenses to make them pop.

Final tip/detail trick - I scattered contract papers all around the floor - it can be hard to make papers look natural, hold paint well and bend in pleasing ways - the answer to this all is to use 1000-2000 grit sandpaper! The material is meant to be used wet, so thin washes and coats of acrylic have no detrimental effects whatsoever.  The grit is so fine that the surface looks smooth - and you can use the back which is generally smoother, but often contains printed text which means more paint to cover - so I prefer the grit side. I used both a brush and a sharpie pen (finer than most of their fine point markers but every bit as stable ink-wise) to write text on the sheets that I had cut (in properly translated IK runic text of course - gotta stay in character/world!). Small details like this really help to finish the story in the scene AND add yet one more contrasting surface/material to the scene, giving it life and believability.


That was pretty much it - if there is anything that doesn't make sense or that you feel I have missed - just ask! Next Monday - the final pics :)

Monday, February 09, 2015

P3 Grandmaster Diorama - "Contract Renegotiation" Part 4 Underpainting & how to make barrels etc

So now that I had established general placement form and lighting it was time to paint in earnest and to finish constructing the set pieces that were needed to fill out the diorama.
 

I started with the Rust effect layer for some of my main metal objects. This involves spraying and brushing on a variety of rust tones and pigments which are sealed/fixed to the surface. 


Here is the fully rusted Warjack - almost a full paintjob beneath the paintjob
Once this is dry a coat of AMMO of Mig Jimenez Chipping fluid was sprayed on (Way more consistent results than using hairspray etc.) and then base colours were airbrushed on top of that.
 
Dry painted surfaces were then rehydrated with simple tap water which dissolved and destabilized the chipping fluid - I then used some wet brushes and small tools to scratch and chip away the upper coat of paint :) Looks so good. I love this technique!
 
In the picture here you can see the results on the table and also that I also used this on the door which I think turned out spectacular.
It is really important to create a variety of rust tones underneath to make it look real and natural. Gormans's rust bombs did some serious work this day...
 
You can also see the can that I made out of thin sheet metal from the scrap booking isle. I simply used a ballpoint pen and a ruler to impress lines in the metal and then wrapped it around a form (marker in this case) super glued the edge and then, once dry, filed away the overlapping edge. Gave it a couple of dents and it looked super real. I filled it with some leftover greenstuff and them once painted added small black gravel that looks like coal! You can also see where I added a piece of wire as a handle on the small bucket made by Tamiya models.
Here is a pic of one of my other containers - this one was made from the lid of a Crayola marker. I used my mini pipe cutting tool to shorten it and then to score in some grooves to give it a bit of interest and then just sanded the gloss surface down to give the paints something better to adhere to. Gas can and big wrench from Tamiya historical kits, the box is from Herne and Jonne (Rhulic Mercenary team) You can also see that I have started to work in some glazes of  green+reddish browns tones into the woodwork here.
Still a ways to go.....

 I then began to rough in the other colours. On the back wall I began to paint all the bricks in a variety of grey tones that I carried into the floor as well. I used mixtures of Nato Black, German Grey, Basalt Grey, Barley Grey and a bit of Hemp, Buff and Beige Brown - all Vallejo Model Colour (VMC) or Vallejo Air Colour (VAC). The goal was to keep them related but not uniform. I looked at reference (see part 1 of this series of articles to see what I am talking about) to give me some ideas for variation and colouration.

The came the scary part - having just built and painted all of this now I had to grout/mortar it - which meant smearing plaster filler right across all the work I just did!

 I used Lepage Poly Filla Big Hole Repair formula - it is thick and I figured it would better hold up to weathering than a lighter version. Using the damp J cloth to remove the excess worked wonders and my mortar filled in nicely!


Got going on Gorman himself, started out using a deep red on the cape (p3 Sanguine base IIRC)  and worked it up through VAC Scarlet and the VGC Fiery Orange colour.

This is a pretty extreme look but my goal was then to use VMC Transparent red to blend it all together.

 
I love the cherry red tonality this gives the piece. I've used this several times in my display pieces/golden demon winners and the colour is one that I get asked about often. Not hard to accomplish but rich and impactful

I then began to rough in the other colours. On Gorman for the grey tones I used the same Nato Black, German Grey, Basalt Grey, Barley Grey al VMC/VAC that I used in the wooden floor.
 
The Browns were AK Interactive Dunkelgelb Shadow and P3 Bootstrap Leather + Menoth White and VGC Beastie Brown. The vials/lenses were painted with P3 Coal Black and trollblood base with VMC Luftwaffe Blue Grey and then highlighted with P3 Morrow white.

Not really a lot of tricks in painting Gorman, He was the one thing that needed to stay clean and smooth in the whole paint job. I can say that I did tone donwn the redness of his cape a bit and ages his leathers by adding some oil paint filtering that really softened up the look a bit. I was very pleased with the overall effect..

Next installment - paint tricks, streaking, black oil and liquid rust......


Monday, December 29, 2014

SNOW BASE TUTORIAL - Little Red Wagon of DOOOOM! Part 2

You asked for it so I'm Bringin' the snow!
In honor of the holiday - whether your Christmas was white and snowy or not! How to make Really nice snow bases, quick, easy and inexpensive (to be followed by another post on ways that are more technical and/or expensive) 

For my small Khador force I built for the kids in my club and for the display and army pieces I have built for my friend Erik (see here, here and last weeks build here for a couple more examples...) I have used a really effective looking, simple and cost effective snow terrain basing method that a lot of people have asked me about. So here it is!


Step 1. Cork
Yep plain old cork - basing material extraordinaire, loved by millions. I get my thick pieces from IKEA where you can get a pack of round trivets for just a few bucks. Break it up into natural rough chunky "rocks". Arrange and glue on base giving consideration to model positioning and composition. If you need to pin a model into the base cork is really weak and unsuitable. Try carving/drilling (proper drill not a pin vice) out a small space where the pin is to go and fill this with apoxie sculpt - you can either pre set your pin in this or drill it and glue the pin in later - either way you know have a hidden strong point for pinning! (for many this tutorial has just proven worth it already....)

Step 2. Landscaping


This is where you add gravel, sand, rocks or what have you - basically all the ground textures. I mostly use a mixture of Gale Force 9 basing stuff. While most people put down a layer of PVA glue - I thought I'd show you something a little different here that can be used on its own or in concert with PVA when building in layers. Gravel and sand fixer  is a super cool product offered by both AMMO of Mig Jimenez USA and AK Interactive. To use it, instead of layering glue, arrange your surface textures first. Once everything is in place then you can use an eye dropper, pipette or brush to transfer the water like glue fluid to the basing media. it will flow around and through the area and really seal the materials together. It dries very quickly though I reccommend letting it have enough time to fully cure before stressing it too far. Additional applications of the fixer can also be added later if yo are building up multiple layers of media or is you just want to further secure the basing materials.


An additional detail trick used for fun in this particular base was to simulate the horses tracks. To do this I raised the pipette up off the surface to drip it down onto the already wetted area. These drips pushed the sand around and left small impressions that would dry solid within a few minutes. I also added some laser cut gears made by Impudent Mortal - (hi Walt!) - definitely check out his terrain, gaming aids etc if you haven't already - he made some AWESOME Warmachine army trays for me that Ill show sometime soon on here.....
Step 3. Paint

Time to break out your airbrush/paintbrush/fingerpaints/what have ya.

I used my usual combo of Vallejo Model Air Camo Black Brown and Vallejo Game Color Beasty Brown with some intermediate tone. In this case I chose a soft earth colour to make it more sympathetic to the snow.

I then used white to frost across the whole thing and to plan my snow applications.

 
Step 4. Goo

No more Nails has been my goo of choice for a while now. It is a construction adhesive that dries solid and is white (note they also do a clear version which can also be great for snow/slush etc). It is cuttable, paintable and sandable when dry, bonds foam like a dream, washes up easily (this is a big one for adhesives), has no fumes, is repositionable for about 20 minutes, grabs instantly and sets up fully in a couple hours.

So for snow I like to use it to build the forms of snowbanks, drifts and bulkier areas where snow flocking etc just wont cut it.

So what I have done below is to take some and simply smear it in place with a small piece of cardboard. I sometimes use a palette knife or old brushes to retexture it along with my wet finger. You can see here that this is my initial application and that I have focused on creating deeper snow in the track area between the Gun carriages wheels and where the horses will walk and again to the outside of those areas. This, along with those earlier hoof impressions, helps to tell the story of a Khadorian road that is used for moving large amounts of wagons, gun carriages, troops etc. in supporting the war efforts. As discussed in previous posts I always try to give some sense of place and time to my bases so that they genuinely add to the presentation of the piece in a meaningful way. Here it is all gooed up!


Since this is an adhesive (and a fairly strong one at that - it will hold siding onto your house....)
I sprinkle my snow flock of choice (in this case GW because he had already used it on other models in his army but I will list a few others at the end of this article!) and gently press it into the surface with my fingers as well. This is what I get!

I now walk away and let this dry overnight to harden up. When I return I add yet another layer of snow flock using a couple of methods - first I use a little more of the sand and gravel fixer to patch onto any parts that the initial layer didn't adhere to as well as I might have liked.

Given 20 minutes or so to set up I ten break out my rattle can of Gloss Varnish and give the whole thing a spray. This helps the snow flock that is already there to adhere even better (as this is a functional gaming base and will be thoroughly handled) and it gives additional sparkle and shine to the snow while giving a bit of an impression of wet slushiness to the well travelled trail areas. I then carefully sprinkle and pat additional snow flock directly on/into the gloss coated area to moderate the effect - allowing for some slush and sparkle but also maintaining the cold dry snow zones.

It is Friday as I write this and I am totally wiped out from a tough week so I'm not entirely sure I made sense in explaining this section but I like the end result and hopefully with trying it out you will find that I speak the truth  here! Anyhoo here is the result!

Note to self - grab this model back from Erik and get out the lightbox and real camera to take proper pics and replace this one when I return from Christmas vacation! Note to viewers - check back in a week or two to this post to see a better shot of the finished product ;P