Showing posts with label Sculpting. Show all posts

Tuesday, May 16, 2017

ScratchBuild Log Part 3: Basing for the 1915 Curiasse "Fortin" Aubriot-Gabet

So now that I had the proto-tank built and riveted, it was time to start working on the presentation base. I started by laying out some rough ideas with scrap pieces of balsa foam and once I had a clear idea in my head I started piecing together the pieces I would actually use.

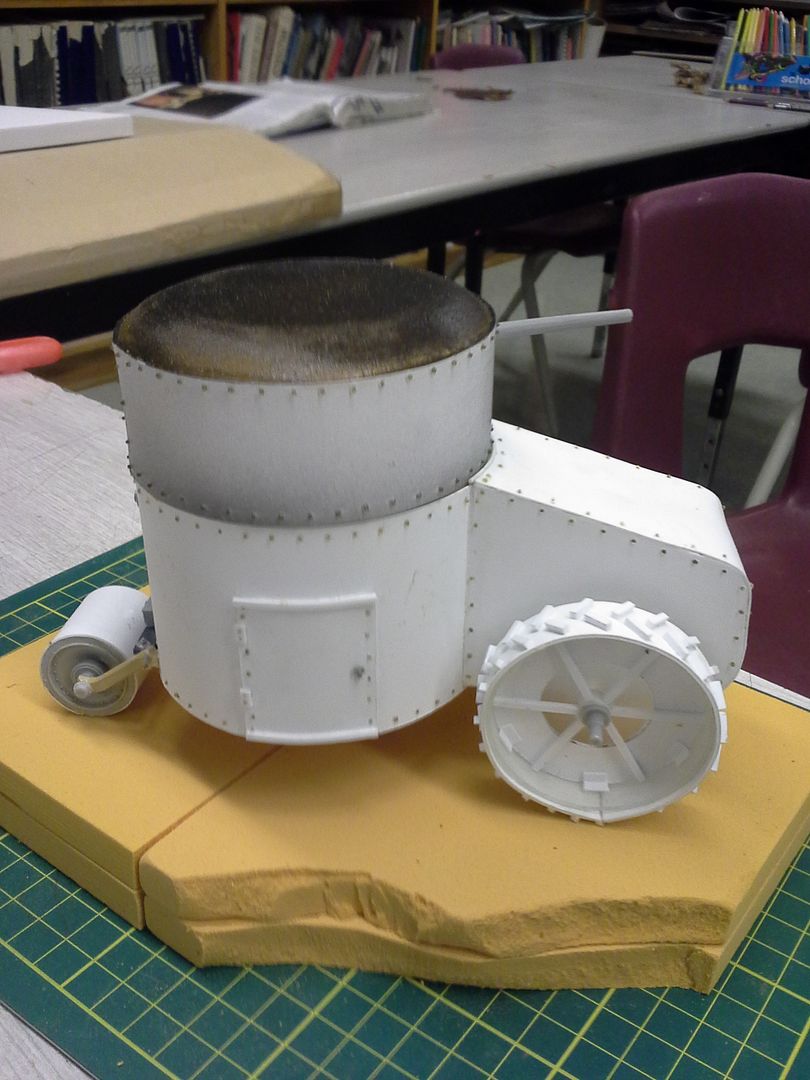
For compositional purposes I wanted to use a raised piece of groundwork that would help draw the sight lines up and that would narrow towards the wide end of the tank and be wider at the narrow back of it. this would give emphasis to the bodywork and form of the vehicle while still giving me some space to add some landscape details and points of interest. It would also give the impression of forward movement.

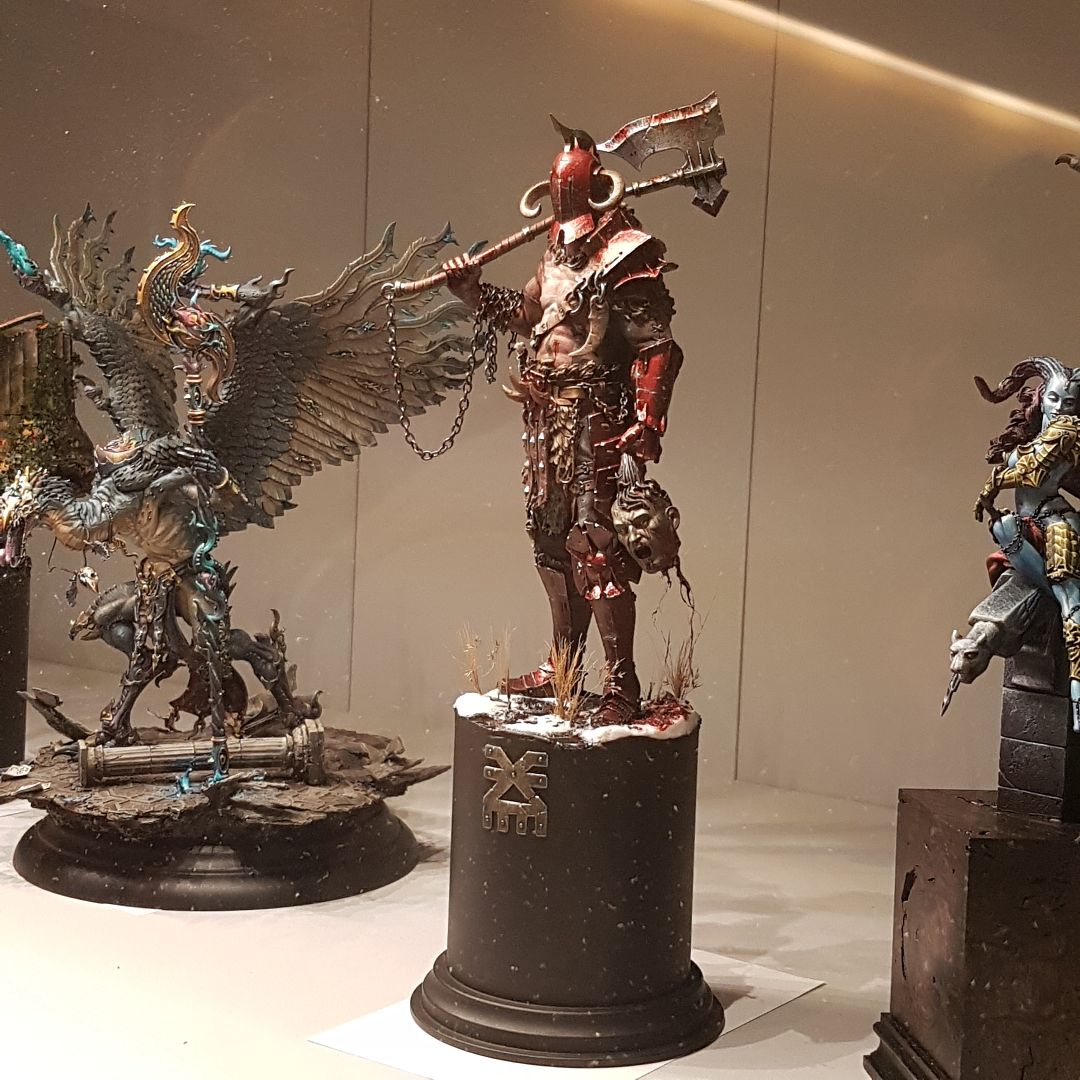
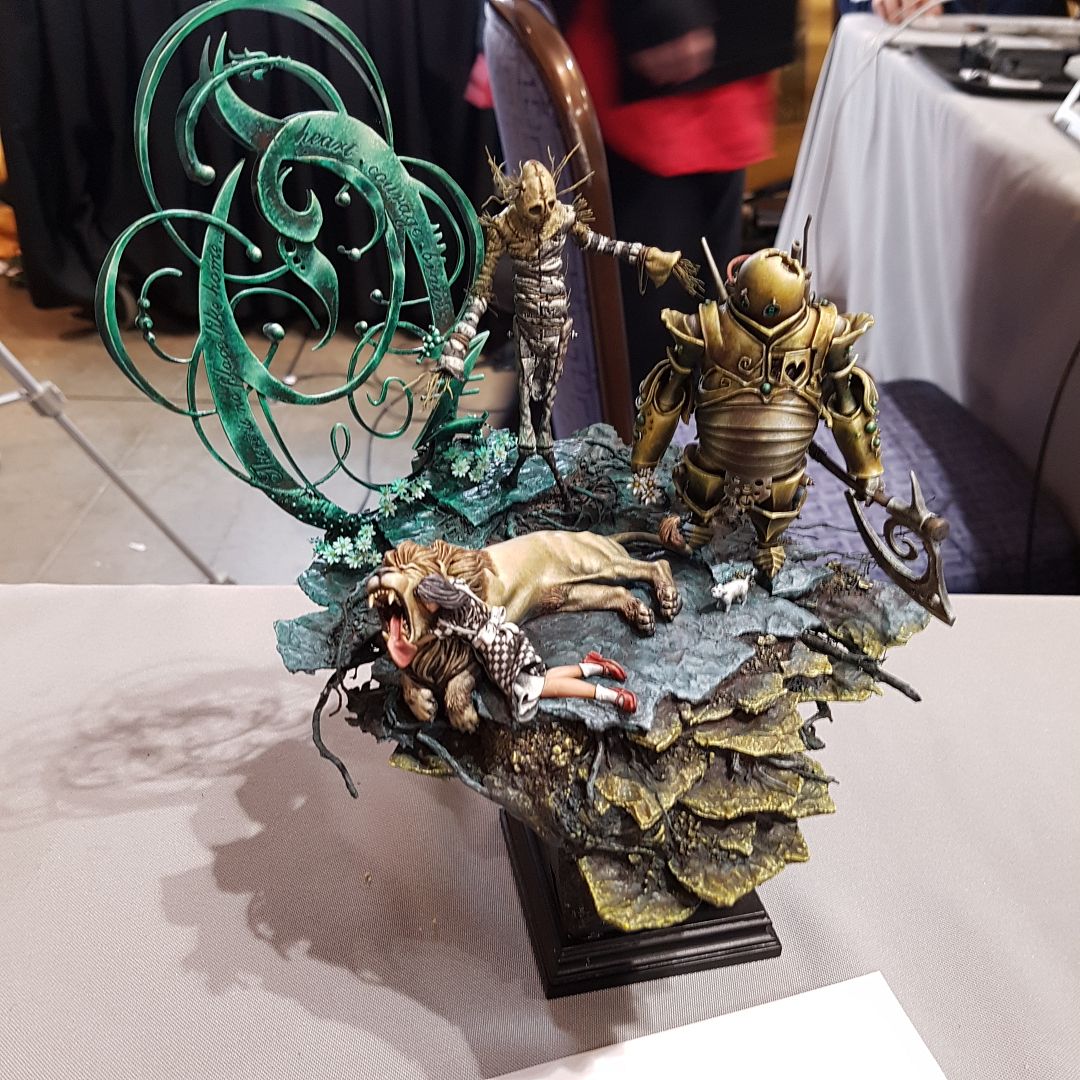
As a competitive modeler an a judge, I cant emphasize enough how important good composition and interesting presentation are to separate your work from the competition.


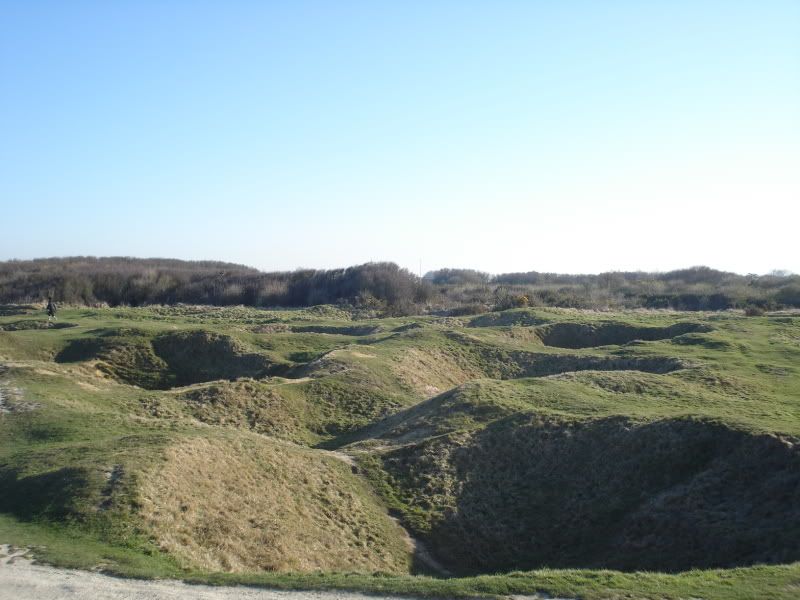
Next up I started to carve into the layers of balsa foam. I wanted to add sunken track marks that would help to emphasise the weight of this contraption as well as to reinforce the nature of WW1 Trench warfare. The Fortin was designed to help cross the muddy shell pocked no mans land - pushing its way through barbed wire and shrugging off conventional small arms fire.  To the right here is a photo I took In France of a section of No Mans Land - even now a hundred years later the effects of the shelling and digging upon the landscape are frighteningly impressive.
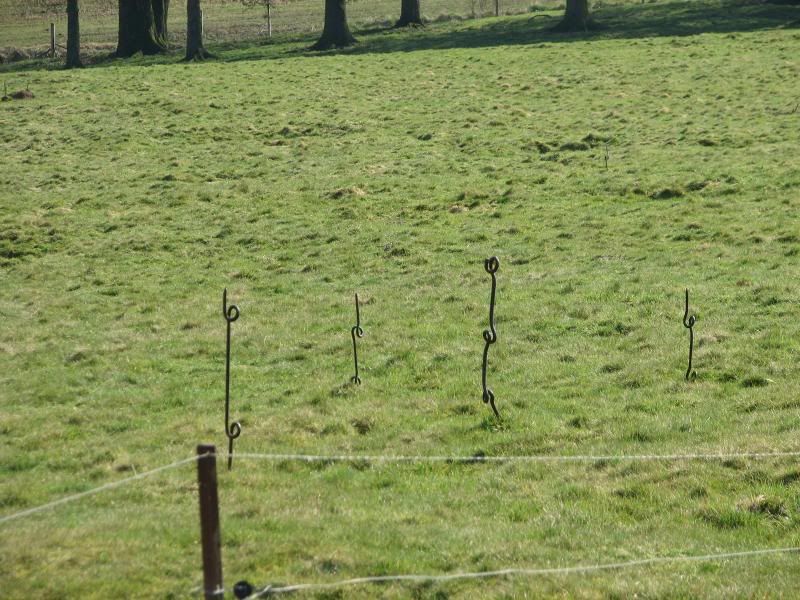
Therefore I wanted to include:  Mud, Barbed Wire, Shell damage/craters, evidence of destroyed features from before the war, and a trench line. The tracks and pockmarks were easy to dig in to the balsa foam and then I just sealed them with some PVA foam glue. I took some Bass wood and used it to make some wooden posts, debris and the core of a shattered tree trunk. I built out the rest of the tree and its roots using Super Sculpey. Finally I made some Barbed wire support pigtails like the ones I had seen when touring the battlefields of Europe out of wire.

Next I broke out the Celluclay - a strong powdered paper mache that is great for making textures. I applied a coat of it to the balsa foam to give a real churned mud texture. It also let me smooth out the seams between the layers of foam. This also allowed me to build even greater depth into the surface and imbed the tree so that it looked like it had grown out of the landscape instead of being placed on top of it. I sprinkled some additional sand, small gravel, cork debris, static grass and wooden shards and worked them into the celluclay "mud" so that it all looked cohesive and organically occurring.


With the groundwork established it was time to begin building the edge of the trench line. I wanted to include a sandbag edge like the ones seen at Vimy. I have built these before with great success for a couple projects and find that it is important to build the bags one at a time and detail each because you never can be quite sure what will show. So I treated each bag as its own little sculpture - texture, patches, stitching tears and all. Though it takes a while it is quite fun to be honest. I made sure that I kept setting aside my favorite bags from the others to become the most visible ones where possible.
I made some with apoxie sculpt and some with super sculpey.


The next steps were pretty fun. I broke out a variety of earth colored paints and powders and went to work creating as natural a finish as I could. The photos don't pick up the color variations nearly well enough but I was pretty happy with the overall result. I broke out some AMMO of Mig rust finishes (enamels and pigments) and treated the barbed wire posts as well as some Forgeworld Brass etch Barbed wire. Once the tree, all the wood and earth and scrap had been fully painted I mixed up a batch of Envirotek Lite clear resin and using a medicine dosing syringe and an old brush I added wet effects and puddles to the mud and added a little static grass in both clump/growths and sprinkled into the mud and water


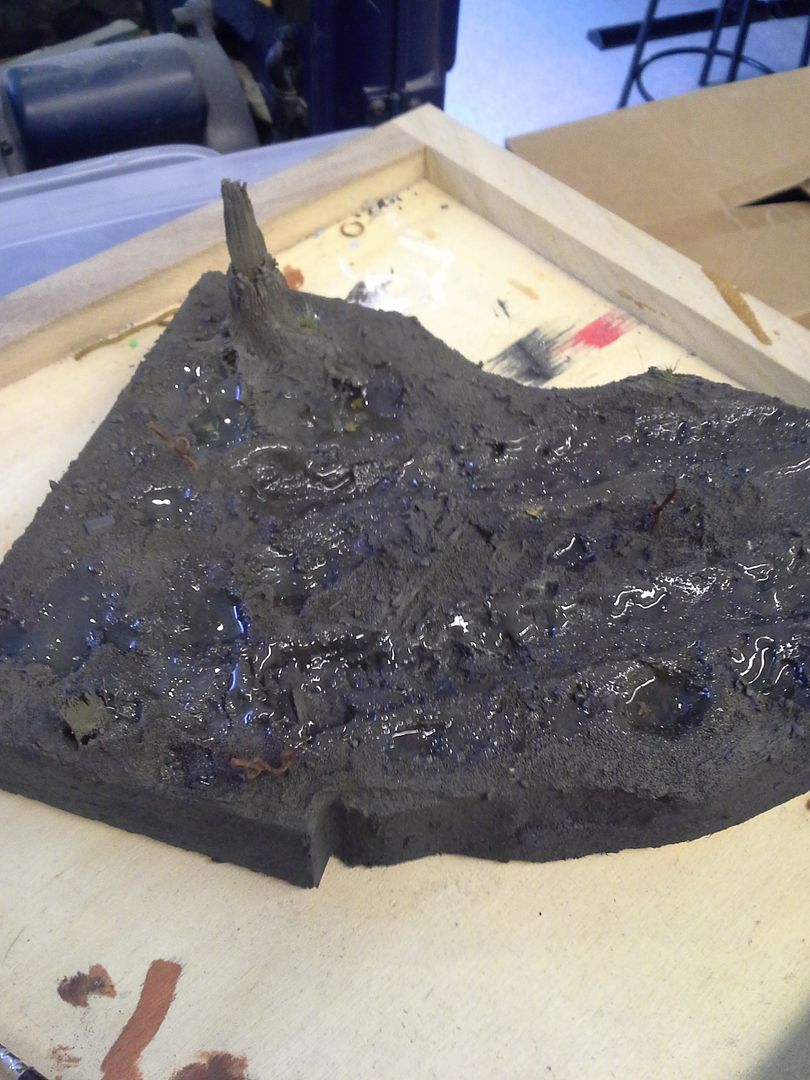
Time to let things sit dry and harden. 
Next week working on the paint and weathering for the Proto-tank itself!!


Tuesday, May 09, 2017

ScratchBuild Log Part 2: 1915 Curiasse "Fortin" Aubriot-Gabet


Balsa Foam armature
So having decided to build this rare oddity of WW1 (a French prototype trenchbusting "tank" made of a tractor with a concrete reinforced turret and an extension cord/ power cable that connected it back to its own trenchline.... not hard to believe they only made one eh?) it was time to start cutting styrene and creating forms.

Initially I was struggling a little - I new I could build the general body forms around a skeleton of balsa foam - this material is easy to glue and cut to shape and sandable to give the opportunity to perfect any complex forms or curvature that would be very difficult to build straight away in styrene without the armature.

I also had a brilliant idea about how to create strong armatures for the circular central body forms! I too two rolls of tape and removed excess layers of tape until they were both the same diameter the one was a little tall so i slid it through my bandsaw to shorten it slightly. Once that was done it was a piece of cake to clas the armature in plastic using thin styrene and Bondene solvent glue.


I also formed the concrete "roof" out of balsa foam which I sanded and filed into shape. In order to ensure that it would take paint well and to avoid further damage or distortion I used a foam glue that is more or less a thinned pva. It absorbs into the foam and seals it making it stronger overall in the process.


While that was drying I set about constructing the wheels. I hunted down a couple of plastic lids that were the appropriate diameter and then wrapped them in styrene. While those were drying I started chopping styrene square rod to appropriate lengths for the welded teeth-like of the wheels.


To ensure I got them placed correctly I took an extra copy of my blueprint and a xylene marker - note this is some pretty nasty stuff to be using in hobby projects but it certainly did the job in this case.as it transferred the pattern from the page onto the plastic. From there the spokes an inner supports of the wheels were constructed out of various thicknesses of styrene and adhered with Bondene.
The center Hubs were initially roughed in with Apoxie Sculpt. but i eventually abandoned these in favor of some better representative parts scavenged from another kit.

Around this time I also cut open a Brita water filter and started separating the beads inside by size. Using a tiny awl I began to punch small divots in the plastic body panels and using an old bent airbrush needle as an applicator

I carefully placed a drop of glue on each indent and then adhered a single Brita bead to each spot. It is slow and patient work but a great way to create rivets on a surface like this!

Once the rivets satrted to go on this really took shape and the overall direction became very clear. I mocked up the appropriate forms for the rear roller and supsension and started on the inital assembly. It was really starting to look good IMHO!


I still needed a way to attach the turret to the hull and came up with an incredibly simple solution that would allow me to position it later once I had figured out the model facing and best compositional lines - I simply used more balsa foam inside the turret and body and a plastic tube as a swivel point. A little apoxie sculpt made sure that it wouldn't move . The alignment was perfect.


From there it was just a little fine tuning around a couple seams and it would be ready for paint!


Next week Developing the Groundwork and Starting the Paint!


Tuesday, May 02, 2017

ScratchBuild Log Part 1: 1915 Curiasse "Fortin" Aubriot-Gabet

Here is the build log for my 1915 Curiasse "Fortin" Aubriot-Gabet (Experimental Electric Armoured Vehicle) Scratchbuild in 1/35

Designed in 1915, the Aubriot Gabet “Fortress” was considered as a way of pushing across the dangers of no man’s land. The armoured Body was fitted to a Flitz tractor chassis to provide protection for a crew of 2 (driver and gunner) and featured a 37mm Navy Cannon.
It was electrically powered by an external source which meant a long cable was required to trail behind it as it rolled through the fields of barbed wire and shell craters. This left it extremely vulnerable as any damage to the power line meant that it would grind to a halt.

Only a single prototype was built and tested before it was determined the design flaws were too significant to continue development, and only a single grainy photo of this remains. 
There does not appear to be any company manufacturing a model of this at this time (nor in the past) so it looked like it could be really fun and a chance to finally scratchbuild something!
Since many of the details were not shown in the picture (like the door to get in and out for example!) I looked to other experiments of the era to draw inspiration from - such as the Fahrpanzer rolling turret emplacement.


 I also found this rather handy digital illustration and tiny resin miniature that was being sold on ebay.  Though it was clear that this maker had altered some of the details (like the rear roller mount) and the placement of the door made no sense considering the large electrical cable that is supposed to hang from the back of this vehicle, it was really helpful to see a clear 3-d interpretation of the forms.
  

Finally, I came across a 1/35 paper model that I could purchase the download for $4 !!! Huzzah! This became the basis for my measurements and made the whole process a real treat. If anyone else decides to build one based on what they see here I highly recommend using this as your starting point.

Now it was time to begin scratchbuilding!!!!! Cya next week with details on how :)

Friday, March 31, 2017

Adepticon Aftermath 2017


So my first Adepticon has come and gone! And it was simply amazing.

People who were there know what I mean - the congratulatory and thankful facebook posts have been rolling through my page filled with tags for seemingly half my friends list, and dozens of people have asked to become my new FB friend.

It was an epic community building event.

That aside, I was in a rather unique position as I was asked to help judge the Crystal Brush painting competition.

This was an incredible honor (and one I sincerely hope to repeat some day) and also a duty that I took very seriously.

I will admit I was rather nervous having to be hyper critical and to give not only my opinion to the other judges (the amazing duo of  Angel Giraldez of Luxumbra/Studio Giraldez/Corvis Belli and Jose Nunez Palomares of Big Child Creatives)  but also constructive feedback to my peers, many of whom I have known for years. In my opinion, it is sometimes harder to be vigilant and critical with friends than with strangers - and this event was full of friends and artist who I have admired for years. As a lifelong student of the Arts and an art teacher for the last 17 years, however, critique is simply part of the job and understood as a neccesity for growth. I know that there are those who I lean on for important constructive feedback.  Dragomir Milanovic whose work I have featured here on several occasions is one such friend that I rely heavily on, and without David Diamondstone's acute critical eye I don't know that I would have been able to push my Boromir bust past the Silver level it attained at GenCon to the Gold it earned in Sword and Brush.

So I judged by the spirit and the letter of the competition. It was exhilarating. Moreso than that it went incredibly smoothly! I couldn't have asked for a better team. Our scores were very uniformly close and showed that we all shared a keen understanding of not only what we were looking at but how we would rank them.

When there was divergence we discussed, but in the end we each scored within a point of another judge on every entry. It was clean and definitive and then handed on to the community to complete the scoring by voting through the website on the incredible photos prepared through the massive efforts of Jennifer Haley.

I am proud of our work and I stand by it.


All of the pieces that were voted upon are available to view at CMON. They were incredible. Many genuinely wonderful creations of form and colour from Raffa, Ben, Sergio, Francesco, Suhre, Kat, etc - so many incredible painters and modelers. By now I'm sure you have seen these or seen them discussed at length. So today I would like to add something else to the discussion, I'd like to mention a few pieces here today that were not the big winners but made a strong impact on me at the event. I have been asked many times now what some of my favorites were -irrespective of score - so here is a list in no particular order of a few entries that resonated with me at Adepticon that you may not have seen yet.....


1. David Diamondstone - The White Orc.
You probably did see this one as it was one of the ones in the running but I decided to include it anyway. One of my favorite pieces in the show and one that I used as an example in discussions throughout the weekend. this piece was a legitimate contender in a stacked category. I have seen and enjoyed this sculpt on the internet many times but this is by far my favorite iteration. The textures in the leather are incredible, the sense of light is subtle and beautiful and the design on the shield is immaculate in its execution. The variety of surfaces depicted is so convincing. I love this piece and will remember it for years to come.


2. Cadwallon by Michael Stubbs - this simple approach to sculpting the background elements was refreshing and just really good! I liked that aspect very much and have filed it away in my memory.....


3. Lauren Fahey (Griffons Roost Painting) - Fade (Kingdom Death) This was a really lovely piece that had beautiful skin tones, solid composition (great use of the vegetation to move the eye around and an interesting way to break up the traditional plinth to create greater interest and movement) and some really great details throughout. Plus the artist was super nice.


4. Cygnar Stormwall - While the finish on it was a dusty drybrushed type of surface that was difficult to take great photos of - the overall impression of this model was excellent. The colour combinations were really cool and the overall level of detail was really great.


5. Monk - mini diorama by Michael Stubbs - Michael again on this list - not because I have known him for years or because I thoroughly enjoy his sense of humor, but rather because his understanding of the "rule of cool" always shines through in his work. He gave a great deal of thought to the overall presentation of this little vignette and the extra details - like the porcelain planters with individual blue glazework designs and the beautiful little koi - are simply cool. I really enjoyed seeing this.


6. Alien Queen - a simple but incredibly effective piece with a HIGH "cool factor". The scene told a clear story and the whole thing was painted very clean. I desperately wish I had a better picture of this! If anyone out there does - I would love to replace this one as it does the little scene zero justice!


7. Zelda - I can save myself - by Seth Walker. Yeah this was up for voting too but i wanted to revisit it because I had a really fantastic critique and discussion with Seth about taking his work to the next level. This led to one of the best parts of the whole weekend for me where he found me a couple hours later in the hallway to show me a new WIP where he was applying the ideas we discussed. It was so clear that he understood and he was so excited that it was truly infectious happyness! I look forward to seeing what comes in the next year from him.....


8. Mordacius Tranquility by Seth Amsden (a different Seth than above!) - the application of painting technique may have been a little oversimplified here but the overall impression was fantastic! I LOVED the composition, the way the natural elements framed the scene and the energy of the rabbit jumping forward - a Kingdom death meets Alice in Wonderland moment to be sure. the sense of dramatic lighting was clever and the whole thing was really really pleasing. Genuinely loved this piece.

Unfortunately there are a few that I really liked that I do not have proper phots of - including Russo's Darth Maul and Mecha entries - But with that being said I do have a few more nice shots to share so I will leave a link for a slide show of some of my shots from across the event here - hope you enjoy as much as I have!


(thats a lie.. you wont.... I enjoyed this too much for you to possibly feel the same... :P )
See you Next week!


Wednesday, February 22, 2017

Half A Million Views! Contest!!!!!


Holy Moly!


I looked at my view count today and realized I am likely to cross the half million mark in the next couple days!

This calls for a small Contest and Prizes!!!!!

So I'm going to make it simple.  Comment on this post on my blog (if you are reading this on facebook you will need to click the link to my actual blog). Please tell me one thing you would like to see (or see more of) in the next year on Lost In The Warp!

Thats it :)

Some time next week I will pick comments at random (probably using a number generator). I will then contact those people and send them a lovely little surprise from my shelves of mini stuff! I don't know how many prizes or what yet but I'm sure I can dig up some fun and random things :)

Thanks to everyone who has been kind enough to follow my little corner of the miniverse! Be good to each other!

The first picture I ever posted on this blog - not sure what I was thinking but it sure looks like fun!

Wednesday, December 14, 2016

Return of the Ma.K - Dragomir's "Last Prayer" Diorama

I have long been a fan of Ma.K (Maschinen Krieger). The time worn historically inspired, anime-esque aesthetic is just cool.

Today I am pleased to present a photo SBS of a Ma.K. build by one of my friends Dragomir Milanovic. Readers will have seen him multiple times in this blog (he even has his own label here!) because aside from being a friend, he is one of the finest and most inspiring modeler's I know.


This piece, entitled "Last Prayer", was something the he picked away at over a couple years in between other projects. I think it is absolutely stunning in its final presentation.

Here (in photos) is how it was made:


The face was a bit bland and uninspiring, and Dragomir had a different direction in mind anyway so a new skull was in order....

A new layer of tattered clothing and equally tattered skin really helped to start setting the tone... 


After some rough/temporary assembly, Dragomir was able to add damage and wear across the suit.


Then it was into casting and carving the background from plaster, model assembly, primer and under painting. Dragomir was the first person to show me salt weathering several years ago - he is still making great use of it!!! (NOTE: You can click on any of these to see them bigger!)

A bit more detailing work and double checking placements for fit as well as shadow and light and it is nearly done! From here he took the following picture and let it sit for a bit to see if there was anything that required significant change before final touch ups.


Whenever you have the option (ie. you aren't painting the night or minutes leading up to a competition entry deadline....but I mean who does that....riiiiiiiight ;P ) this is a really good practice to be in. It is also at this stage having a couple of really critical friends can make those finishing touches so worthwhile.


The finished piece with light cascading through the window in all its atmospheric glory. 
Just awesome!

Back again soon with more cool work (even my own!) to share :)

James TKKultist Craig