So John has his B1 Bis in paint - and looking some seriously good by the time I get mine mostly assembled - DANG! That being said - I am quite pleased with the level of detail I have managed and the research I have done has served me well thus far so all is well!
In keeping with the specific tank I have chosen to represent, I have extended the exhaust pipes and added int insulation flanges around the pipes (sculpted in Duro) and replaced the exhaust covers with longer brass ones. I textured the exhaust pipe with mr.surfacer 500 and added the resin antenna housing and base from my BLAST models upgrade kit.
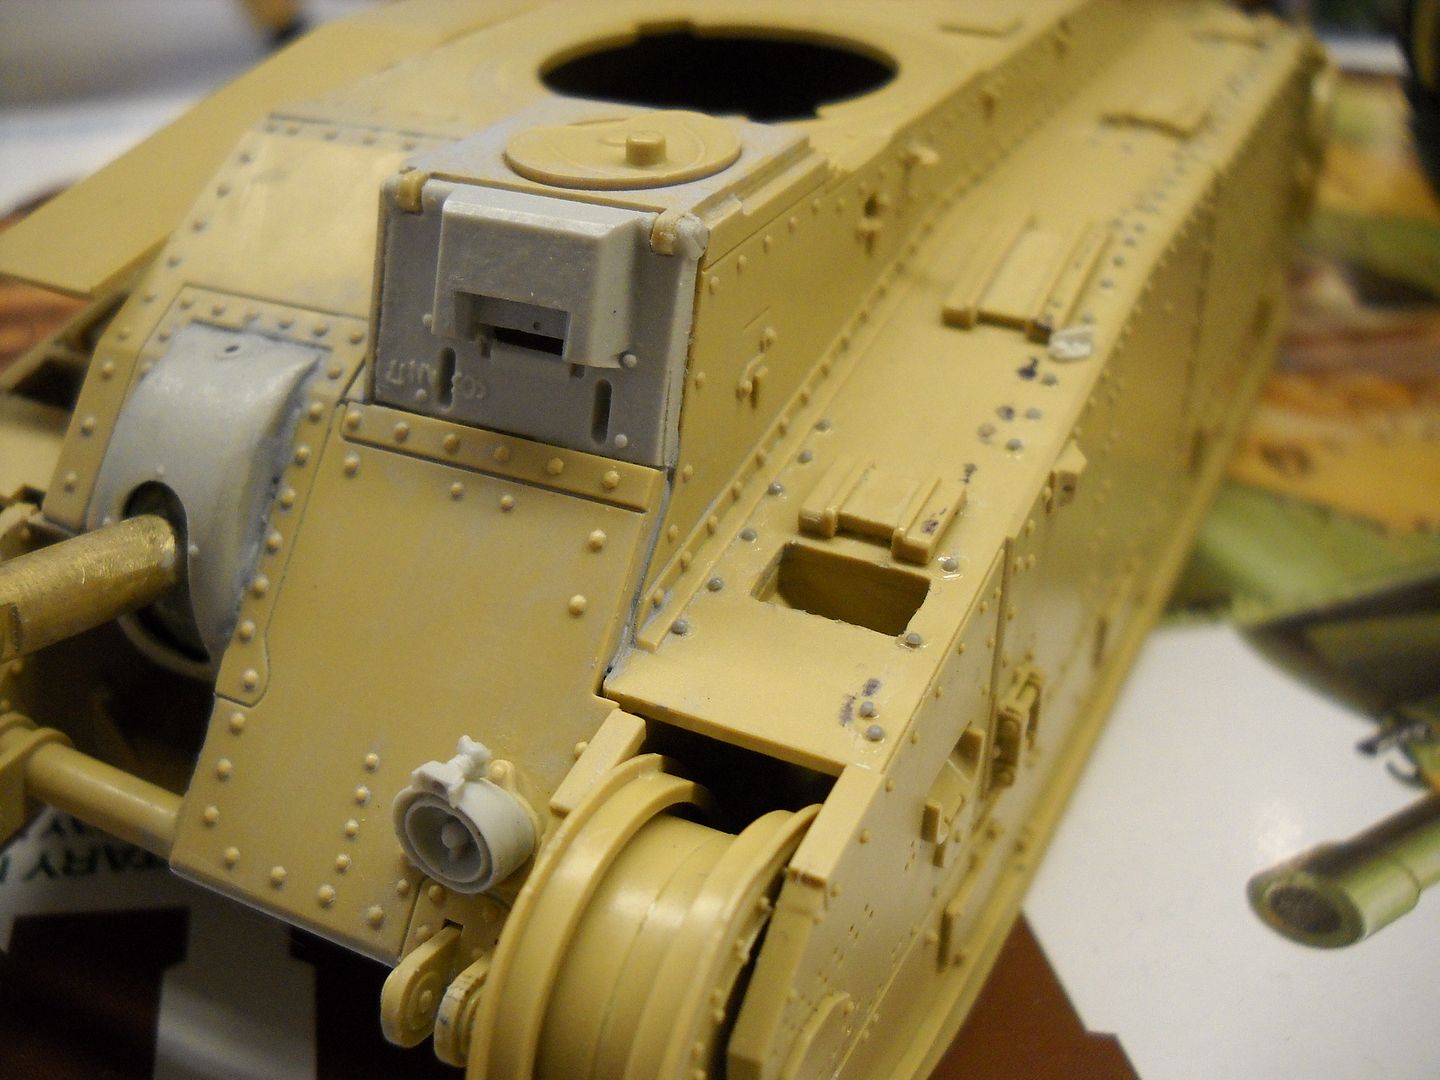
In this shot you can see the rows of Grandt Line rivets going onto the sponsons according to the diagram I found.
 Also the front gun housing with the proper bolt pattern and the resin eadlight with the nice ardware detail. You can also see where I have used Mr Surfacer to seal some of the seams. This is really neat stuff for texturing or filling and I found that it cleans really nicely with a bit of alcohol. Also you can see that the mudshoots have been opened and small resin mudscrapers were installed. I actually lost one of these but was able to remake it using a piece of resin sprue and two more little rivets shaved off of a 40k kit.
I also shaved the molded fender support off of the kit and replaced each one with brass supports and
small brass hex bolts. Here they are just before I glued it all up.
Now the turret has been built and it finally looks like a tank :) I have added the other parts of the antenna housing, textured the turret with mr surfacer and added the casting seam using a black heavy body acrylic paint (tulip brand) neat stuff that worked pretty well! I also added the resin top hatch and gun mantles as well as the brass barrel for the turret. If you look carefully under the back corner of the turret you can see that I have made a radio wire insulator out of platicard and actually wired the antenna to it. the rest of the hull details are now finished as well.
I also discovered that different models had different angles where the front plates of the tank meet. From best I can determine this was the correct angle for the specifc tank that I have settled on.
So here we are - My tank is built and ready for final details checking before going into primer while John has applied decals, set them and begun the weathering process using AK interactive washes (man those things are great!) His is really looking amazing and it gives me a great deal of hope and inspiration to continue.
COMING SOON: more tank action, more beastmen, a WHOLE WACK of more warmachine, pics of my golden demon entries, a mini build log for my thunderbolt!, even more warmachine, oh and a smattering of warmachine to booe!


No comments:
Post a Comment