
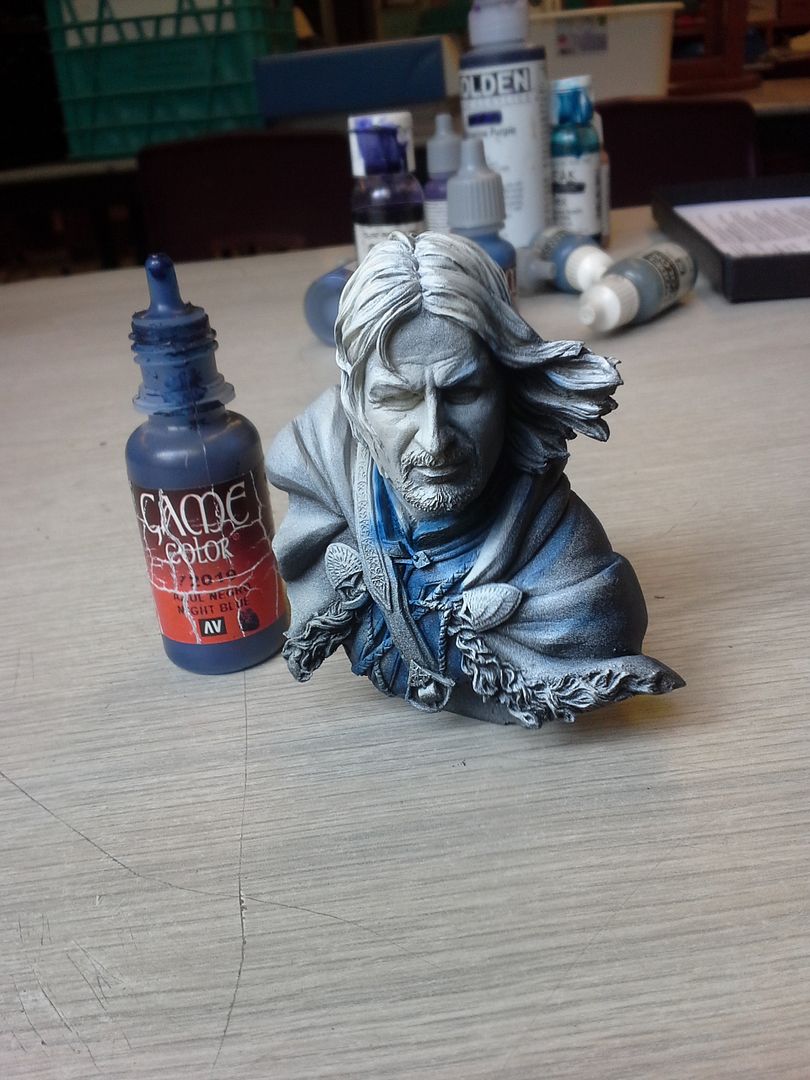
 A couple years ago I started to prepare my own sculpted bust of Boromir, but when I saw this one I stopped - there was little point as this one is so good. Boromir has always been my favorite character from LOTR and having Sharpe's Sean Bean play him in the films was a fantastically cool choice. I would like to finish this for the large category in the GenCon painting competition. I have the plinth already (made several years ago by Wayne of Wayne's Bases for the first planned bust) and I am thinking about trying for a paint job that plays on the duality of Boromir's character - having one side of the face warmer and the other side cooler suggesting the influence of the ring working upon him. A little ambitious for a first try? Perhaps - but I have everything to gain in the experience and nothing to lose but my own mind!
Well, I did it.
And I'm Darn proud of the results - but I'm getting a little ahead of myself. Lets talk about the kit itself first and show you how I painted it before skipping right to the reveal ;). This will probably take a couple posts so lets get to it!
 So the kit comes in a really nice looking little box, which I feel is just slightly too small for the contents. The box was literally bulging when it arrived in the post. This aside my cast was luckily whole and unbroken and on first blush was pretty clean. The cleanup was for the most part as expected - wash, some small mold lines to file/sand (wear a mask it is resin!) and a couple little bubbles to fill. If it wasn't for competition I could probably have overlooked a bit of this, but I took my time - watered down some apoxie sculpt and broke out the 600 and 1200 grit to make sure it was right. Took only one evening to clean, that's pretty great.
 The sculpt is beautiful - looks very much like Sean Bean and has some really nice combinations of fine sculptural detailing and broad smooth surfaces. I really like the way the hair flows and the texture of it as well. Wasn't 100% sold on the sculpted ropes - but not enough to redo them. As much as I can be critical - I was (and am) genuinely over the moon pleased with this piece!
Once prepped I hit it with both black and a light grey primer (Ammo of Mig) to establish a sense of light and volume. I then got out VGC Night Blue and began to establish some cool tones in my shadows. I then added VMC Intermediate Blue to the mix - this softens the colour in the fabric somewhat. I also used Golden Brand Dioxanine Purple to basecoat the cape (fabulous paint SUPER pigmented - but a little harder to clean from the airbrush!).
I still left a lot of light showing in the ripples of the fabric as this undercoat is really to set tone rather than fully paint. I also sprayed in a small amount of badger FreakFlex transparent blue - basically the same as the more well known "ghost tints" this is a translucent film which can tint colours without adding great opacity.
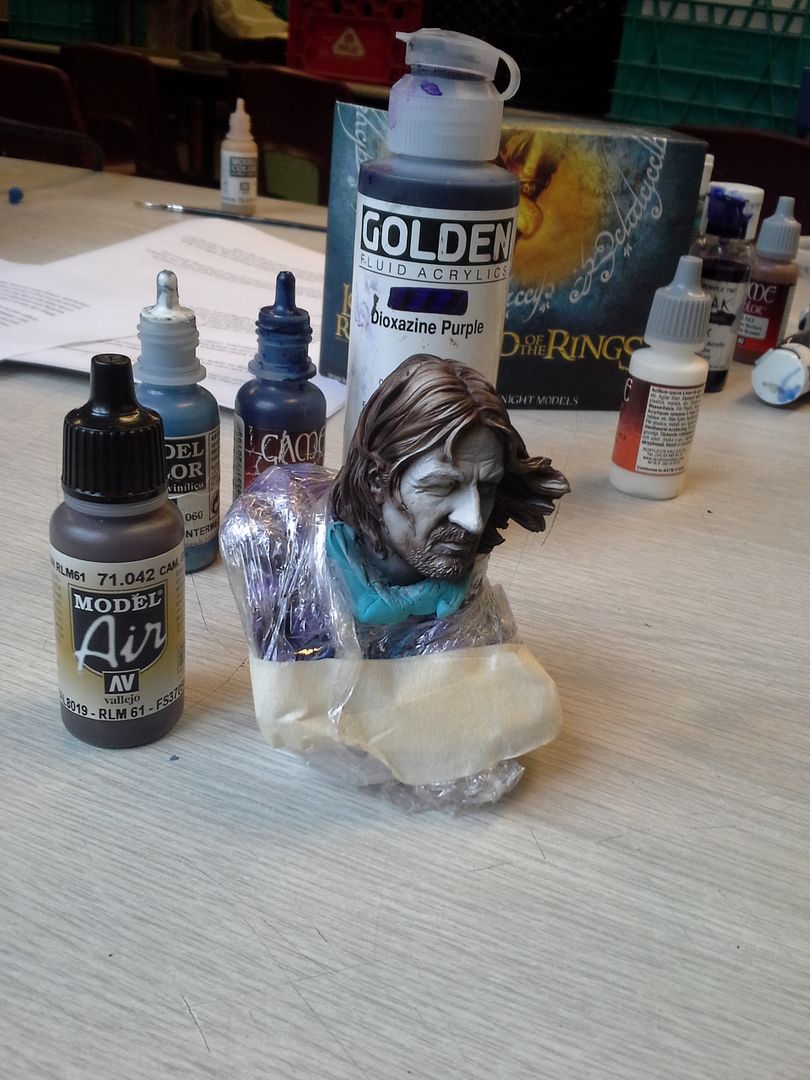 With that in place, I masked off the sprayed areas with blu- tack and saran wrap and grabbed my VMA Camo black brown (as my readers know this my "go to" for a warm dark colour) and again began to lay out a sense of volume in the hair as well as using it to preshade the deepest areas.
I really want to pick up some of the black masking putty I have seen some other painters use - if you are a painter who has tried it - do leave a comment and let me know what you thought (if you are the manufacturer and want to send me some to review I wont argue with you either lol!)
Seriously though I think I will definitely need to pick something like this up for future projects!
Well I think this is a good start and my wife is starting to wonder if I plan on making it up to bed tonight so I think I will log off and continue next time with the most interesting and complicated part - painting skin and a full on damask pattern!! Cya in a week (ooooh cliff hanger!)
2 comments:
great start! What psi are you shooting your paint at for this stage? Are you going super thin and with low psi to get nice fine lines?
Hey Zab - I think I had it around 18 psi in these early stages though later I would drop it further - when I was painting the face and some finer highlights I was down around 10-12
Post a Comment