Tuesday, May 31, 2016

{T} Rolling Along..... Minimal input for Maximum Style! Fennblades 2.0

Howdy readers, back again with some Trollblood building goodness! A few small updates this week.
I know I said I would be continuing with my Long Riders, but I am still waiting on some conversion parts from PP so Ill end up rolling them out a little more slowly and showing a few other things first!

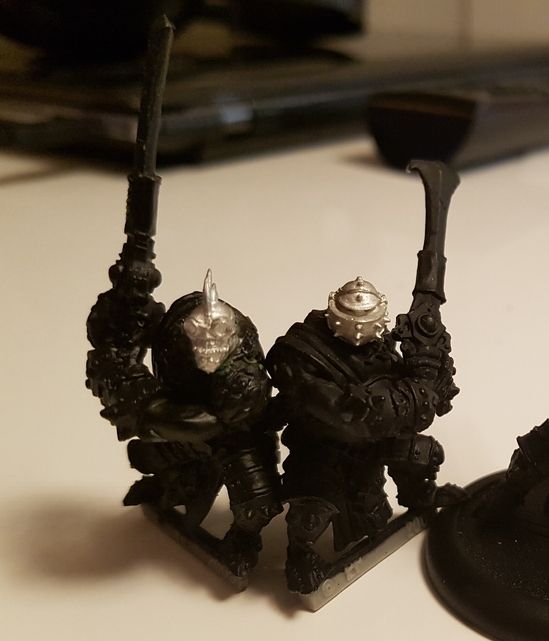
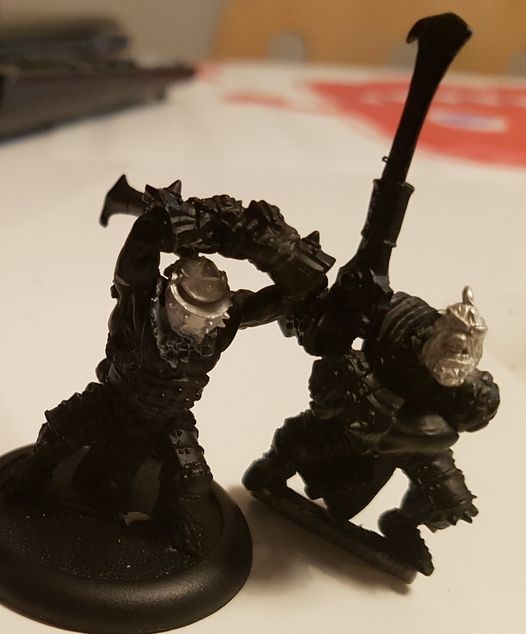
Which brings me to my Fennblades! A while back I wrote a very favorable review of the Fennblades kit - where my only real concern was the repetition of models - not really a big issue for most - but always a minor thing that grates on me. Back then - my intent was a quick paint to play kind of army.... since that idea has completely fallen off the rails with me now converting and personalizing the majority of models in this army, I have decided to revisit these sword wielding dervishes!

Being beautifully simple 2 piece models, however, leaves me with very few choices how to modify them without major re sculpting. Then again, sometimes the simplest solutions are the best :)

Head Swaps!!!


Grabbed the clippers, knife and a file and had 4 of their heads off in no time flat! Some of the extra metal heads I have bits ordered or cannibalized from other kits and a tiny bit of greenstuff for new necks/gap filling and I had successfully added genuine variety to the unit.


Plus I still have the limited Fennblade "kilt lifter" to assemble which means with the 5 unique bodies in the box,4 conversions and the lifter I have 10 different models now in the unit! (plus 1 left over for the bits box!) With that this unit of really great looking models will look even greater (which will line up nicely with their rumored new greater utility - CLEAVE FTW!!!!)

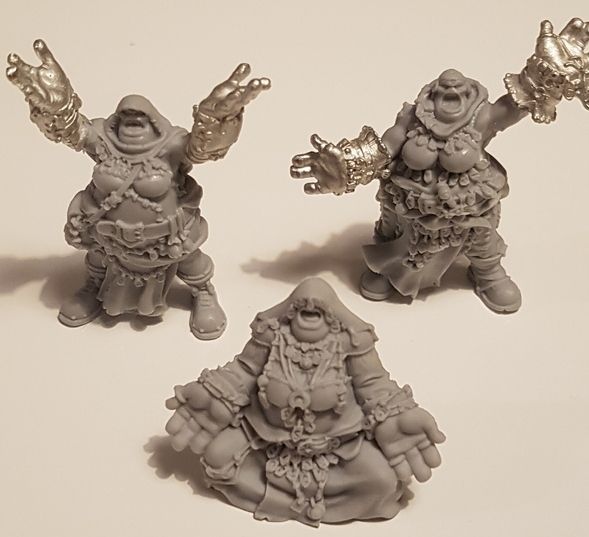
Since this was a pretty small edit and simple conversion- I also had the time to clean and prep my Dhunian Knot - I LOVE these models. Brian Dugas is to trolls what Brian Nelson was to Orks back in the day - stylized fresh and genuinely interesting sculpts! As I showed before I bought two sets of these - one to use for conversion (like my super cool Fire Eater conversion and my equally satisfying Runeshaper Conversion) - and the other I chose to simply assemble as is! They are so nicely sculpted and with such variety that I saw no reason to do otherwise.


I can already tell these will be that hybrid of a joy to paint because of the character and cool details while simultaneously being a paint to do because of the same multitude of fiddly small things to paint!!! #firstworldgamerproblems LOL!

That being said, I am having so much fun building the models that I haven't really painted anything in a while - Id best start figuring out what Im going to do about that before the AMAZING crew over at Moose Machine start teasing me about it...... (see what I did there...no?... it was  plug for my favorite Warmahordes podcast! You should watch it too.)

Till next week
James TKKultist Craig


Wednesday, May 25, 2016

How to: Realistic Broken Pavement By Dragomir

An amazing tutorial from one of my favorite painters (and a great friend) Dragomir Milanovic!


I've had a few requests on how I did the concrete on the PT Sturmgacruiser Fallout base. Hopefully I can fully explain it here.

I used dental plaster for the base. This is much harder than regular Plaster of Paris. Regular plaster has a hardness of about 3000 psi, dental plaster is 8000psi so you can be fairly rough with it, I'll explain later. You can use regular plaster but you have to be a lot more delicate in your work.
Mix the plaster with sand and grit, just think of the scale and avoid larger particles which would be rocks in real like. I added pigment powder to the mix. Since this plaster is cream coloured ( beige ) The pigment used was called Industrial Dust (MIG Powders). You have a dry mixture ready to add water.

Next, you will need to make a mould. You can glue plastic strips to a sheet of styrene. You have to remember that the surface you will work on is on the bottom of the mould so you have to build the mould in reverse. The mould about 1/4 inch deep which makes a bit difficult to pull it out with out cracking but in this case it's ok. If you want a more solid concrete pad with less cracks just make it thicker.


The trick used here to keep the plaster pad from falling apart is to cut strips of drywall mesh tape and embed it into the plaster when pouring. Mix the plaster to a thick creme consistency and pour about half of the mould and embed the stripes of drywall mesh, any nylon mesh will do but drywall mesh if exposed will look like the steel rebar reinforcement which you can see in the above  photo. Pour the rest of the mould and shake and vibrate the mould to get rid of air bubbles. Place the mould on a level surface and take a straight edge, level the plaster to the top of the mould sides and remove excess plaster. Make sure the mesh doesn't touch the bottom or it will be visible when you remove the plaster when viewing the working surface (Bottom surface of the mould).

When dry, remove the plaster base from the mould and have the bottom surface face up, this is your working surface. It should be smooth but it's too smooth now. Place the pad on a surface with some give ( rubber surface ) and start pressing the plaster to form crack patterns. Once happy with the cracks, I mentioned that you will be rough with the plaster, well.....you will need a wire brush, the ones welders use to scrape metal. They can be found at any Hardware store, and a small wire brush which can be found at most Dollar stores in a set. Start brushing the surface in small circular motion. Mix the areas used between the two brushes to give a random patterns. This will roughen up the surface and also expose the grit particles you embedded. You can add water when brushing, this changes the effect the brush is doing because you are making the plaster a tough softer. You can also hammer the surface with the brush to make pock marks and divots. You can see the scratches in the picture .

Once you finished brushing the surface and happy with the effect, you are on to the next violent phase. You will need a small hobby hammer. Yes..... a hammer. That's why I use dental plaster. ;)

If you want old large open crack, start tapping ( Whacking ) along the crack. This will start to shatter the edges and will open up and become wider the more you hammer. It's up to you how far you go. Vary the widths of the cracks, from no tapping to a much as you want. Just keep it looking natural and random.


Once happy, you can apply sand and scale aggregate to some of the large open cracks and use Future as a glue and let dry. I didn't want to use glue because if you have glue residue or smears it will show when you seal the plaster. Seal the plaster with Future Floor wax, either brush it on or airbrush, there is no real difference. Let the Future dry completely.


Above the base has been assembled and basecoated. The lettering has been stenciled but not before coarse salt was added to the area. this way once the yellow paint dried it would be chipped and abraded away in a natural looking way by the removal of the salt mask as below.


 You can do an oil paint wash at this point. You can either apply it just to the cracks or as I did, over the whole surface. Wait till the wash goes from a wet look to a matte finish, about 30-45 minutes and take cotton swabs and start removing the dried wash from the large surface but leave it on near the cracks and in the cracks. That's how you will get some tonal changes and give the concrete an old earthy tone. Colour is up your preference. If you remove too much, reapply the wash, let dry and do the clean up again till you are happy. Let it dry at least a day and seal it with matte varnish. This should be applied with an airbrush or spray can, I found that brushing can lift the oil pigment and you will end up losing the effects and streak the oil pigments.

 
Now it is just in need of some natural groundwork, vegetation, details and debris!
 
(JAMES RECCOMENDS: Check out the documentary Life After People if you want some cool inspiration!)


Birch seeds make excellent leaf litter and there are many types of static grass in both prepared clumps and loose formats. 

James would like to add that there is also the sweet new leaf punch system available from Green Stuff World - I don't have these yet but REALLY want them so that I can punch real looking leaves out of actual leaves!


Hope this was helpful.
Feel free to ask any questions!

Also to see more of Dragomir's work check the tags on the side of the blog page you will see one that links to several postings I have made about his projects :)

Cya Soon!
 James "TKKultist" Craig


Wednesday, May 18, 2016

{T}Rolling Along - Long Riders come up short......

When I decided to pick up a small Trollblood force (HA! I should have known better...my friend Erik and I now own almost the entire faction worth of models between us) one of the units that enticed me to make this leap was the Long Rider Cavalry. Even before I knew the rules the idea of a fast crushing cavalry unit of mounted Trollkin just really appealed to me - so I decided to buy them.

Holy crap they are an expensive unit - Over $100 even before Horthol! But..... they were so cool, and I heard the rules for them were also awesome - Totally going to be worth it anyway. Right?
So I dove in!

.... And then I opened the box to begin the assembly.....

Oh Crap.


Seriously - what a load of crap.


I was flabbergasted - these were some of the worst fitting models I have ever built - and I built that jacked up P.O.S. Forgeworld Thunderbolt where I had to completely rebuild the wing mounts and whole sections of the body......Ok maybe a they weren't quite as bad as that....
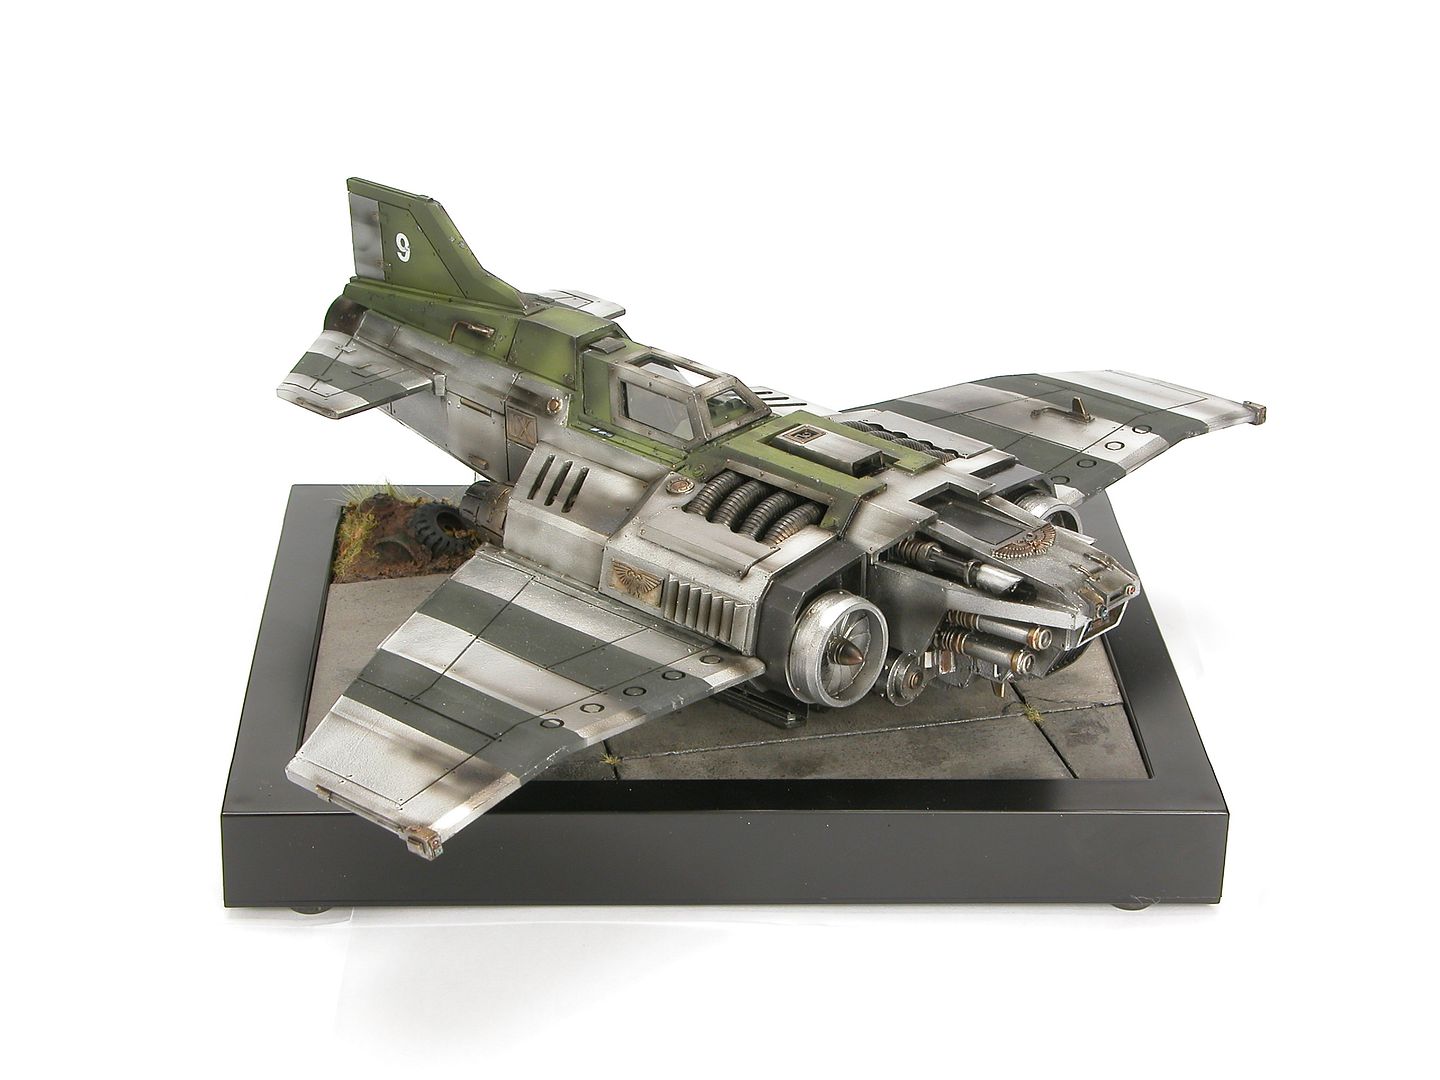
And it turned out ok in the end....... ;)
For the price of a colossal or gargantuan, I think this little unit of models should have almost assembled themselves. Instead they had ENORMOUS gaps. No two halves fit properly - not a single pair out of 6. The Molding lines were a real pain and a couple of the parts required a significant amount of filing, grinding and/or filling because one side of the cast or mold line was lower than the other.
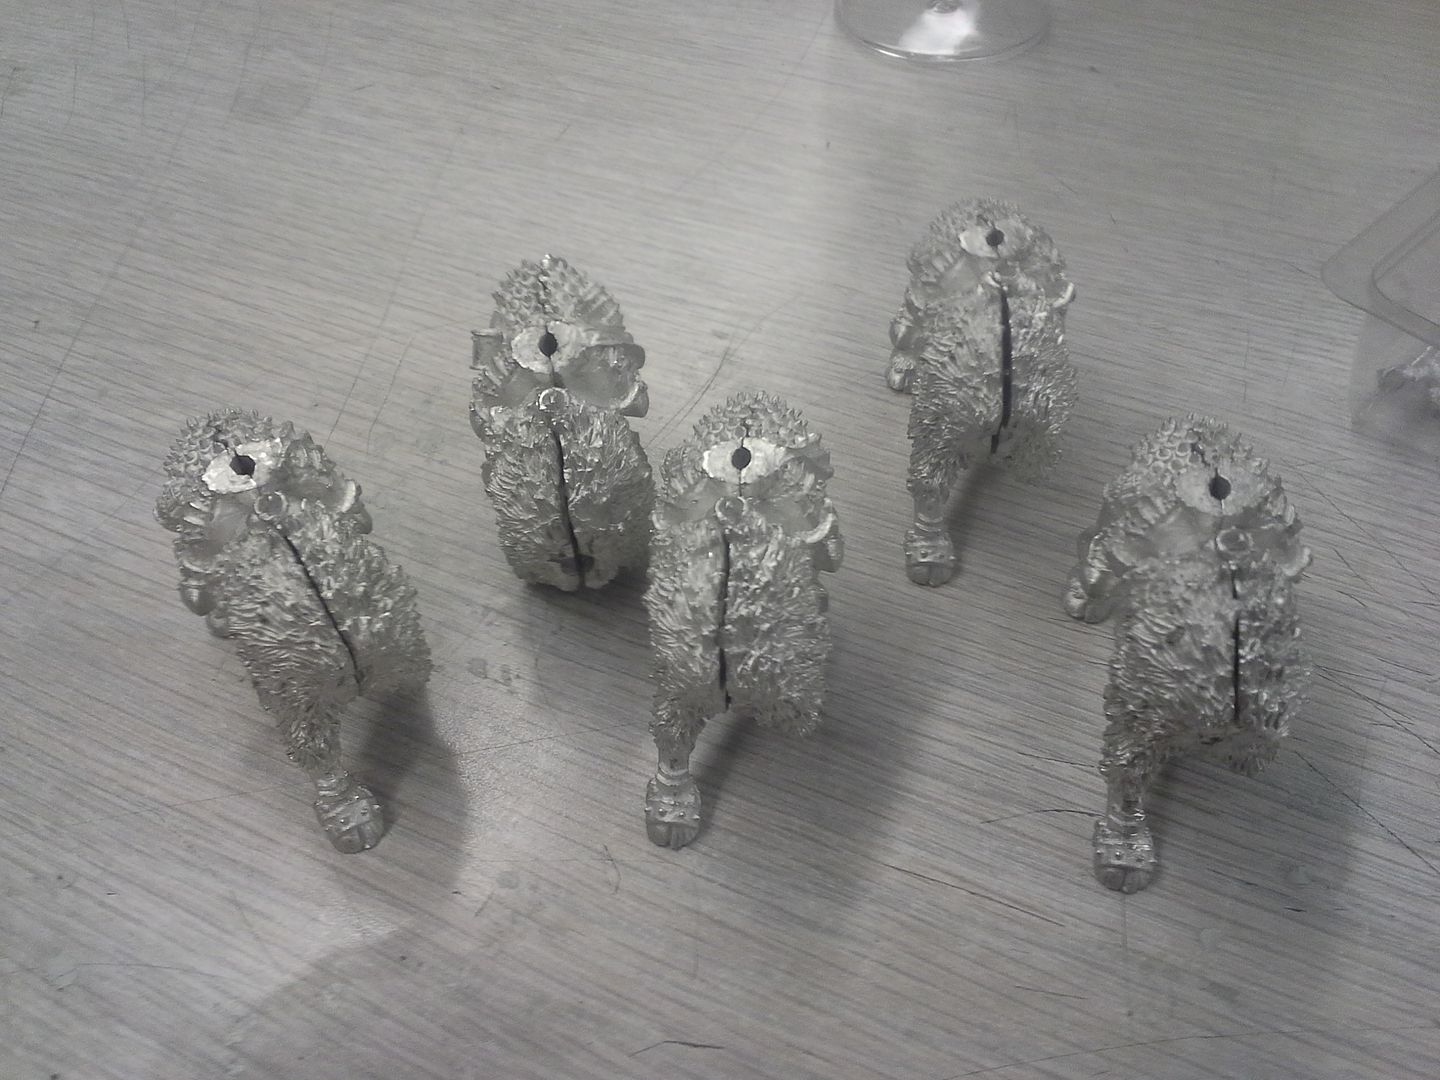
Bad as it is, this picture does not show the true extent problems faced by belly halves that required major filing/dremelling to even out or the poor fit and finish of the riders. I can only hope that I had a particularly bad batch and that this is not the usual situation faced by people with these models....
In the end I used apoxie sculpt and resculpted the center section of each model. Hair textures and straps, some armour plates. It was a lot of work to be honest and took all impetus I had to complete this unit and flushed it away. They have sat unfinished for about a year now. I have played them riderless in friendly games to get a feel for them several times, but still they have sat unfinished.
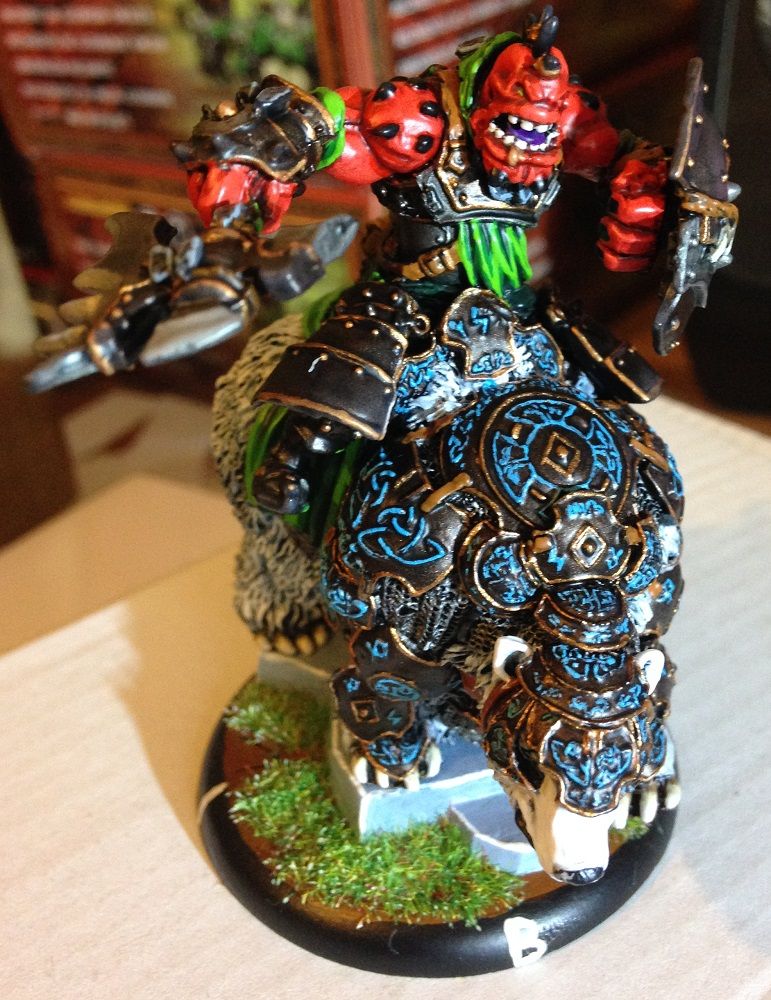
 

Longrider by Bakaryu
What is more, the last year has seen many changes in the Trollblood line - notably many larger proportioned figures - making these older long riders look a little puny by comparison.... Mind you I really like mixing older and newer sculpts - showing a populace of varied height and size, Also it makes sense that the absolute biggest trollkin would be less likely to be mounted and massively weighing down their rides..... that seems more a job for somewhat slighter kin. So I took another look at these models,and realized that the biggest and least fun part of the job (basic assembly)  was already done.

Whats more, when I saw the cool Bear mounted versions by bakaryu on the pp forums I could feel my interest rising once more. As I got into the swing of things converting my Highwaymen and 2 Fire Eater Units, I knew I was finally ready to revisit the toughalows! The PP insider discussing Longriders as being the most powerful cavalry unit in MK3 sealed the deal. Time to level up the Longriders!
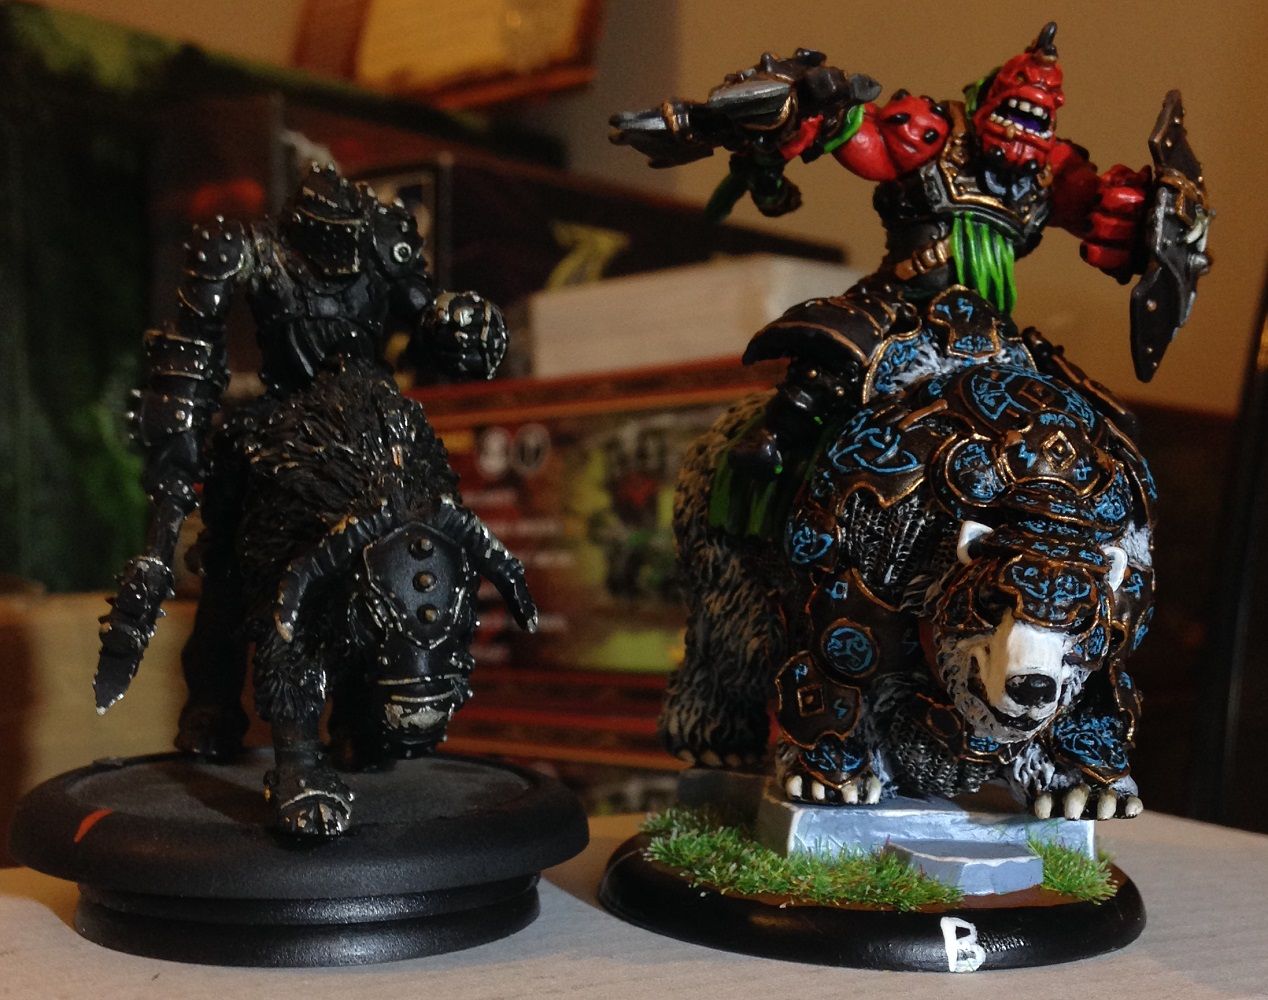
Much more impressive!
So what could I do to make these models better. I initially thought of swapping the upper body of some of the models but was unconvinced that the legs would look right under one of the plastic torsos - so instead I decided to find ways to add a bit of added bulk and some character to the existing riders. The first idea that stuck was to upgrade their shields. The ones that came with the Warders are super cool and much larger than the little target bucklers carried by the riders (and old kriel warriors) - they would certainly add some bulk to the profile! I had an unbuilt box of Warders (since the nerf I was in less of a rush to build another unit anyway!) but felt that I might want to use these awesome shields in multiple places and applications so I broke out my CMON Instant Mold and made a press mold of the shield I liked best. Soon enough I had a full set for the unit and with only a smidge more work added some unique battle damage and amulets/trophies to some of them to differentiate. I used the actual plastic one on the unit leader because you can clearly see the inside of the shield and my press molded shields are really best seen from the front. I also replaced the heads of a couple of the riders with armored helmets from my bits box (from Boomhowlers unit IIRC)
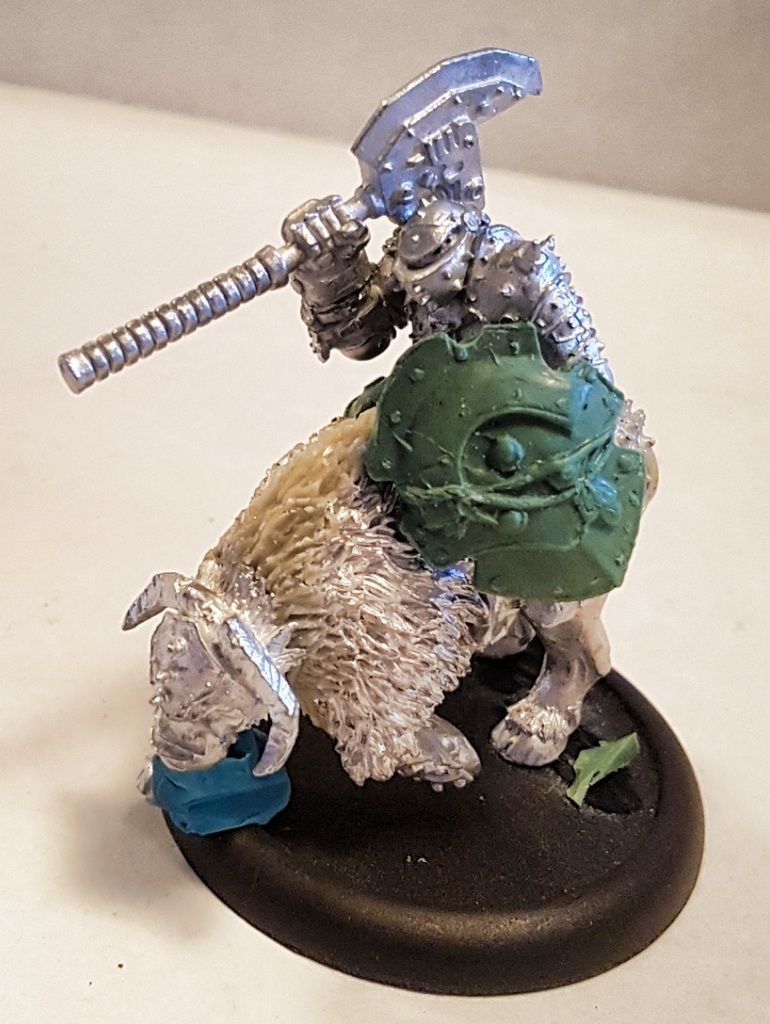
In breaking out my box of warders I was reminded of something else that I had squirreled away for a conversion! You see - my first warder unit had already been filled with characterful tweaks and weapon swaps, and when I had planned to run two - I had also planned a little something for the second group. Whereas the first unit had all gone for hammers and bludgeoning weapons, I had planned the second squad to have all axes....not just any style of axe though - ones that would command a little respect and attention. As such, I happened to have nearly a squads worth of "Lola"'s ready to use! The iconic axe of the Butcher in each of his incarnations is just such a cool and brutal design! It would have served the warders well - but I think it will be even better utilized to replace the small but ridiculously powerful "Cavalry Axe" carried by each long rider! Also with the Warders are some really cool armoured skirt/thigh pieces. Horthol the Longrider character also has these but the regular riders don't..... A couple more press molds and bingo I have matching leg armour to bulk up the riders that little bit more!


Oh yes this is getting much better! Now that the riders are looking a little bulkier, I decided to add a bit more armour and detail to the toughalows. Once again I grabbed my Instant Mold - this time one that I had previously pressed of the Bouncer's shield when I was making the shoulder pad for Frank (my Dire Troll Bomber). This time I only filled the center of the shield with putty to create a smaller but still really cool looking plate. I also grabbed some of the smaller shields I had and played around with fitting them as additional plating for the mounts. A few extra pieces of stowage/kit and they really started to look great!

So a year on, I finally found the inspiration and impetus to build my longriders... But what of their fearless leader Horthol?  To see what I have done with him, and the rest of the (now mostly finished) unit - I reserve the right to a couple more tweaks and surprises!- you will have to check back next week!

CYA Soon!
James K. Craig AKA TKKultist

Sunday, May 08, 2016

Happy Mothers Day from LITW

The Woman, The Myth, The Legend....


To all the Mothers out there, 
Thankyou and Happy Mothers Day 
From Lost In The Warp


Thursday, May 05, 2016